How to Install Windows 7 Using Pen Drive
This wikiHow teaches you how to install Windows 7 on a Windows computer by using a USB flash drive instead of an installation disc. Back up your computer's files if necessary. If you plan on wiping your current computer's hard drive to...
Table of Contents
Part 1 of 6:
Preparing to Install Windows 7
-
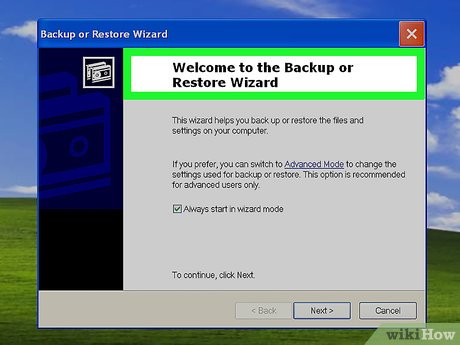 Back up your computer's files if necessary. If you plan on wiping your current computer's hard drive to install Windows 7, consider backing up your computer's files to a hard drive before proceeding.
 -
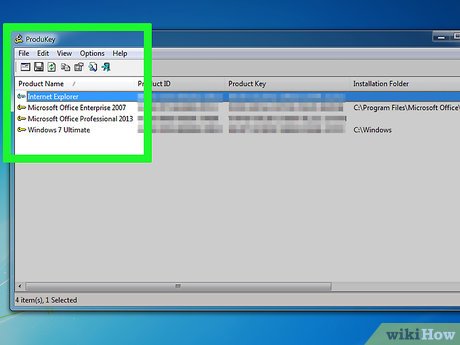 Find your Windows 7 product key. In order to download the Windows 7 installation file (ISO), you'll need to enter your Windows 7 product key on the Microsoft website.
- The product key is typically found on your Windows 7 installation disc's packaging. If you installed Windows 7 on a different computer, you can find the product key there.
- The product key that accompanies most computers which have Windows 7 pre-installed is not considered a valid key by Microsoft.
-
 Obtain a USB flash drive. Buy or find a USB 3.0 flash drive that can store at least 8 gigabytes of information.
- This is the pen drive you'll use to install Windows 7.
-
 Download and install the USB creation tool. Microsoft has a dedicated USB creation tool that you can use to burn your Windows 7 installation file onto a flash drive:
- Go to the Windows USB creation tool page.
- Click Download in the lower-right side of the page.
- Check the box next to your installation language (e.g., the one ending in "US" for English).
- Click Next in the bottom-right side of the page to prompt the download to begin.
- Install the tool by double-clicking the downloaded file and following the on-screen prompts.
-
 Partition your hard drive if you like. If you want to install Windows 7 without removing the currently installed operating system, you can create a space (or "partition") for your Windows 7 installation on your hard drive. You'll use the built-in Disk Management program to do this.
- Make sure your hard drive has enough space on it for you to do this. You should have at least 50 gigabytes of free space for Windows 7, though 100 gigabytes or more is preferred.[1]
- You can also buy an external hard drive and install Windows 7 onto it.
-
 Find out your computer's BIOS key. The BIOS key is the key you'll need to press when restarting your computer in order to open the BIOS, which is a crucial step in installing Windows 7. To find your computer's specific BIOS key, do the following:
- Find your computer's manufacturer name.
- Open a search engine (e.g., Google).
- Type in your computer's manufacturer name followed by "bios key", then press ↵ Enter.
- Open a result from the manufacturer's website.
- Determine which key your computer uses by looking for your computer's model number if necessary.
- You can find your computer's model number by right-clicking the Start icon, clicking System, and looking at the number directly under "Device specifications".
Part 2 of 6:
Downloading the Windows 7 ISO File
-
 Open the Windows 7 download site. Go to https://www.microsoft.com/en-us/software-download/windows7 in your computer's web browser.
 -
 Enter your Windows 7 product key. In the text box near the bottom of the page, type in your 25-character product key.
 -
 Click Verify. It's below the text box.
 -
 Select a language. Click the language drop-down box at the top of the page, then click the language you want to use for your Windows 7 installation.
 -
 Click Confirm. It's below the language drop-down box.
 -
 Click 64-bit Download. This option is in the middle of the page. Doing so prompts the Windows 7 ISO file to begin downloading onto your computer.
- The Windows 7 ISO file is large, so it may take a while for it to download.
- Depending on your browser's settings, you may have to select a download location before the ISO file will download.
Part 3 of 6:
Creating the USB Installation Drive
-
 Insert the USB flash drive into your computer. Plug the flash drive into one of your computer's rectangular USB ports.
 -
 Open the Windows USB creation tool. Double-click the Windows 7 DVD USB Download Tool app icon, then click Yes when prompted.
 -
 Add your Windows 7 ISO file to the tool. Click Browse on the right side of the window, then click once the Windows 7 ISO file and click Open.
 -
 Click Next. It's in the bottom-right corner of the window.
 -
 Click USB device. This option is at the bottom of the window.
 -
 Select your USB drive if necessary. If you see a different drive in the drop-down box than the one you want to use, click the drop-down box and then click your flash drive's name.
 -
 Click Begin copying. It's in the bottom-right corner of the window.
- If prompted, click Erase USB and then click Yes before proceeding.
-
 Wait for the USB to finish burning. It can take up to an hour for Windows to finish creating your installation drive. Once the tool notifies you that the installation is complete, you can proceed.
Part 4 of 6:
Changing Your Computer's Boot Order
-
 Turn off your computer. You can do this by pressing and holding the computer's "Power" button, or you can click Start, click the Power icon, and click Shut Down.
- Make sure your computer is completely shut down before proceeding.
-
 Turn back on your computer. Press your computer's "Power" button to do so. Your computer will begin turning back on.
 -
 Begin pressing the BIOS key. As soon as your computer begins to boot up, begin pressing rapidly the key your computer uses to open the BIOS. You can stop pressing the key once the BIOS page opens.
- If your computer restarts before you have a chance to press the BIOS key, you'll need to turn back off and then on your computer and try again.
-
 Find the "Boot Order" section. Using the left and right arrow keys, scroll through the BIOS tabs until you find a list of boot items.
- You may have to select Boot Order (or similar) and press ↵ Enter to open the menu.
- Each computer's BIOS will be different, so consult your computer's online documentation if you can't find the boot order menu.
-
 Select your flash drive's name. Use the arrow keys to scroll down until you've selected the USB flash drive's name.
 -
 Move the flash drive to the top of the list. In most cases, you'll press the + key until the flash drive's name is at the top; if this doesn't work, consult the key legend at the bottom (or side) of the BIOS screen for instructions.
 -
 Save and exit. Press the "Save and Exit" key as specified by the key legend. Doing so will save your changes to the BIOS and then exit the BIOS screen.
- You may have to confirm your choice by pressing another key before you can proceed.
-
 Restart your computer if necessary. If your computer finishes starting into Windows, restart your computer before proceeding. This will open the Windows 7 installation page, from which point you can begin installing Windows 7.
Part 5 of 6:
Installing Windows 7
-
 Select a language and region. Click the "Language" drop-down box and click a language you want to use for Windows 7, then do the same with the "Country" drop-down box.
 -
 Click Next. It's in the bottom-right corner of the window.
 -
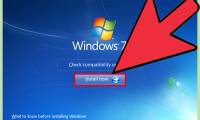
 Click Install now. This option is at the top of the page.
 -
 Accept the terms of use. Check the "I accept" box, then click Next.
 -
 Click Custom (advanced). It's at the bottom of the window.
 -
 Select a partition. Click the partition (e.g., "0") on which you want to install Windows 7.
- If you see an error that says "Windows cannot be installed to [partition]", click the Disk options link, click Format, and click OK when prompted before proceeding (this will erase the partition).
-
 Click Next. It's in the bottom-right corner of the window. Windows 7 will begin installing.
 -
 Allow Windows 7 to install. This can take a long time, so make sure your computer is well-ventilated and charged. Once the "Set up Windows" window opens, you may proceed.
- Your computer will restart several times during this process.
Part 6 of 6:
Setting up Windows 7
-
 Enter a username and computer name when asked. Add your preferred username to the top text field, type in whatever you want your computer to be named in the bottom text field, and click Next.
 -
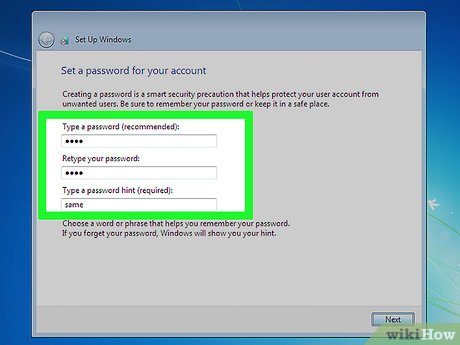 Create a password. Type your preferred password into the top two text fields, then click Next. Your password must match in both text fields for this to work.
- If you want to add a password hint in case you forget your password, type it into the "Hint" text field at the bottom of the window.
-
 Enter your Windows 7 product key. Type your 25-character product key into the text field in the middle of the window, then click Next.
 -
 Click Use recommended settings. It's at the top of the window. This will use Windows 7's default security settings for your computer.
 -
 Select a time zone. If the time zone is incorrect, click the drop-down box at the top of the window and click the proper time zone. Click Next to finish the setup.
 -
 Wait for Windows 7 to finish setting up. Once Windows 7 is finished setting up your account, the desktop will open, and you'll be able to begin using Windows 7 as you please.
- Make sure you remove the USB flash drive from your computer so that your computer doesn't start into the Windows 7 setup menu the next time you restart.
- You might want to re-open the BIOS and move back down the USB flash drive's name in the boot order menu.
Was this article helpful?
Your feedback helps us improve.
Related Articles
 Install Win 7 from your hard drive, no need for USB, install Win disk6 minutes read
 Install Windows XP from a USB Flash drive5 minutes read
 Instructions on how to install Windows 7 using a DVD, USB drive, or hard drive.5 minutes read
 How to Create a Bootable Windows 7 or Vista USB Drive6 minutes read
 How to create a USB flash drive to install Windows 82 minutes read
 Things you need to know about how to install Windows today6 minutes read
Reader Comments 0
Sign in with email or Google to join the discussion.