Cách đặt Windows Photo Viewer làm trình xem ảnh mặc định trên Windows 11
Windows Photo Viewer được phát hành lần đầu tiên cùng với Windows XP và đã nhanh chóng trở thành một trong những công cụ được sử dụng thường xuyên nhất trên Windows..
Windows Photo Viewer được phát hành lần đầu tiên cùng với Windows XP và đã nhanh chóng trở thành một trong những công cụ được sử dụng thường xuyên nhất trên Windows. Mặc dù đã hơi 'lỗi thời' về mặt phần mềm, nhưng Windows Photo Viewer vẫn hoạt động khá tốt trong Windows 11. Nếu bạn vẫn muốn tiếp tục sử dụng trình xem ảnh đơn giản này, có thể kích hoạt và đặt nó làm mặc định trên PC của mình. Cùng tìm hiểu ngay sau đây.
Kích hoạt Windows Photo Viewer trên Windows 11
Microsoft không cho phép bạn sử dụng Windows Photo View trong Windows 11 theo mặc định. Phần mềm này vẫn được bao gồm trong hệ điều hành, nhưng nó đã bị vô hiệu hóa hoàn toàn. May mắn thay, vẫn có phương án 'lách luật'. Trong Windows 10, Windows Photo Viewer có thể được kích hoạt lại bằng cách thực hiện một vài chỉnh sửa đối với registry - tương tự trên Windows 11 cũng vậy.
Trước tiên, bạn download các tệp REG nén bằng cách truy cập liên kết phía dưới. Sau đó mở tệp nén ZIP đã download bằng chương trình giải nén mà bạn có. File Explorer sẽ hoạt động tốt trong trường hợp này, vì nó hoàn toàn có khả năng giải nén các tệp ZIP.
- https://www.howtogeek.com/wp-content/uploads/2022/07/Activate-Windows-Photo-Viewer-on-Windows-11.zip
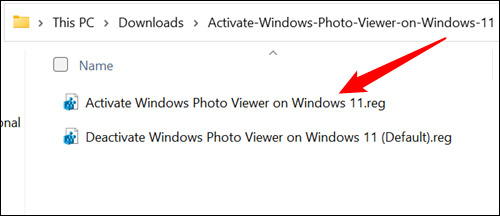
Tiếp theo, nhấp đúp vào tệp ZIP có tên 'Activate Windows Photo Viewer 11' để mở nó, sau đó, bạn tìm REG key có tên 'Activate Windows Photo Viewer on Windows 11.reg'.
Nhấp đúp vào REG key này và bạn sẽ thấy một cửa sổ bật lên cảnh báo về các rủi ro bảo mật khi thêm registry key.
Bạn cần phải cẩn thận khi thao tác với các tệp REG, đặc biệt nếu chúng không đến từ một nguồn đáng tin cậy, vì chúng có thể bị sử dụng với mục đích xấu. Nếu nghi ngờ về một tệp REG, bạn có thể tự mình kiểm tra xem nó có tác dụng gì. Chỉ cần mở tệp REG đó trong một trình soạn thảo văn bản thuần túy, chẳng hạn như Notepad, và xem các mục registry mà nó sửa đổi. Nếu vẫn không rõ tệp REG có chức năng gì, bạn có thể tra cứu các key liên quan trên internet. Windows Registry được lưu trữ cực kỳ đầy đủ, vì vậy không quá khó để tìm ra các mục nhập trong tệp REG.
Trong trường hợp này, tệp REG an toàn tuyệt đối và đã được thử nghiệm rộng rãi trong nhiều năm, vì vậy bạn có thể yên tâm rằng nó không độc hại. Chỉ cần tiếp tục và nhấp vào 'Yes'.

Windows Photo Viewer hiện đã được kích hoạt. Nó sẽ hiển thị ở tất cả những vị trí thông thường nơi bạn tìm thấy ứng dụng xem ảnh, như trên menu ngữ cảnh, khi bạn nhấp vào 'Open With', cũng như trong menu Default Programs.
Set Windows Photo Viewer as the default image viewer on Windows 11.
On Windows 11, Photos is the default application for handling almost all image formats on the operating system. However, if you want to choose Windows Photo Viewer as your default image viewer, there are several convenient ways to do so.
Right-click on the image file to change the default viewer.
This is the simplest method you should try. Just right-click on any image file, such as a PNG. In the context menu that appears, select ' Open with ', then click ' Choose Another App '.

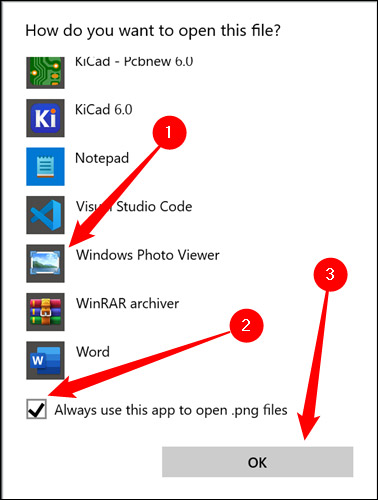
Scroll through the list of available applications until you see Windows Photo Viewer. You may need to click ' More Apps ' for the application to appear. Click on Windows Photo Viewer once to select it, check the box at the bottom that says ' Always Use This App To Open .png Files ', and then click ' OK '.
From now on, any PNG file you double-click will open in Windows Photo Viewer unless you specify a different application. You will need to repeat these steps for every image format (such as JPG or BMP) that you want to open in Windows Photo Viewer.
Set default apps in Settings
Windows 11 has a centralized management area for file formats associated with specific applications. First, you need to access the Settings app, navigate to ' Apps ', and then click on ' Default apps '.
Enter any image format you want into the search bar at the top of the window, such as ' .jpg ', then click the square icon on the right side.

The ' Open With ' window will appear. Scroll down, click ' More Apps ', and continue scrolling until you reach Windows Photo Viewer. Click on it once to select it, then press ' OK '.
You will need to do this for every image format you want to associate with Windows Photo Viewer.
Remember, the inclusion of Windows Photo Viewer in Windows 11 doesn't mean it's fully supported. It's older software and could very well be discontinued by Microsoft in the future.