How to Determine the Bit Count for a Windows Computer
This wikiHow teaches you how to determine your Windows computer's bit count, which typically will be either 32- or 64-bit. Open Start . Click the Windows logo in the bottom-left corner of the screen. The Start window will pop up.
Table of Contents
Method 1 of 2:
Windows 10 and 8
-
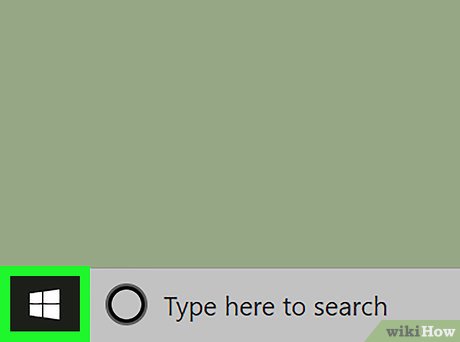 Open Start. Click the Windows logo in the bottom-left corner of the screen. The Start window will pop up.
- You can also just right-click Start (or press ⊞ Win+X) and click System in the resulting pop-up menu. If you do this, skip the next two steps.
-
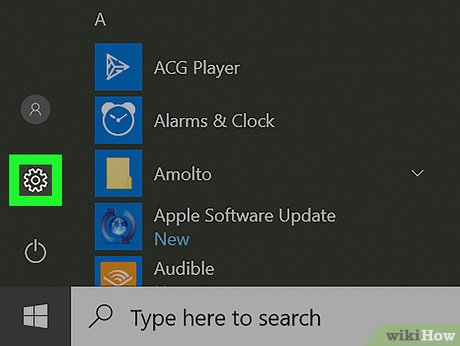 Open Settings. Click the gear-shaped icon in the bottom-left corner of the Start window. This will open the Settings window.
-
 Click System. It's a computer monitor-shaped icon in the Settings window.
 -
 Click About. This tab is at the bottom of the left-hand column of options. Doing so brings up a list of your computer's attributes.
 -
 Look for the "System type" heading. It's near the bottom of the "Device specifications" section toward the bottom of the window. You'll see either "64-bit" or "32-bit" to the right of "System type"; this is your computer's bit count.
Method 2 of 2:
Windows 7
-
 Open Start. Either click the Windows logo in the bottom-right corner of the screen, or press the ⊞ Win key.
-
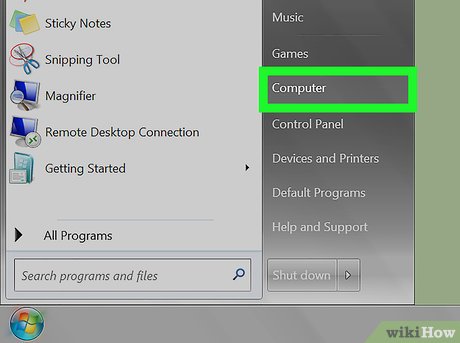 Right-click Computer. It's on the right side of the Start window. Doing so prompts a drop-down menu.
- If the My Computer app is on your desktop, you can right-click it instead.
- If you're using a laptop with a trackpad, tap the trackpad with two fingers instead of right-clicking.
-
 Click Properties. This option is near the bottom of the drop-down menu.
 -
 Look for the "System type" heading. It's below the "Installed RAM" heading on this page. You'll see either "64-bit" or "32-bit" to the right of "System type"; this is your computer's bit count.
Was this article helpful?
Your feedback helps us improve.
Related Articles
 Steps to fix Word Count not showing up in Microsoft Word5 minutes read
 COUNT function in SQL Server3 minutes read
 The COUNT function in Excel: Formulas and the simplest ways to use this counting function.7 minutes read
 How to accurately count words in Word3 minutes read
 How to Determine Why Your Computer Won't Start8 minutes read
 What is the COUNT function used for? Some things to note when using it.3 minutes read
Reader Comments 0
Sign in with email or Google to join the discussion.