Table of Contents
This updated guide examines How to Uninstall Windows 7 from Your Computer and organizes the essential facts, background, and practical takeaways in clear American English.
Method 1of 2:
Replacing Windows 7
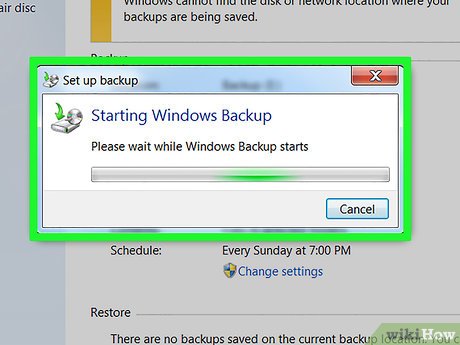 Back up your files. When replacing Windows 7 with a different operating system, you will lose some or all of your files. The best way to prevent permanent loss is by transferring all of the files that you want to keep to an external hard drive.
- Even though most modern operating systems give you the option of keeping your files when installing the operating system, backing up your files is a safety precaution that you shouldn't skip.
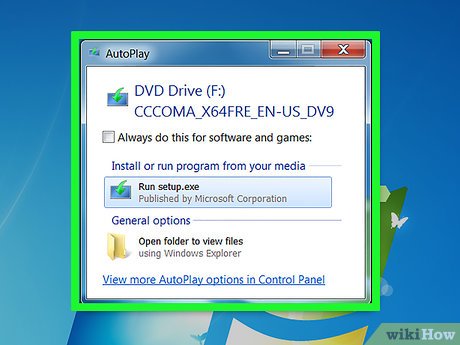 Insert the installation disk or flash drive. To install a new operating system on Windows, you must have the operating system's install tool on a DVD or flash drive, and the disk or flash drive must be inserted into your computer. If you don't have a version of the operating system you want to download, you can download one for the following operating systems:
- Windows 10
- Windows 8
- Windows 7
 Open Start
 . Click the Windows logo in the bottom-left corner of the screen.
 Click the Power button
 . It's in the bottom-left corner of the Start window. A pop-up window will appear.
 ClickRestart. You'll see this option at the top of the pop-up window. Clicking it will prompt your computer to restart.
 Press and holdDelorF2to open the BIOS. Most computers will display a message on startup that says "Press [key] to enter setup" or something similar. This key may vary, so look for this message when your computer restarts to confirm the key you should press to access the BIOS.
- Consult your computer's manual or online support page to confirm your computer's BIOS key.
 Select theBoottab. You'll use the arrow keys to select this tab.
- The Boot tab may instead say Boot Options , depending on your computer's manufacturer.
 Select a boot device. Use the arrow keys to highlight a device from which to boot. There will be two options you can use:
- For a USB flash drive , select the Removable Devices option.
- For a disc installation , select the CD-ROM Drive option.
 Move your boot option to the top of the list. Press the+key until your boot option is first. This will cause your computer to restart from your selected boot option, thereby beginning the installation process for your selected operating system.
- On some computers, you'll instead press one of the function keys (e.g.,F5) to navigate an option up to the top of the menu. The key will be listed on the right side of the screen.
 Save your settings. You should see a key prompt (e.g.,F10) at the bottom of the screen that has "Save and Exit" written next to it. Press this key to save and exit the BIOS.
- You may have to press↵Enterto confirm before you can exit the BIOS page.
 Wait for your computer to restart. Once it does, you should see your chosen operating system's first setup window.
 Follow the on-screen installation directions. Once you complete these, Windows 7 will be completely replaced by the new operating system. These directions will vary depending on the operating system you're installing:
- Windows 10
- Windows 8
- Windows 7
Method 2of 2:
Deleting from a Multiboot Windows Computer
 Back up your files. When you remove Windows 7, you will lose any files that aren't backed up. The easiest way to back up your Windows 7 files is by booting your computer into Windows 7, attaching an external hard drive, and transferring all of the files you want to keep onto the hard drive.
 Make sure you're using the operating system you want to keep. You cannot delete Windows 7 while using it. If you aren't using a different operating system, restart your computer and then select the operating system you want to keep during the restart process.
 Open Start
 . Click the Windows logo in the bottom-left corner of the screen. You can also press the⊞Winkey on your keyboard.
- If you're on Windows 8, place the mouse cursor in the top- or bottom-right corner of the screen, then click the magnifying glass icon.
 Typesystem configurationinto Start. This will search your computer for the System Configuration utility.
- On Windows 8, type into the search bar instead.
- System Configuration is available on most versions of Windows.
 ClickSystem Configuration. It's either at the top of the Start window (Windows 10) or below the search bar (Windows 8). Doing so opens the System Configuration window.
 Click theBoottab. You'll see this at the top of the System Configuration window.
 Select your current operating system. Click the operating system (e.g., Windows 10 or Windows 8) that you want to set as the default. You can't delete an operating system if it's set as your default.
- If your current operating system is already the default, skip this step and the next one.
 ClickSet as default. This will change the default operating system from Windows 7 to your current operating system.
 SelectWindows 7. Click this operating system to do so.
 ClickDelete. This button is below the window that shows the currently installed operating systems.
 ClickApply, then clickOK. These are both at the bottom of the window. Doing so will indicate that you want to delete Windows 7.
 Restart your computer . Once your computer finishes rebooting, Windows 7 should be gone.
- You won't be able to use the Windows 7 hard drive space until you remove the partition that Windows 7 was using.
FAQ
What is How to Uninstall Windows 7 from Your Computer about?
It provides a structured overview of windows, explains the main context, and highlights practical takeaways for readers.
Why does this topic matter?
Understanding the main concepts helps readers evaluate the issue, avoid common mistakes, and make better-informed decisions.
How should readers use this information?
Use the guidance as a practical starting point, confirm details that may have changed, and follow current product, safety, or security recommendations.
Related Articles
 How to Completely Uninstall WSL on Windows 10/114 minutes read
 4 Ways to Return to the Previous Version of Windows 10 Without Losing Data8 minutes read
 3 Ways to Quickly Remove Applications on Windows 11 from3 minutes read
 How to Uninstall Software on Windows 113 minutes read
 How to Uninstall Apps on Windows 114 minutes read
 How to Uninstall Windows 10 April 2018 Update4 minutes read
Reader Comments 0
Sign in with email or Google to join the discussion.