Instructions on using PowerShell to scan for viruses on Windows
If Windows Defender is not working on your computer, you can use PowerShell to scan Windows for viruses and malware.
Table of Contents
If Windows Defender on your computer cannot scan for viruses, you can use PowerShell to scan Windows for viruses and malware. All processes are performed using commands in PowerShell. Below is a guide on how to use PowerShell to scan your computer for viruses.
How to use PowerShell to scan for viruses on Windows
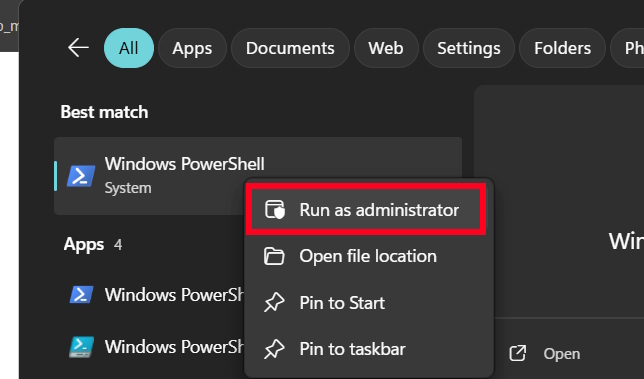
First, search for PowerShell in the Windows search bar. Then, right-click on PowerShell and select Run as administrator.
Check the security status of Windows.
You need to ensure that the Windows security application is running on your computer. This method will not work if you are using any other security program.
In the PowerShell window, enter the command below.
Get-MpComputerStatusThe command above will list all the details about Windows Security. If the security tool is running on your system, it will show True in the AntivirusEnable field.

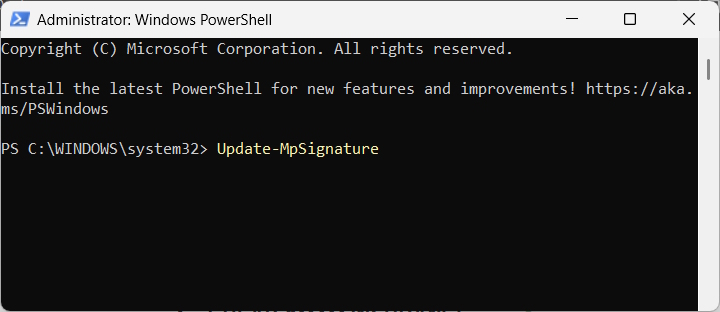
Windows security update
If you haven't installed the Windows 11 updates, you'll need to update the Windows Security app manually.
Update-MpSignature
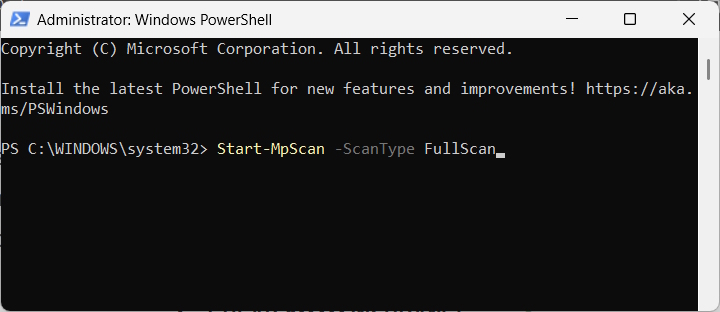
Run a Full Virus Scan
You can use PowerShell to run a full virus scan on your computer. A full scan will check every file on your Windows computer.
Start-MpScan -ScanType FullScan
Because a full scan takes time to complete, you can force Windows Security to perform a background scan. To do that, run the following command.
Start-MpScan -ScanType FullScan -AsJob

Run a quick scan using PowerShell
To run a quick antivirus scan using PowerShell, execute the following command:
Start-MpScan -ScanType QuickScan

Scan Windows Security Offline
Before scanning offline, save all open files. To run an offline scan via PowerShell, execute the following command.
Start-MpWDOScan

Was this article helpful?
Your feedback helps us improve.
Related Articles
 Instructions on how to use PowerShell in Windows Server 20124 minutes read
 Windows PowerShell Could Allow Viruses to Infiltrate Undetected6 minutes read
 How to install PowerShell 7.0 in Windows 10/8/72 minutes read
 3 ways to scan Windows 10 system-wide viruses with Microsoft Defender3 minutes read
 12 Most Useful PowerShell Commands for Windows7 minutes read
 About PowerShell15 minutes read
Reader Comments 0
Sign in with email or Google to join the discussion.