Delete these temporary Windows folders to reclaim precious storage space
Windows creates temporary files in the background to keep things running smoothly. But over time, these hidden files silently accumulate in system folders, slowly taking up all the space you have.
Windows creates temporary files in the background to keep things running smoothly. But over time, these hidden files silently accumulate in system folders, slowly taking up space you could use for photos, apps, or anything else that's really important to you.
1. User Temp folder (%temp%)
The User Temp folder is where applications, background processes, and Windows store temporary files that are left behind. Programs use this folder for installations, logs, cache files, and leftovers from updates or crashes. These files are considered temporary, but are not usually cleaned up.
Over time, especially when installing or uninstalling software frequently, the folder can fill up with junk files and grow to several gigabytes without you realizing it.

To access and clean up, press Win + R to open the Run dialog box . Then type %temp% and press Enter. This will open the Temp folder in File Explorer. Select everything inside with Ctrl + A , then press Delete. If some files are still being used by background apps or services, Windows will let you know. Skip those files and delete the rest.
2. System Temp folder
Windows also uses the system Temp folder to store temporary files, but unlike the user-specific folder, this folder is used by the operating system and system-level services. This folder often contains files left over from installations, updates, and other background tasks.

To find this folder, open the Run dialog box, type temp , and press Enter. You can also go straight to C:WindowsTemp in File Explorer.
3. Software Distribution folder
When Windows downloads updates, it stores all the necessary files in the Software Distribution folder before installing them. This folder contains two main parts: Download, which stores the update packages, and DataStore , which stores logs and profiles related to the update history.
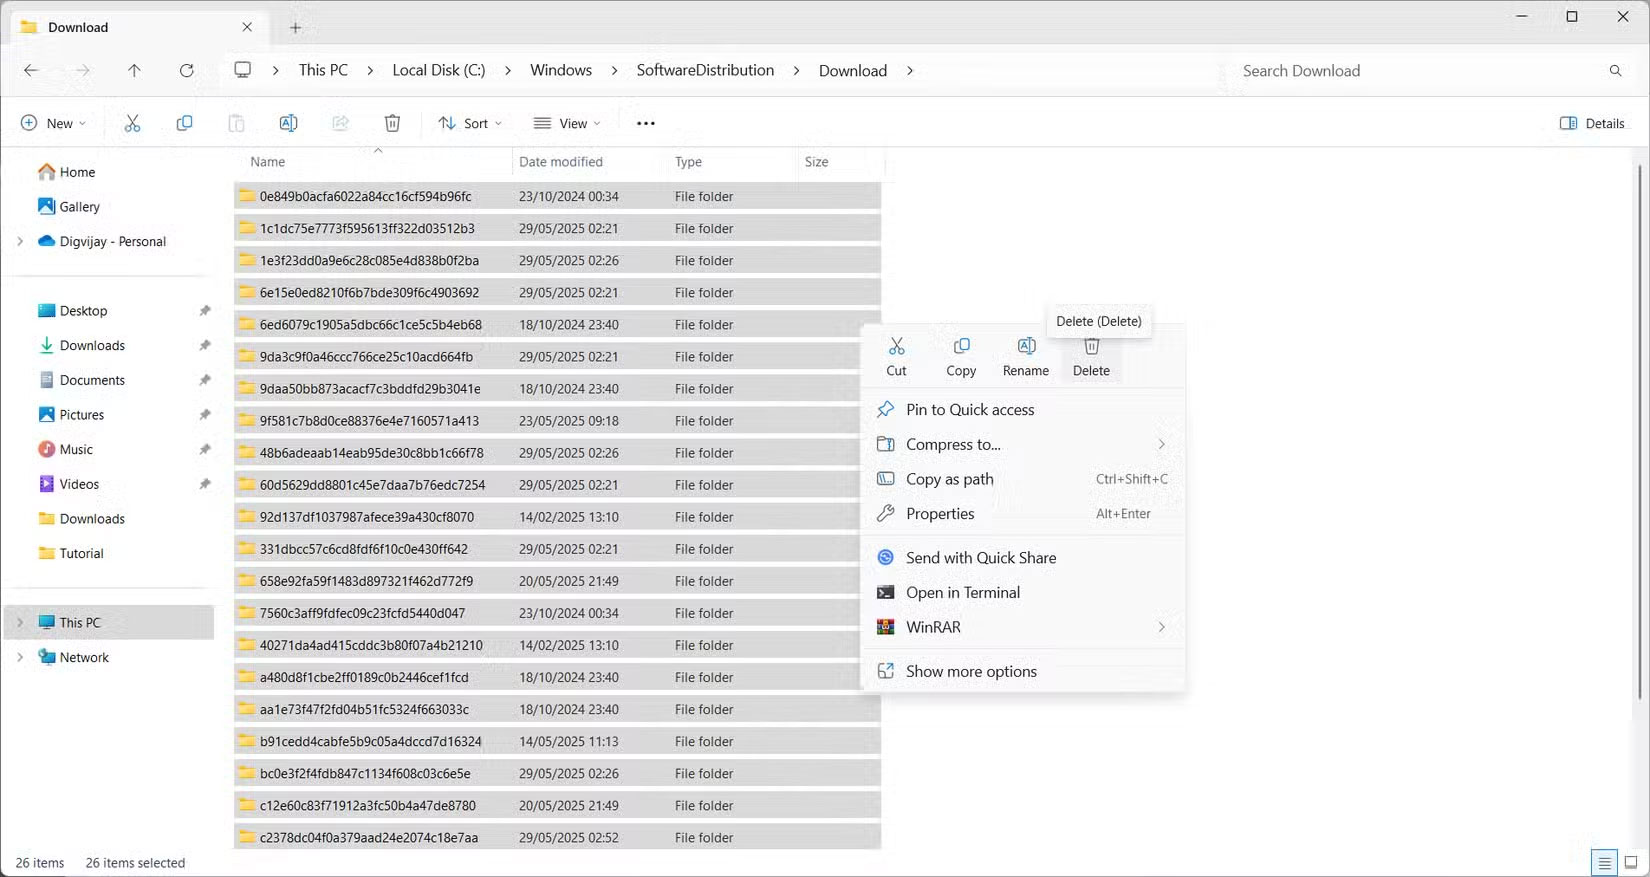
Over time, your Downloads folder can become filled with outdated or incomplete update files that you no longer need. These leftover files are not automatically deleted and take up disk space, especially after multiple system updates or failed installations.
To clean up, open File Explorer and navigate to C:WindowsSoftwareDistributionDownload. Select everything inside and delete. Be careful not to delete the main Software Distribution folder, just the downloaded contents.
4. Recycle Bin
Another place where disk space can build up is in the Recycle Bin . When you delete a file, it doesn't immediately leave your system. Instead, it goes into the Recycle Bin and stays there until you restore it or the Recycle Bin reaches its limit. This Recycle Bin acts as a safety net in case you accidentally delete something important.
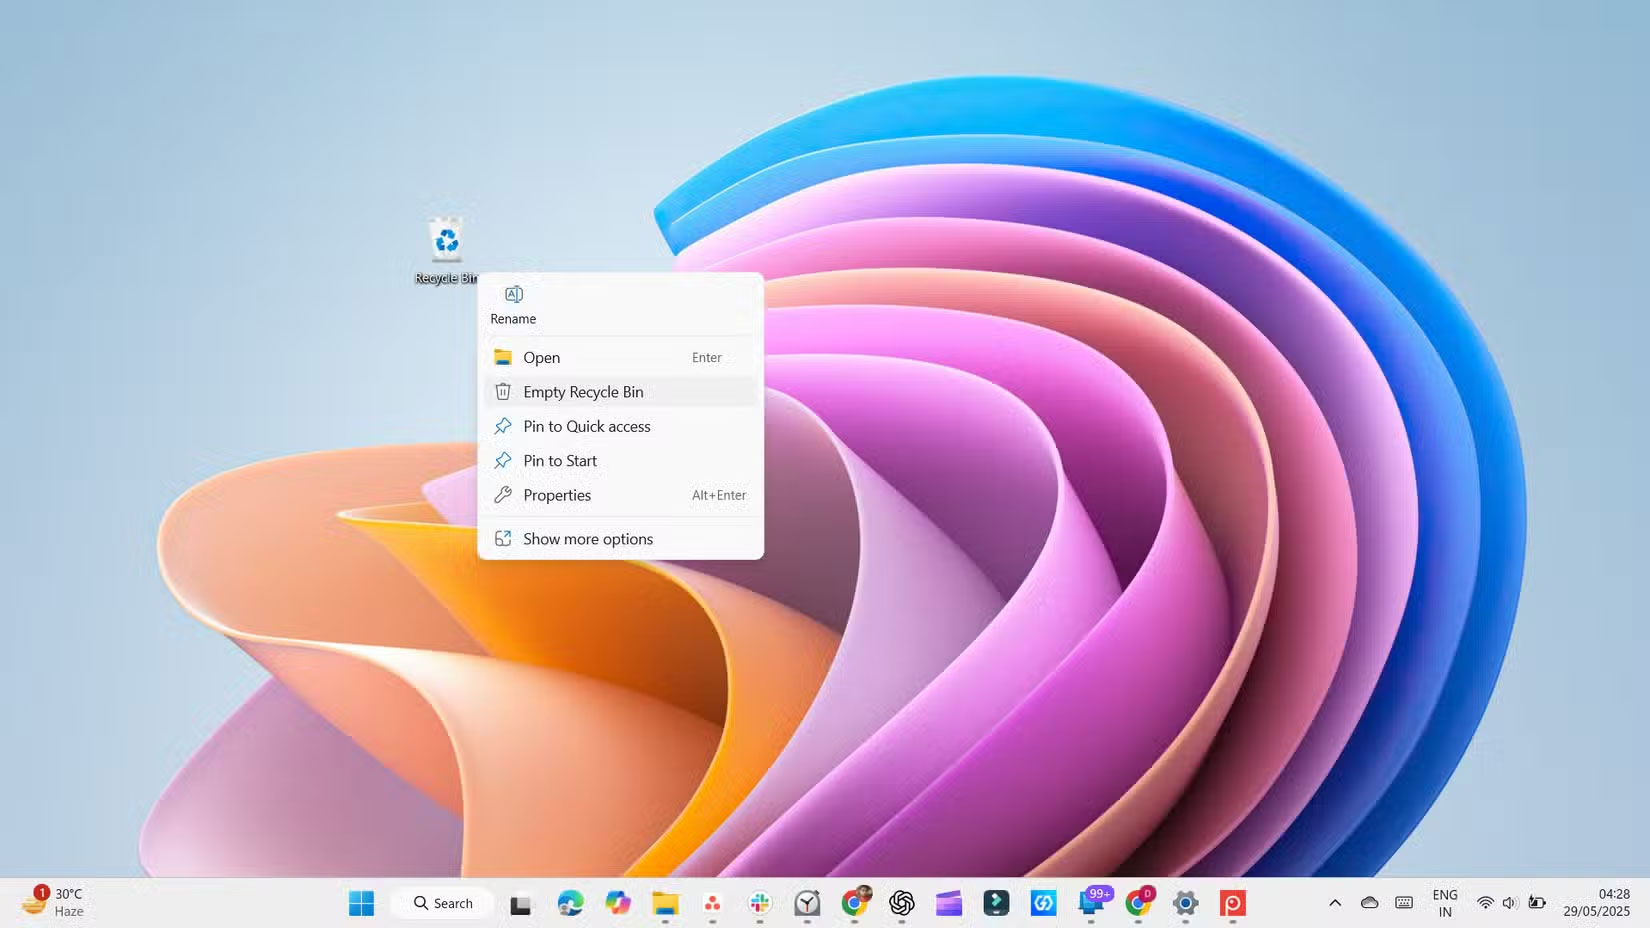
However, if left unchecked, the Recycle Bin can accumulate a large collection of deleted files and silently waste gigabytes. To avoid this, get into the habit of emptying the Recycle Bin regularly or set Windows to automatically empty the Recycle Bin .
5. Windows.old folder
When you upgrade to a new version of Windows, the system saves a copy of your old installation in a folder called Windows.old. This folder contains everything from your previous setup, including system files, installed applications, and personal data.
This folder exists in case you want to roll back to a previous version, but if the upgrade went smoothly and you don't intend to roll back, you probably don't need this folder. This folder can be quite large, sometimes taking up 12 to 25GB of space on your hard drive.
6. Delivery Optimization Files
Delivery Optimization Files are cached copies of Windows Update files. They help speed up updates by allowing your PC to share those files with other devices on your network or even online. This reduces Internet usage and speeds up updates.
However, after installing updates, these files are no longer needed and can take up hundreds of megabytes. It's perfectly safe to delete them and free up some space, especially after major updates.
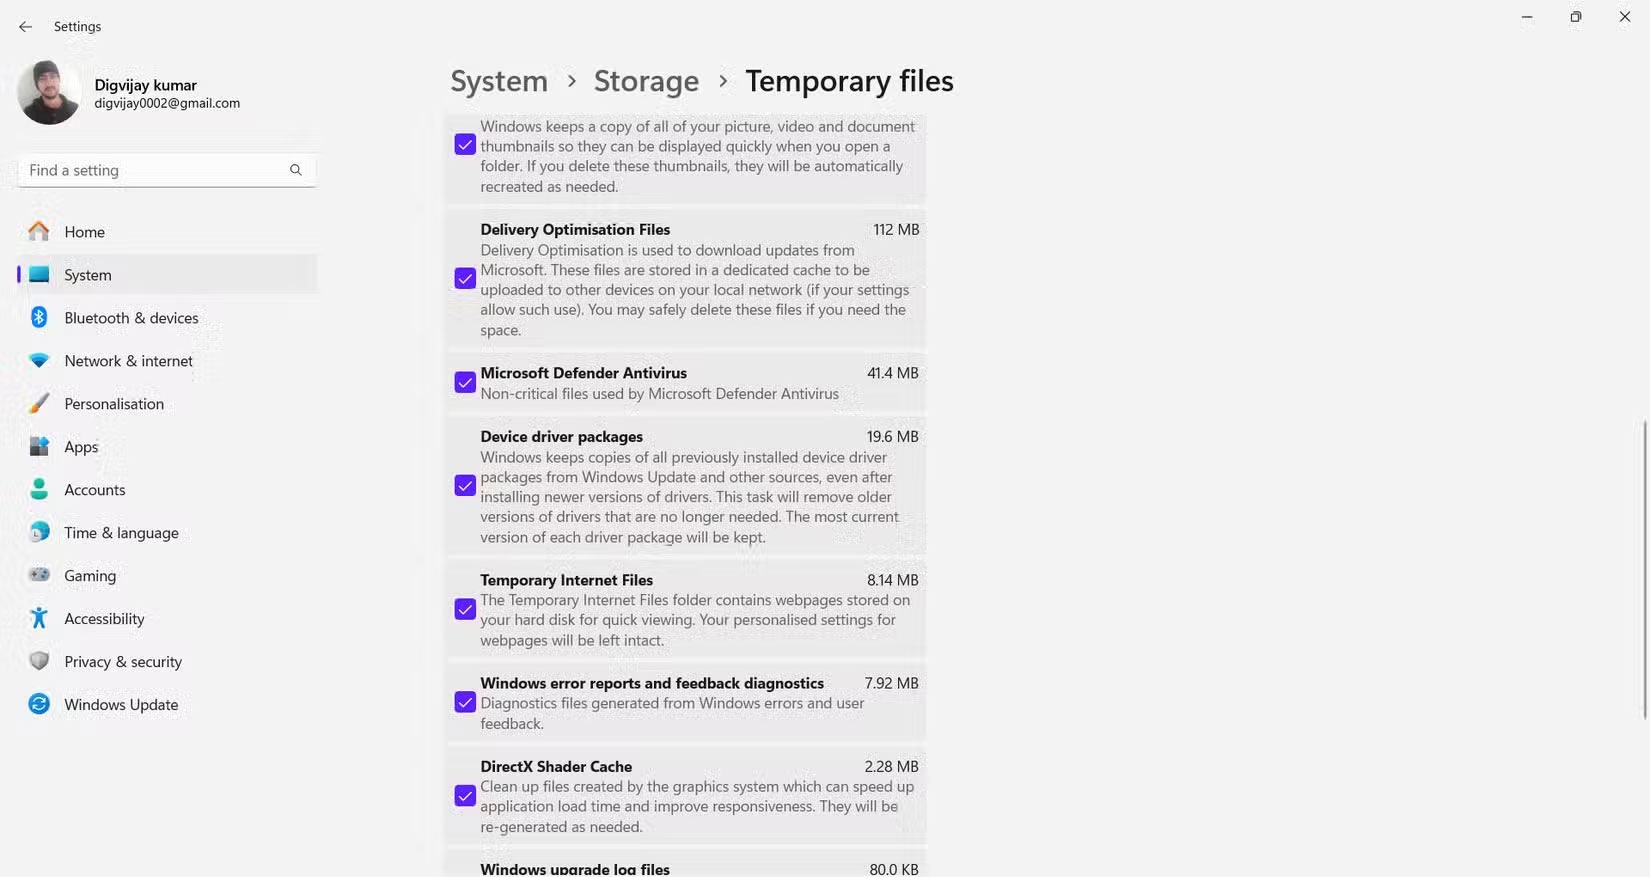
To remove Delivery Optimization Files, navigate to Settings > System > Storage . Under Local Disk (C), click Temporary files and check Delivery Optimization Files , then click Remove files to free up disk space.
7. Low impact file folders
After you've dealt with the large archive files, there are a few smaller folders you can delete to free up a little more space. These usually don't take up much space, but cleaning them out can still help reduce clutter and keep things organized.
Recent Items folder
Windows stores shortcuts to files you've recently opened in a hidden folder so you can quickly find them in the Start menu or File Explorer. These are just links, not actual files, but they can accumulate and fill up the folder.
To delete them, press Win + R , type shell:recent , and press Enter. When the folder appears, select everything and delete it. Don't worry; you're only deleting the shortcuts, not your actual files.
Downloaded program files
Despite the name, this isn't your typical Downloads folder. This is an old location used by Internet Explorer to store ActiveX controls and Java apps, both of which are now obsolete.
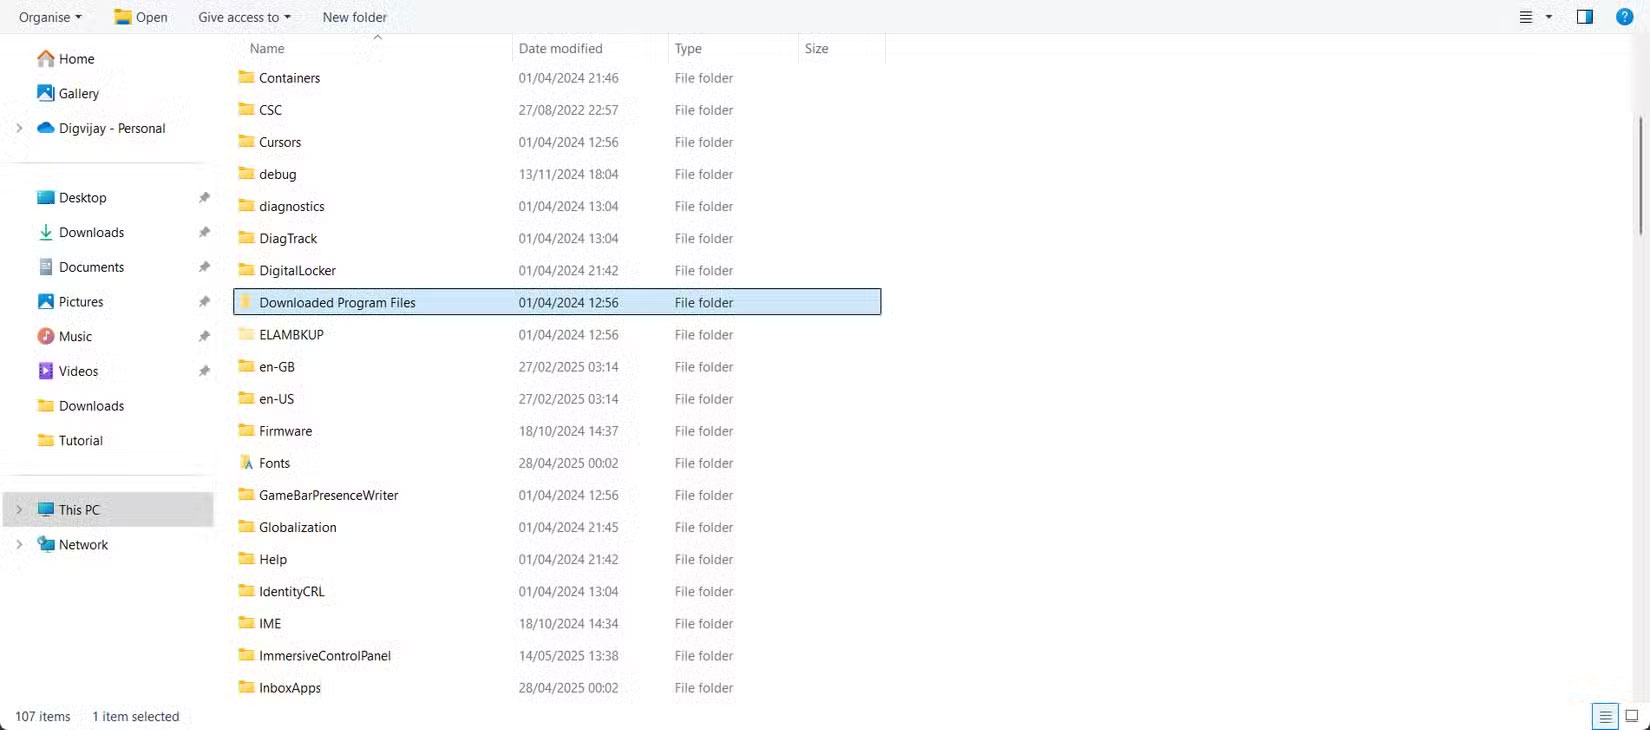
To clean up, go to C:WindowsDownloadedProgram Files and delete any files you see. Chances are this folder is empty or full of unused items that you can safely delete.
Thumbnail Cache
Windows creates thumbnail previews of your pictures, videos, and documents to make browsing faster and easier. These previews are stored in a cache, which can grow over time.
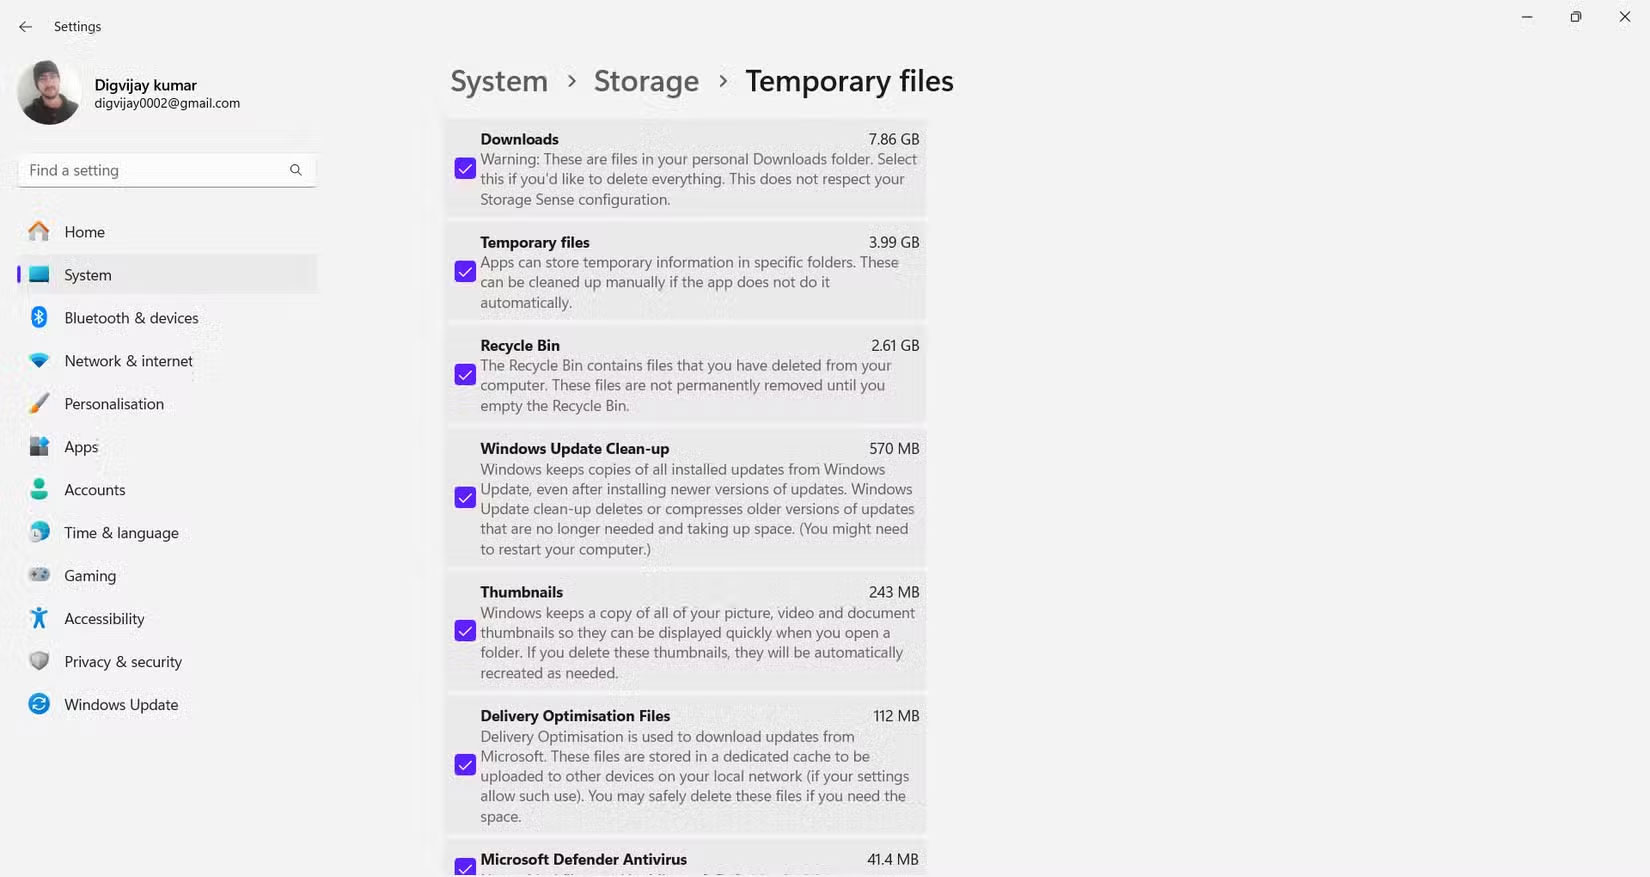
To delete them, open System Settings and go to System > Storage > Temporary files . Check the box next to Thumbnails and click Remove files . Removing these files won't delete your actual files, just the previews that Windows will recreate when needed.
- How to Automatically Delete Temporary Files on Windows 11
- How to use Storage sense Windows to free up disk space
- Free up space on Windows 10 by deleting temporary files
- Automatically delete temporary files every time a Windows 10 computer is opened
- Instructions to delete empty folders in Windows computer
- How to regain storage space for Chromebooks
- How to delete files and folders on Dropbox
- 7 files and folders Windows can delete to free up space
- How to fix temporary files taking up a lot of space on your computer
- How to visualize and reclaim memory on Windows with altWinDirStat
- 11 ways to open the Recycle Bin on Windows
- How to fix Recycle Bin not working
- How to View Recently Deleted Files on Windows 10/11?
- How to Add Recycle Bin to File Explorer
- How to create a shortcut to clean the Recycle Bin on Windows 10/11
- How to delete the Windows.old folder in Windows 11
- Simple tips to clean Recycle Bin on Windows 10
- 5 Recycle Bin settings on Windows 11 you should know
- 4 ways to recover files from Recycle Bin in Windows 10
- How to set up automatic emptying of the recycle bin in Windows 11
-
 Use code interpreter to analyze structured data in Copilot Studio.
-
Add unstructured data as a knowledge source for the Copilot Studio agent.
-
Use unstructured data as a knowledge source for agents in Copilot Studio.
-
Create a group of files to serve as a knowledge source for the agent in Copilot Studio.
-
Upload files to create a knowledge base for agents in Copilot Studio.
-
All you need to know about PDF files - What is a PDF file?
 Use code interpreter to analyze structured data in Copilot Studio.
 Add unstructured data as a knowledge source for the Copilot Studio agent.
 Use unstructured data as a knowledge source for agents in Copilot Studio.
 Create a group of files to serve as a knowledge source for the agent in Copilot Studio.
 Upload files to create a knowledge base for agents in Copilot Studio.
 All you need to know about PDF files - What is a PDF file?