Word 2013 Complete Guide (Part 16): Image format
- Word 2013 full-text tutorial (Part 12): How to break pages, paragraph breaks
- Word 2013 Complete Guide (Part 13): Divide the text column
- Word 2013 Complete Guide (Part 14): Page title, footer and page numbering
In the previous section we talked about how to insert the Text Wrapping image and function into Word 2013 , as well as how to customize the position of the image so that it appears where you want it in your document. In this section, we will continue to learn about image formats in Word 2013 .
There are many ways to format, edit photos in Word document documents. You can change the size or shape of the image to better fit the document you are working on. Or it can make images look better thanks to the image enhancement tools that Microsoft has equipped for Word 2013. Follow our Word 2013 category to constantly update your best Word tips. Please!
Invite you to take a look at the video Format in Word 2013 :
How to crop photos in Word 2013
When you crop an image, part of the image will be removed. Cutting photos is useful when you have to handle an image that is too big or contains lots of content but you just want to focus on one part of it.
1. Select the image you want to cut. The Format tab will appear.
2. On the Format tab, click the Crop command.
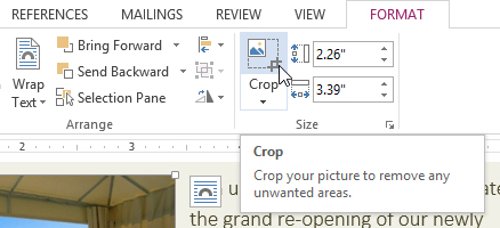
3. The cropping frame appears, click on the black button on the edge and drag to the desired position to crop the image. Because the image button positions are very close to the image resizing button, you must be careful not to press the wrong button.
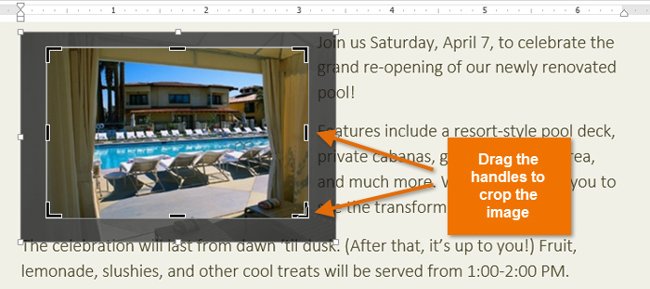
4. Click the Crop command. The image will be cut.
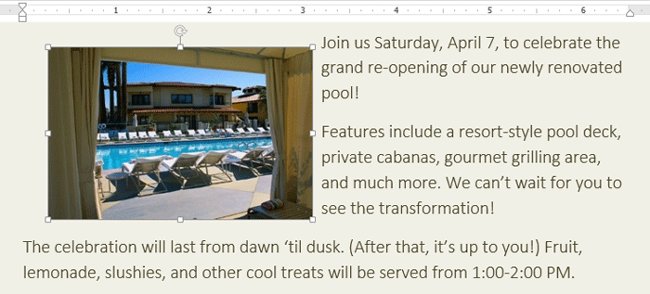
- Black buttons at the corner will be handy when you need to crop the image horizontally or vertically.
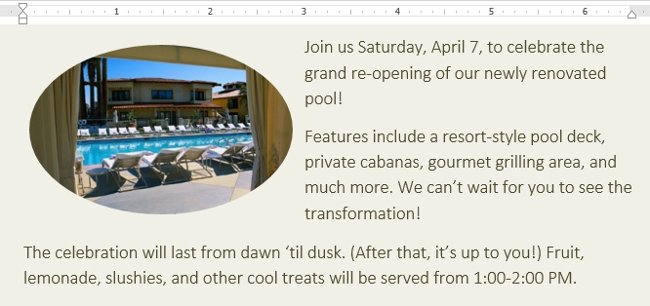
Cut pictures in Word 2013 into other shapes
1. Select the image you want to cut, then click the Format tab.
2. Click the drop-down arrow at Crop . Hover over Crop to Shape , then select the desired shape from the drop-down menu.
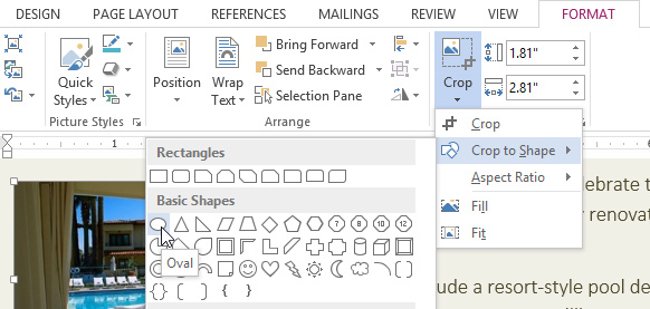
3. The image will appear in the format you selected.
Add borders for inserted images in Word 2013
1. Select the image you want to add the border to, then click the Format tab.
2. Click the Picture Border command. A drop down menu will appear.
3. From here, you can choose colors ( Color ), thickness (Weight ) and border type ( Dash ).
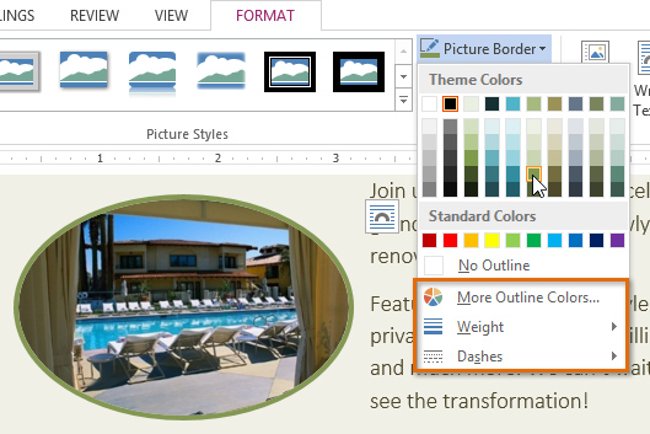
4. The border will appear around the image.
Adjust images
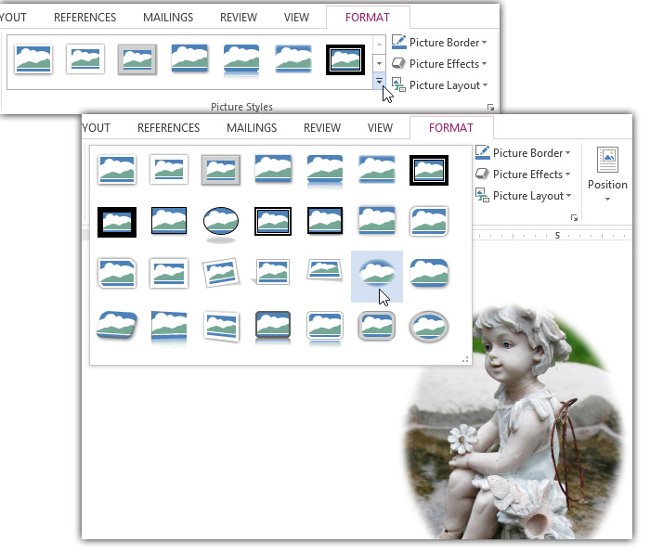
Word provides several options to change how images appear in documents. For example, you can add frames, edit images, change the color or brightness of images and even add some fashion art effects. These options are in the Adjust and Picture Styles group on the Format tab.

When ready to perform image adjustments or experiment with the look of images in Word 2013, simply select the image, click the Format tab and use the options highlighted in the image below:
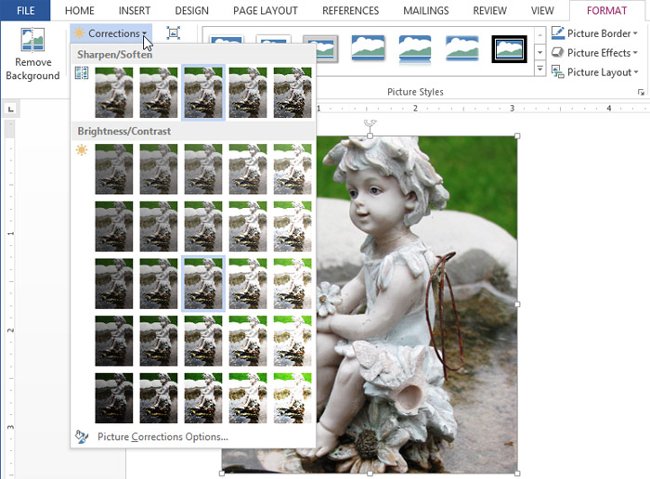
- Corrections : This command is in the Adjust group. Here, you can sharpen or soften the image by adjusting the opacity or clarity of the image. You can also adjust the brightness and contrast, control the light that appears in the light or shadow so that the image appears as you want.
- Color : You can adjust the saturation of the image ( vivid color ), color tone ( color temperature of the image, from cold to hot ) and add color ( change the overall color of the image ).

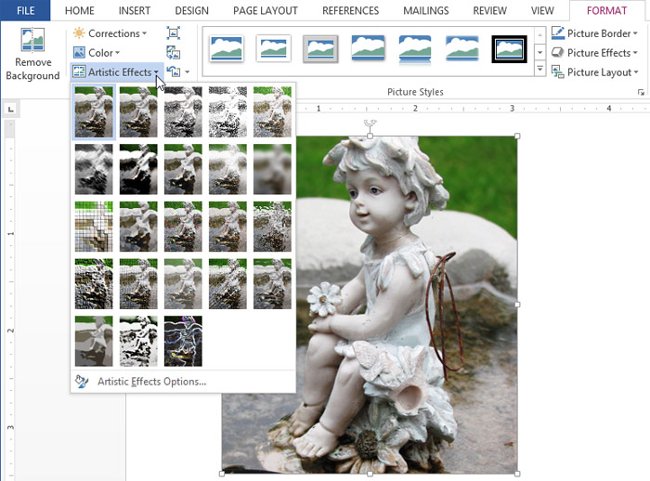
Artistic effect: This command is in the Adjustment group. From here, you can add artistic effects like chalk, watercolor, and bright edges.
- Artistic Effect : Select the effect available to apply to images such as pastel colors, watercolors and glowing edges . These effects are quite strong so you should consider when using them, so that they are suitable for the document and not " outrageous ".
- Picture Styles : This group of tools contains a lot of pre-installed image styles, making it easier to format images such as frames, borders and edges. Picture Styles are designed to add frames to images without changing the basic settings or effects.
Compress images in Word 2013
If you plan to email documents containing images, you will need to track the file size. High resolution images can quickly make your documents heavy, which can be difficult or impossible to attach to emails. In addition, the cropped areas of the image saved in the document by default, can be added to the file size.
Word 2013 also provides an image compression tool that reduces the specific image size and overall file size, reduces resolution and deletes garbled areas.
How to compress photos:
1. Select the image you want to compress, then click the Format tab.
2. Click the Compress Pictures command.
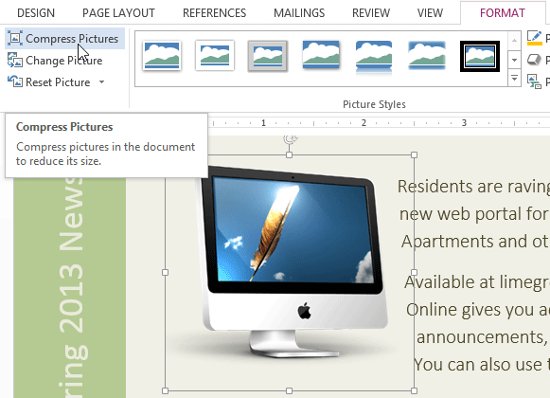
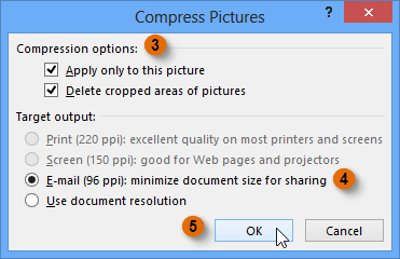
3. A dialog box will appear. Select Delete cropped areas of pictures . You can choose to apply this setting to all images in the document or just for the selected image.
4. Select Target output . If you plan to send this document via email, you can choose Email to reduce the file size.
5. Click OK .
Delete photo background
Removing background images can make it appear clearer. In printing documents, it can also save you ink.
Invite you to take a look at the video Remove the photo background in Word 2013 :
With the Background Removal feature, Word uses special algorithms to determine which part of the image is the background and then removes these areas from the image.


To remove a background from an image:
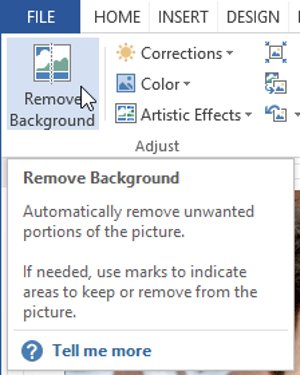
1. Select the desired image, then click the Format tab.
2. Click the Remove Background command.
3. Word will try to guess the background of the image to remove and mark the background with purple pink color. It will also place a box with selected handles around the image.

4. Drag the selected control bar until all the main images are inside the box. After that, Word can adjust the image background.
5. At this point, you may need to help Word decide which part of the image is located and which part is hidden. You can do this by using Mark Areas to Keep and Mark Areas to Remove commands:
- If Word has highlighted a pink and purple part in front of it, click Mark Areas to Keep and draw a line in the area of the image.
- If a background is not highlighted in purple, click Mark Areas to Remove and draw a line in that area of the image.
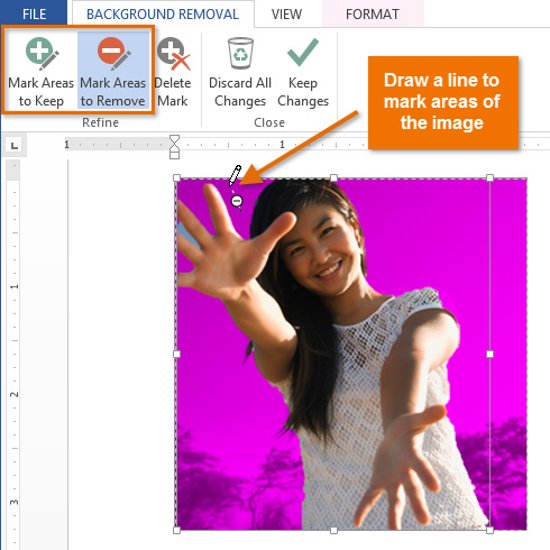
6. After adding the sign, Word will adjust the image again.

7. When you are satisfied with the image, click Keep Changes .
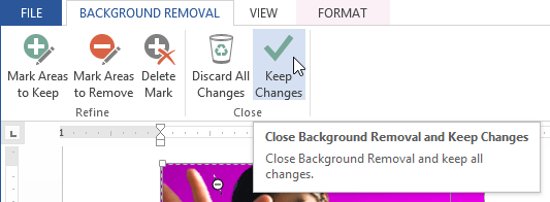
8. The background will be removed. You can adjust the image at any time by clicking the Remove Background command again.

See also: Word 2013: Instructions for using Microsoft and OneDrive accounts
Having fun!