Word 2013 Complete Guide (Part 18): How to insert Text Box and WordArt
- Word 2013 Complete Guide (Part 15): Insert Images and Text Wrapping functions
- Word 2013 Complete Guide (Part 16): Image format
- Word 2013 Complete Guide (Part 17): Drawings and how to create effects for drawings
Introduce
The Text Box text box can be useful in attracting readers' attention to specific texts. They can also be useful when you need to move the text in your document. Word 2013 lets you format Text Box text boxes and text within them as WordArt .
Please refer to how to insert Text Box and WordArt in Word 2013 :
How to insert Text Box and WordArt in Word 2013:
- A. Insert Text Box
- I. Move the Text Box text box:
- II. Resize Text Box
- B. Change the text box
- I. Changing the shape of the text box:
- II. Change color
- III. Change the border
- IV. Change the style
- V. Change shadow effect
- C. 3D effect
- I. Using 3-D Rotation:
- II. Use Bevel:
- D. Create WordArt
- I. Apply quick style to text
- II. Convert plain text to WordArt:
- III. Convert text
A. Insert Text Box
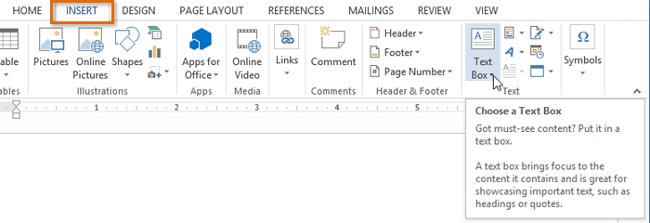
1. Select the Insert tab, then click the Text Box command in the Text group.
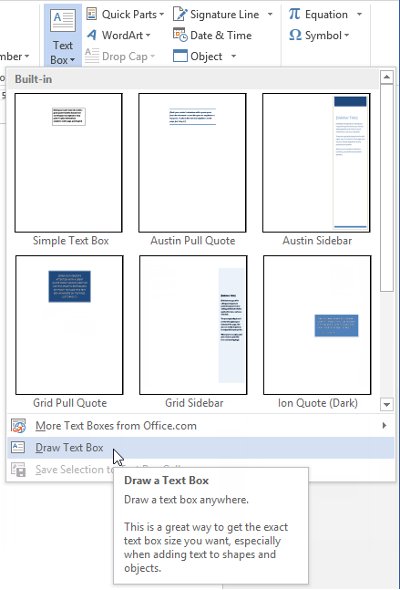
2. A drop-down menu will appear. Select Draw Text Box .
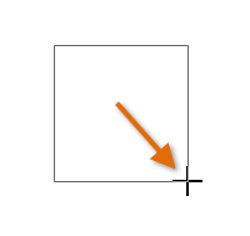
3. Click, hold, and drag to create a text box.
4. The insertion point will appear inside the text box. You can enter to create text in the text box.
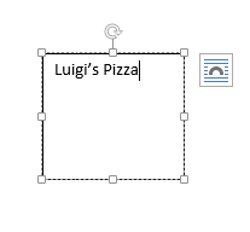
5. If desired, you can select the text and then change the font, color and size by using the commands on the Home tab.
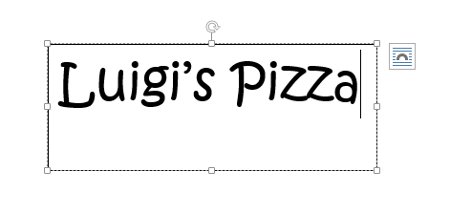
6. Click anywhere outside the text box to return to your text.
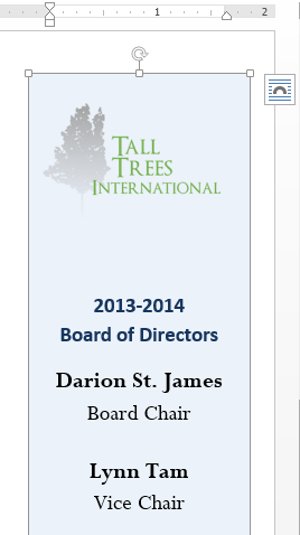
- You can also select one of the created text boxes including predefined colors, fonts, location and sizes. If you select this option, the text box will automatically appear, so you won't need to paint it anymore.
I. Move the Text Box text box:
1. Click the text box text box you want to move.
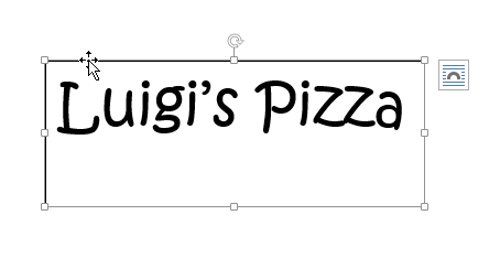
2. Hover over one of the edges of the text box. The cursor will change to a 4-arrow icon  .
.
3. Click, hold, and drag the text box to the desired location.
II. Resize Text Box
1. Click the text box that you want to resize.
2. Click, hold, and drag any circular latch on the corner or edge of the text box until it is the desired size. 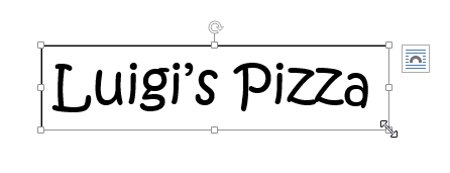
B. Change the text box
Word 2013 offers many options to change the way text boxes appear in your document. You can change the shape, style and color of text boxes. Also, when you want to add a smaller size you can add shadow effects.
I. Changing the shape of the text box:
Changing the shape of the Text box text box can be a useful option to create an interesting look in your document text.
Selecting a shape style allows you to apply colors and effects to quickly change the appearance of the Text Box .
1. Select the text box you want to change. The Format tab will appear.
2. From the Format tab, click the Edit Shape command.
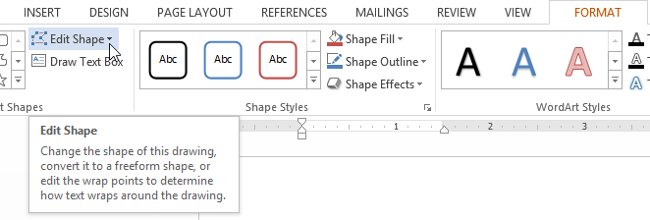
3. Hover over Change Shape , then select the desired shape from the menu that appears.
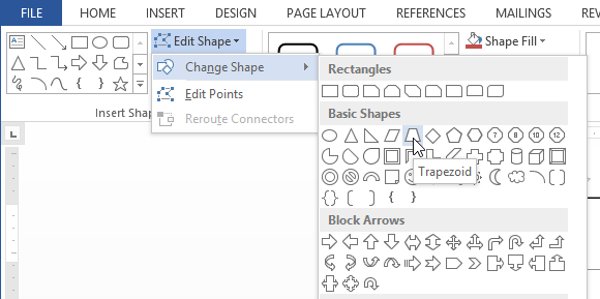
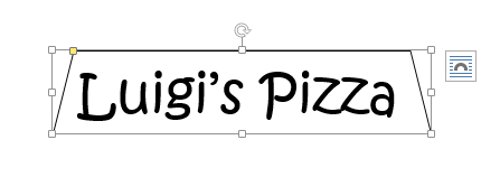
4. The text box text box will appear under the shape you selected.
II. Change color
1. Select the text box you want to change.
2. On the Format tab, click the Shape Fill drop-down arrow. The Shape Fill drop-down menu will appear.
3. Choose the color you want to use. To see more color options, select More Fill Colors .
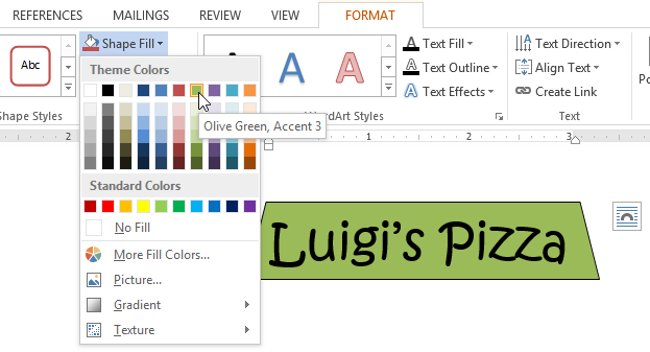
4. The text box text box will appear in the selected color.
- If you want to use a different color style, select Gradient or Texture from the drop down menu. You can also select No Fill to make it transparent.
III. Change the border
1. Select the text box text you want to change.
2. On the Format tab, click the Shape Outline drop-down arrow. Menu Shape Outline will appear.
3. Choose the color you want to use. If you want, you can select the colorless border, select No Outline .
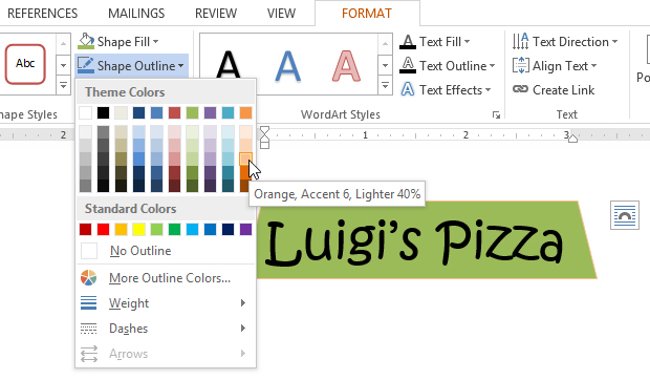
4. The text box text box will appear in the selected border color.
- From the drop-down menu, you can change the border color, thickness and dashed lines.
IV. Change the style
Selecting a style allows you to apply existing colors and effects to quickly change the appearance of the text box.
1. Select the text box text you want to change.
2. On the Format tab, click the More drop-down arrow in the Shape Styles group.
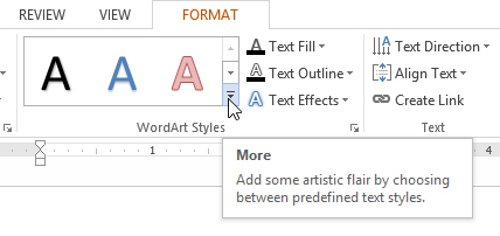
3. A drop-down menu will appear. Select the type you want to use.
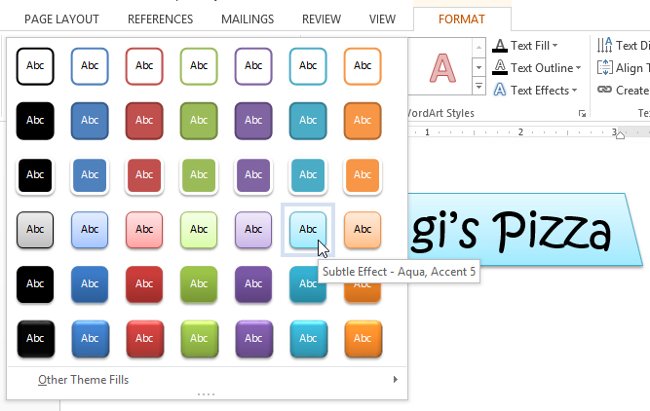
4. The text box text box will appear in the selected style.

V. Change shadow effect
Adding a shadow effect to the image can make it appear as if it is floating on the page and help increase the contrast between the shape and the background.
1. Select the text box text you want to change.
2. On the Format tab, click the Shape Effects drop-down arrow. In the menu that appears, select the shadow you want to use.

3. The shape will appear with the selected shadow.

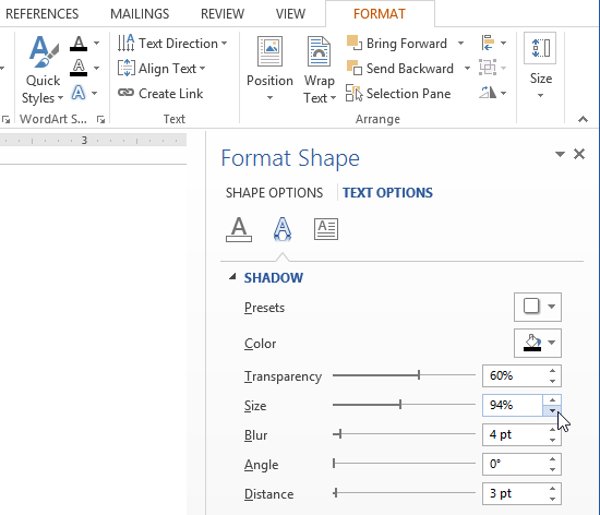
- To adjust the shadow color, size, distance and more, select Shadow Options from the drop down menu. Format Shape will appear.
C. 3D effect
There are two types of effects you can apply to text box text boxes to create 3D effects : 3-D Rotation and Bevel. 3-D Rotation makes text box text boxes appear as if you were viewing a text box from another angle. The Bevel effect increases the thickness and rounded edges for text boxes.
I. Using 3-D Rotation:
1. Select the text box you want to change.
2. On the Format tab, click the Shape Effects drop-down arrow. In the menu that appears, select the desired 3-D Rotation effect.
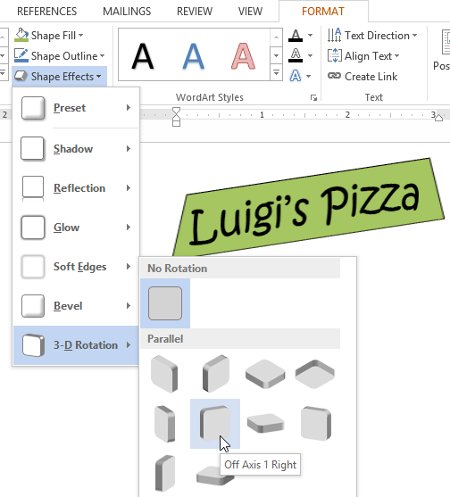
3. The text box text box will appear in the selected Rotation 3-D effect.
- If desired, you can customize Rotation 3-D . Select 3-D Rotation Options . from the drop-down menu and the Format Shape pane will appear. From here, you can adjust the rotation values.

II. Use Bevel:
1. Select the text box you want to change.
2. On the Format tab, click the Shape Effects drop-down arrow. In the menu that appears, select the desired bevel preset.
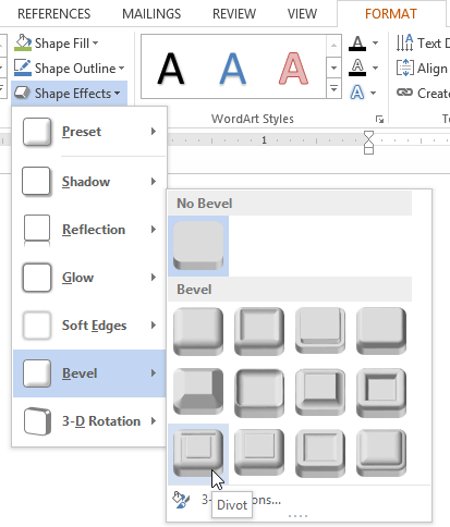
3. The text box text box will appear in the selected bevel effect.

- If you have changed the shape of the text box, it is important to note that the bevel effect does not work with all shapes.
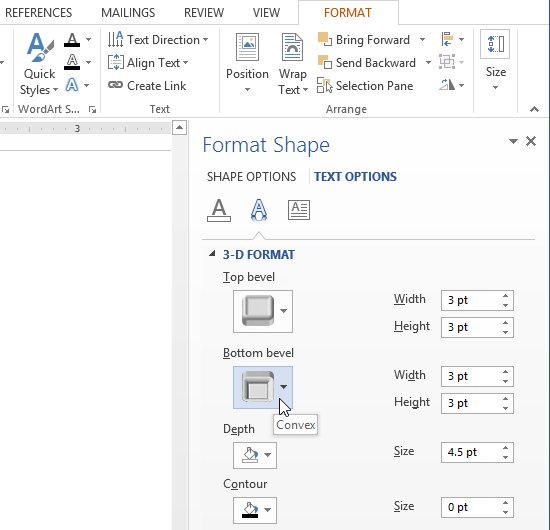
- If you want, you can customize the bevel effect. Select 3-D Options . from the drop down menu. Format Shape will appear. From here, you can change the width, height and depth of a bevel.
D. Create WordArt
In addition to adding effects to the text box text box, you can add effects to text within the text box, known as WordArt . Most types of effects that you can add are like effects you can add to drawings or text boxes ( such as shadow effects, bevel effects, . ). However, you can also convert text to create a wavy, italic, or zoom .
In general, you should not use WordArt in other official documents such as profiles and referrals because it may appear non-formal.
I. Apply quick style to text
Quick style will automatically apply some effects to your text at the same time. You can then tweak the look of the text by adding or modifying text effects.
1. Select the text box text box or select some text inside the text box.
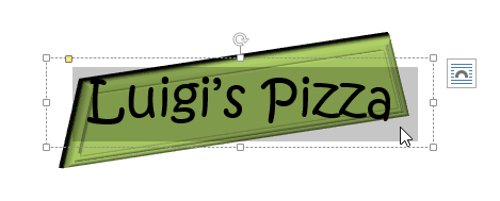
2. On the Format tab, click the Quick Styles command in the WordArt Styles group. A drop-down menu of text styles will appear. Select the type you want to use.
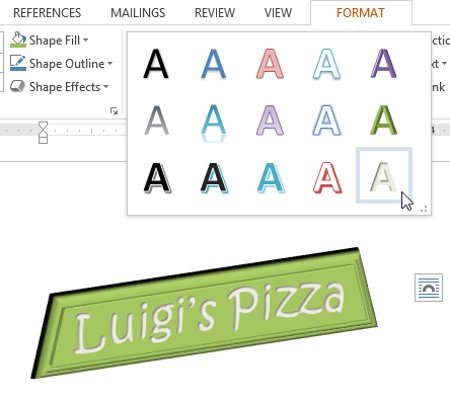
3. The text will appear in the selected style. If you want, you can change the font or font color from the Home tab.
II. Convert plain text to WordArt:
For WordArt- formatted documents, it must be in a text box. However, there is a shortcut that allows you to convert text into WordArt even if it is not in a text box.
1. Select the text you want to convert, then click the Insert tab.
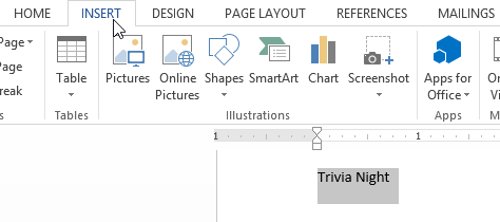
2. Click the WordArt drop-down arrow in the Text group. A drop-down menu of WordArt types will appear. Select the type you want to use.
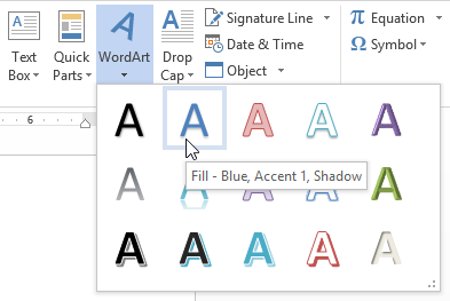
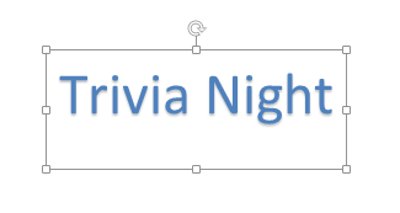
3. Word will automatically create a text box text box for text and text that will appear in the selected style. If you want, you can change the font or font color from the Home tab.
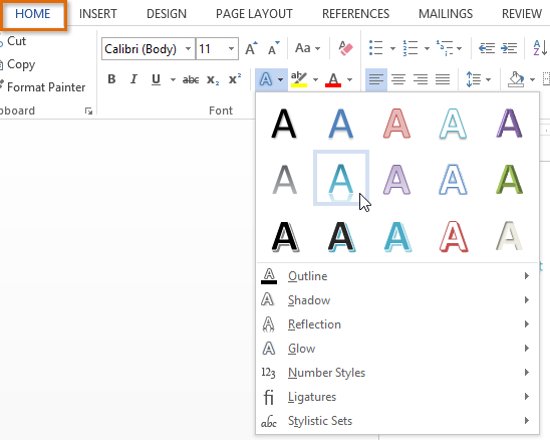
- Some effects like shadow effects, can be added from the Text Effects menu in the Home tab. When you add effects in this way, it will not put text into a text box.
III. Convert text
1. Select the text box or select some text inside the text box.

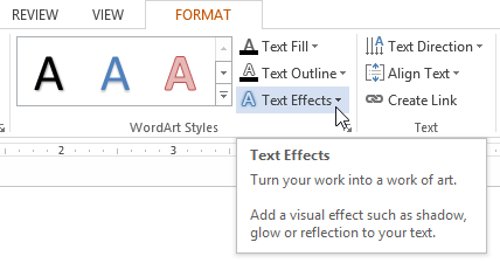
2. On the Format tab, click the Text Effects drop-down arrow in the WordArt Styles group.
3. An effect drop-down menu will appear. Hover over Transform and select the transition effect from the menu that appears.
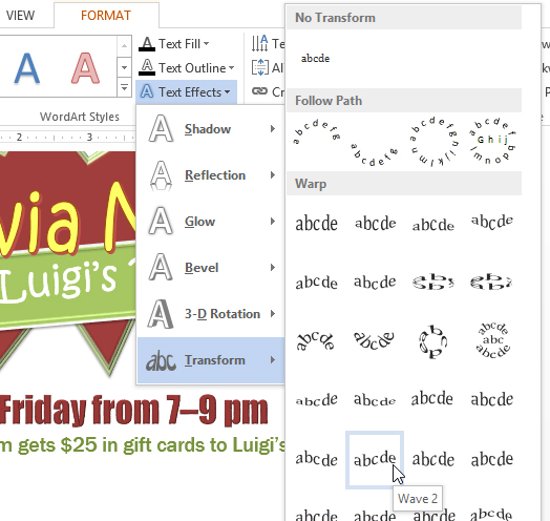
4. The text will change to the type you selected.

- If desired, you can add additional effects like shadow effects, bevel effects and more for conversion text.
See also: Word 2013 Complete Guide (Part 3): How to store and share documents
Having fun!