Word 2013 Complete Guide (Part 15): Insert Images and Text Wrapping functions
Let's TipsMake.com learn more how to insert photos and Text Wrapping functions in Word 2013 in the article below!
Table of Contents
- Word 2013 full-text tutorial (Part 12): How to break pages, paragraph breaks
- Word 2013 Complete Guide (Part 13): Divide the text column
- Word 2013 Complete Guide (Part 14): Page title, footer and page numbering
Adding images to document documents on Word 2013 can be a great way to illustrate important information or to highlight more for the current paragraph. Inserting images into Word is not difficult, with the interesting tips we provide below, make sure you get the documents with images that are nice, beautiful and professional.Let's TipsMake.com learn more how to insert photos and Text Wrapping functions in Word 2013 !
Insert image from file:
If you already have a specific image saved on your computer, you can insert an image from the file. In the example below, we will insert an image that is already stored on the computer.
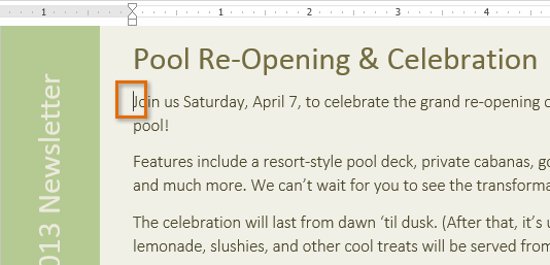
1. Place the insertion point where you want the image to appear.
2. Select Insert on the Ribbon tab and click the Pictures command .

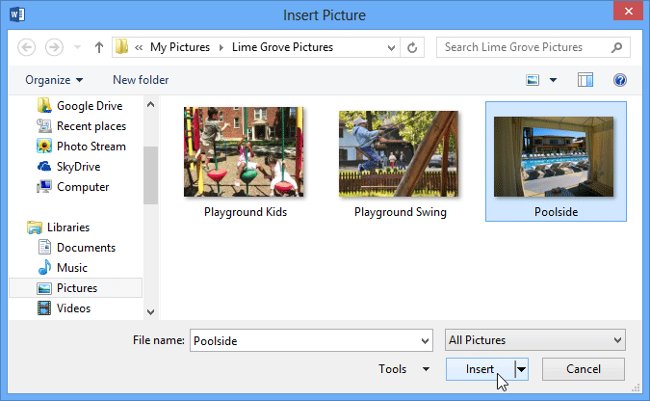
3. The Insert Picture dialog box will appear. Select the desired image file, then click Insert .
4. The image will appear in the document.

- To resize an image, click and drag one of the dots in the corner
 then the image will resize and still retain the aspect ratio. If you want to drag it horizontally or vertically, you can use the round dots on the side
 , but then the image will be distorted. Therefore, consider carefully before pulling.

Insert images online
If images are not available on your computer, you can search for images on the network and insert them into your document text. The application provides users with 2 options to find photos online.
- OneDrive : If photos are available on the OneDrive storage service ( formerly called SkyDrive ), you can select and insert files. Alternatively, you can link your Microsoft account to other accounts like Facebook or Flickr.
- Bing Image Search : You can use this option to search images on the Internet. By default, Bing only displays images that are licensed by Creative Commons , which means you can use them for your projects. However, you should click on the image link to see if it is limited.

Previously, Word also had the option to insert Clip Art images from Office.com , but the service was stopped. Instead, you can use Bing Image Search to find images for your documents.
To insert an online image:
1. Place the insertion point where you want the image to appear.
2. Select the Insert tab, then click the Online Pictures command.
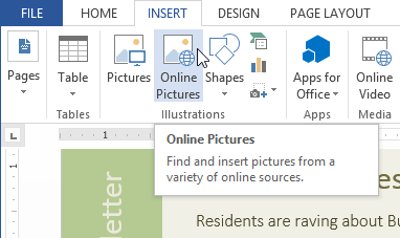
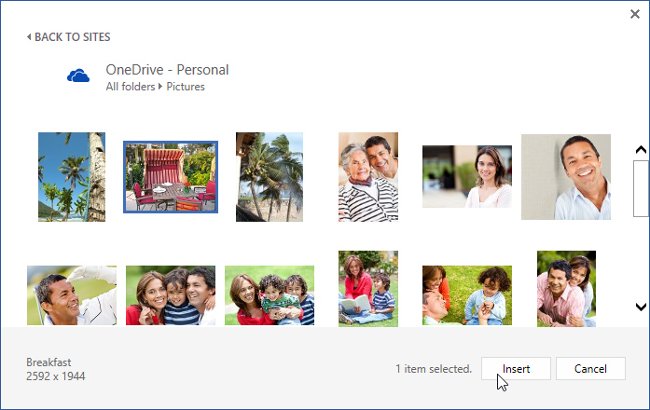
3. The Insert Pictures dialog box will appear.
4. Choose your Bing Image Search or OneDrive . In the example, we will use Bing Image Search .
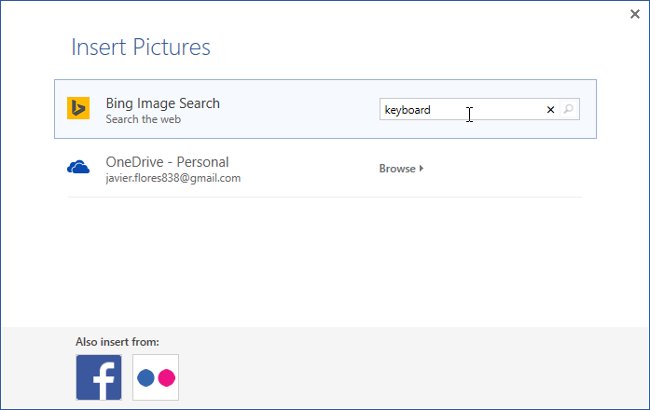
5. Press the Enter key. The search results will appear in the dialog box.
6. Select the desired image, then click Insert.
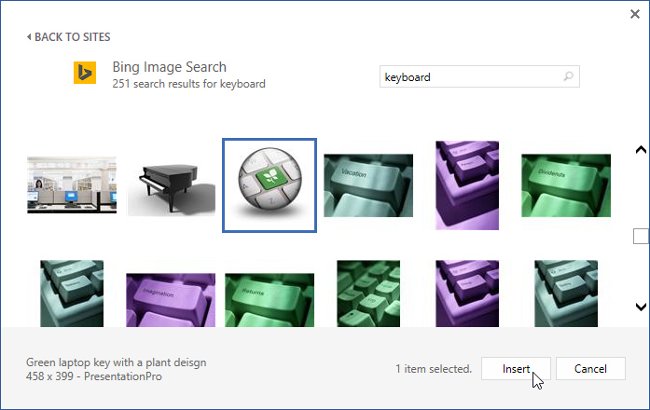
7. The image will appear in the document.
- When adding photos, videos or music to your own project, it is important that you ensure your legal rights to use them. Almost everything you buy or download online is copyright protected, meaning you are not allowed to use them.
Change text wrapping settings
When inserting an image, you may find it difficult to move the image exactly as you desire. This happens because by default, the image is consistent with the text.
If you want to move images freely or text around images more naturally, you need to choose a different text wrapping setting . Text wrapping for an image is set to In Line with Text.
To change the image display style in Word 2013 and how the text appears around the image you need to follow these steps:
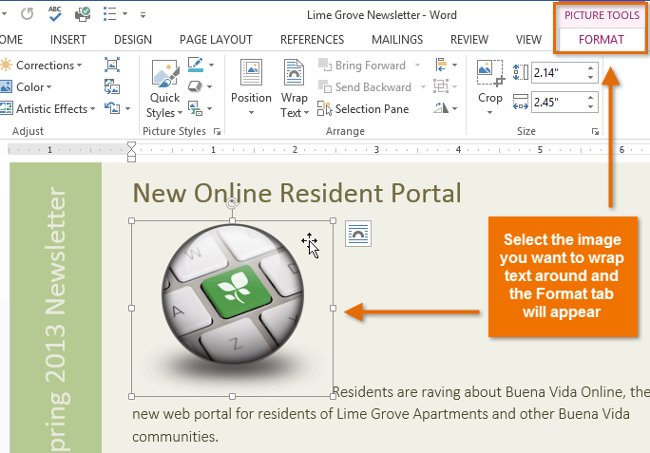
1. Select the image you want to wrap around. The Format tab will appear on the right side of the Ribbon.
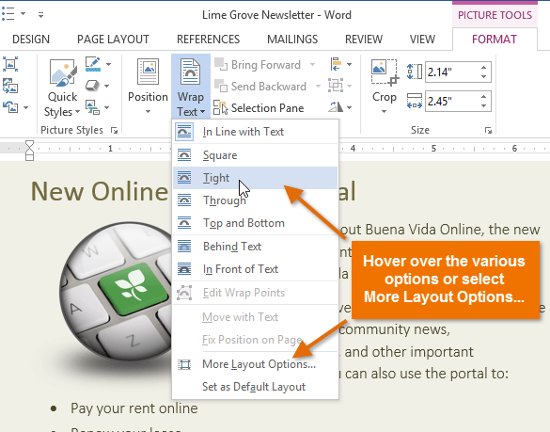
2. On the Format tab , click the Wrap Text command in the Arrange group. A drop down menu will appear.
3. Hover over different text-wrapping options. The live text-wrapping preview will appear in the document. Once you've found the text-wrapping option you want to use, click on it. Alternatively, you can select More Layout Options . to further refine the layout.
4. Text will wrap around the image. You can move the image if you want. Just click on the image and drag it to the desired location. When moving, instructions alignment guides appear to help you align the image on the page.

- In addition, you can access text-wrapping options by selecting an image and clicking the Layout Options button that appears.

- If the above guides guides do not appear, click the Page Layout tab , click the Align command. Use Alignment Guides from the drop-down menu.

To use predefined text wrapping settings:
Using a pre-set photo display mode: Word 2013 comes with Text Wrapping styles to help you quickly move images to special locations on the page. The text will automatically wrap around images and other objects and still be easy to read.
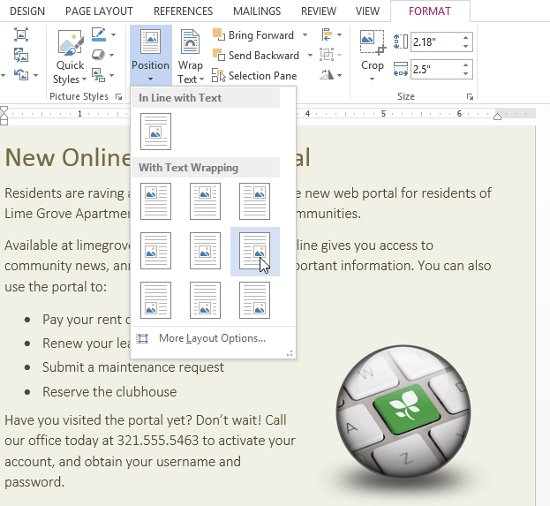
1. Select the image you want to move. The Format tab will appear on the right side of the Ribbon.

2. On the Format tab, click the Position command in the Arrange group.
3. The drop-down menu of the predefined image location will appear. Select the desired image location. The image will adjust in the document and the text will wrap around it.
See also: Word 2013 Complete Guide (Part 8): Using Indents and Tabs
Having fun!
Was this article helpful?
Your feedback helps us improve.
Related Articles
 Word 2013 Complete Guide (Part 16): Image format8 minutes read
 Word 2013 Complete Guide (Part 18): How to insert Text Box and WordArt11 minutes read
 Insert images into text content9 minutes read
 Complete guide Word 2016 (Part 9): Use Hyperlink2 minutes read
 Word 2013 Complete Guide (Part 17): Drawings and how to create effects for drawings10 minutes read
 How to insert text into images on Word4 minutes read
Reader Comments 0
Sign in with email or Google to join the discussion.