Word 2013 Complete Guide (Part 6): Aligning page layout
The text format aims to attract the reader's attention to specific parts of the document and emphasize the important information contained therein. A format aspect that you will need to consider when documenting a document is whether to perform page layout alignment . The page layout affects how content appears on the page and includes the orientation, margins and size of the page.
Please refer to the video below to learn more about page layout alignment on Word 2013 :
In addition, you can refer to the Word 2013 Complete Guide ( Part 3, 4 and 5 ) here:
- Word 2013 Complete Guide (Part 3): How to store and share documents
- Word 2013 Complete Guide (Part 4): Get familiar with text editing
- Word 2013 Complete Guide (Part 5): Formatting text
I. Page orientation
Word gives the user 2 choices of Landscape and Portrait . Landscape is a page format horizontally, while Portrait formats the page vertically. Depending on the content of the drafted text, you can select the page by purpose. Compare the example below to see how page orientation affects the appearance and space between text and images.
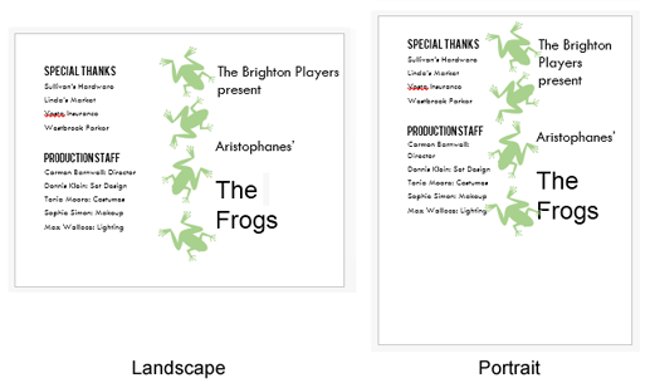
To change page orientation:
1. Select the Page Layout tab - Page layout .
2. Click the Orientation command in the Page Setup group.
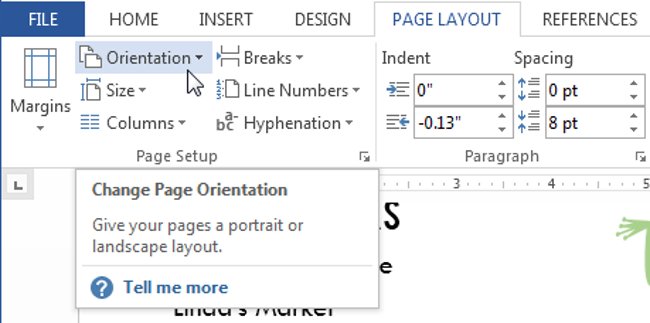
3. A drop-down menu will appear. Click on Portrait or Landscape to change page orientation.
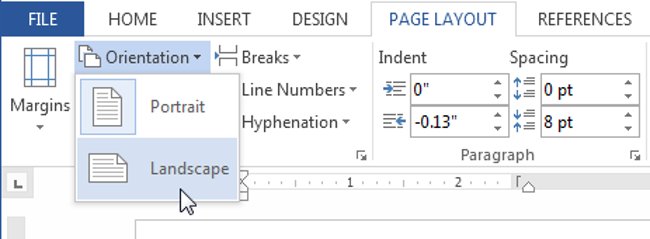
4. The page orientation of the document will be changed.
II. Alignment
The margin is the space between the text and the edge of the document. By default, the margin of the new document is always set to Normal , which means that the distance between the text and the edge of the paper will be set to 1 inch. Depending on the individual needs of users, Word allows you to change the margin of the document.
To format page margins:
Word has a range of predefined margin sizes for users to choose from.
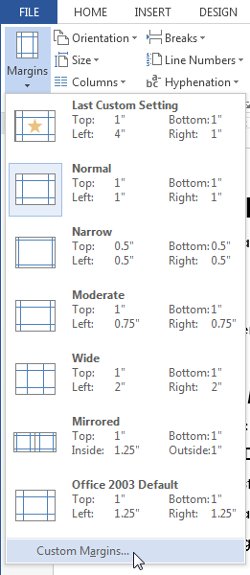
1. Select the Page Layout tab, then click the Margins command.

2. A drop-down menu will appear. Click Predefined margin sizetoselect a suitable size as you like.
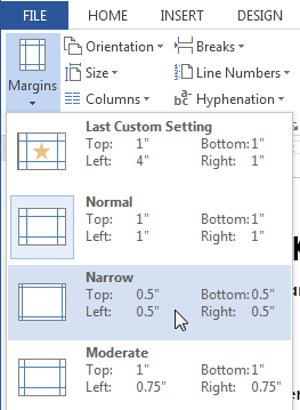
3. The margin of the document will be changed.
Use custom margins:
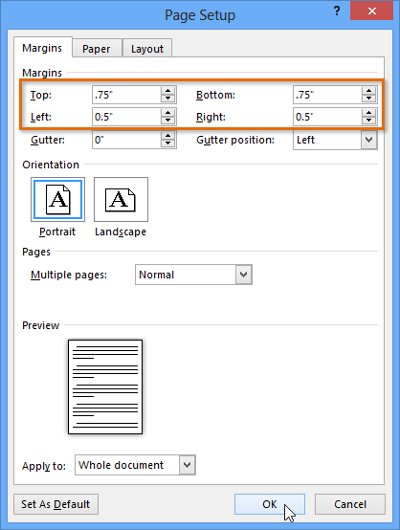
Word also allows you to customize the size of the margins in the Page Setup dialog box.
1. From the Page Layout tab, click Margins . Choose Custom Margins . from the drop down menu.
2. The Page Setup window will appear.
3. Adjust the parameters accordingly. Then, click OK to save.
4. The margin of the document will be changed.
III. Set paper size
By default, files in Word 2013 will be in paper format of 8.5 inches x 11 inches. Depending on the project, you may need to adjust the page size of the document accordingly. It is important to note that before modifying the default page size, you should check the appropriate paper size for the printer before determining the default paper size.
Change the paper size
There are many paper sizes available in Word to choose from.
1. Select the Layout tab, then click the Size command.
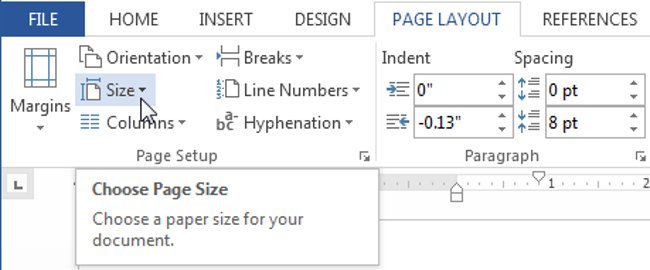
2. A drop-down menu will appear. The current paper size will be highlighted. Click the predefined margin size to select the available paper size that fits your document.

3. The paper size of the document will be changed.
Customize paper size
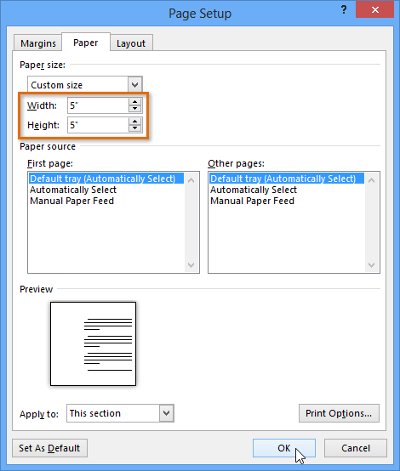
Word also allows you to customize the paper size in the Page Setup dialog box.
1. From the Layout tab , click Size . Select More Paper Sizes from the drop-down menu.

2. The Page Setup window will appear.
3. Change the Width and Heigth values ( height ), then press OK .
4. The page size of the document will be changed.
- Alternatively, you can open the Page Setup dialog box by navigating to the Page Layout tab and clicking the small arrow in the lower right corner of the Page Setup group.
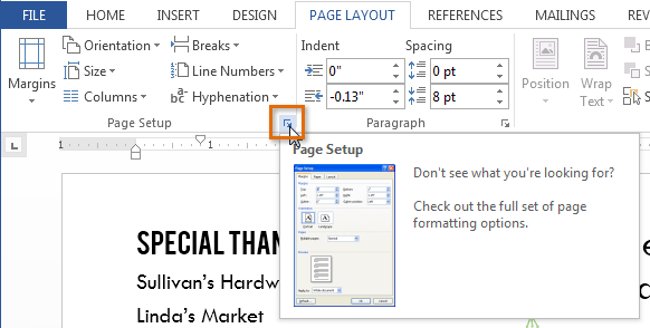
- Note : You can use Word's Set as Default feature to save all formatting changes you have made and automatically apply to new documents later.
See also: Word 2013: Instructions for using Microsoft and OneDrive accounts
Having fun!