How to Create a Recovery Disc in Windows 7
Method 1 of 2:
Creating a Windows 7 Installation Disc
-
 Understand what this disc does. A Windows 7 installation disc allows you to install Windows 7 from scratch using your product key. You can create a Windows 7 installation disc legally by downloading the necessary files from Microsoft. You can use the product key that came with your computer to reinstall Windows. The Windows 7 installation disc does not contain any drivers for your specific computer, but you'll be able to download the drivers from the manufacturer's website. You'll be able to use this disc on any computer as long as you have a valid product key.
- If you want to create a recovery disc that contains all of the necessary drivers for your computer, see the next section.
-
 Find your product key. In order to create an installation disc, you'll need your Windows 7 product key. If you purchased a prebuilt computer or laptop, you can usually find the product key printed on a sticker affixed to the bottom of your laptop or on the back of your tower. It may be included with your computer's documentation. If you purchased Windows 7 from a store, the key will be in the DVD case or in your confirmation email.
- If you can't find the sticker, download ProduKey from NirSoft for free here. Unzip the file and run the program. Your Windows product key will be displayed in the ProduKey window.
-
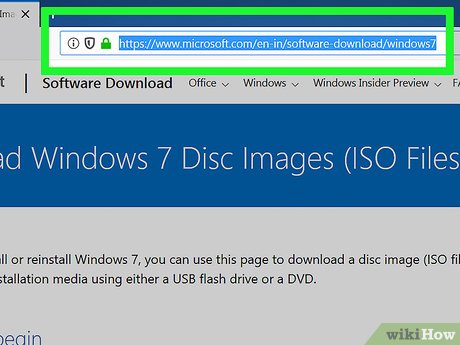
 Visit the Windows 7 download site. Microsoft allows you to download the Windows 7 disc image file, or "ISO," as long as you have your product key. You can download Windows 7 from Microsoft here.
 -
 Download the Windows 7 ISO file. You'll need to verify your product key and then download the correct version. The download is several gigabytes large, and may take a while to complete.
- To determine if you need the 32-bit or 64-bit version, press ⊞ Win+Pause and check the "System type" entry.
-
 Download and install the Windows DVD/USB Download tool. This program will allow you to easily create a bootable DVD or USB drive that contains the Windows 7 ISO file. You can download the program for free from Microsoft here.
 -
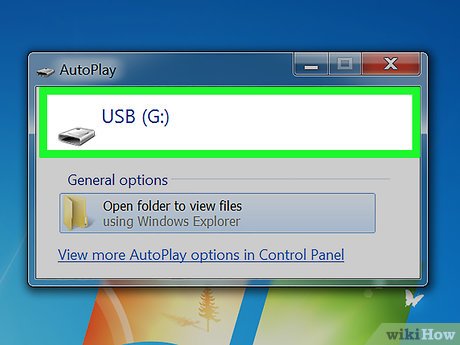
 Insert a blank DVD or 4 GB USB drive. Windows 7 is traditionally put onto a blank DVD, but you can also use a USB thumb drive, which is great for computers without a disc drive. The thumb drive will need to be at least 4 GB, and all of the data on it will be deleted.
 -
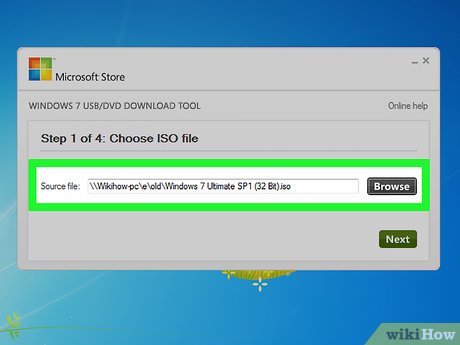
 Launch the Windows DVD/USB Download tool and load your ISO file. Browse your computer to find the ISO file that you downloaded. It will usually be in your Downloads folder.
 -
 Follow the prompts to create the disc or USB drive. The ISO file will be burned to the blank disc or copied to the USB drive. This may take a little while to complete. Once the process is finished, you'll have a fully-functional Windows 7 installation disc.
Method 2 of 2:
Creating a Windows 7 Recovery Disc
-
 Create a disc using the tool included by your computer's manufacturer. Major computer manufacturers such as HP, Dell, and Acer include programs in Windows that allow you to create recovery discs. If you built your own computer, or your manufacturer didn't include recovery disc creation tools, move on to the next step to make your own.
- HP/Compaq[1]
- Gather four blank DVD-/+R discs; you cannot use DVD-RW discs. You may not need all four. You can also use a USB drive with at least 16 GB of storage.
- Click the Start button and type "recovery manager." Select "Recovery Manager" from the list of results.
- Click "Recovery Media Creation" in the right-hand menu in the Recovery Manager window.
- Select the media type that you want to create. You can select either DVD or USB drive. Once you select one, you will be shown how many DVDs or how large a USB drive you need.
- Follow the prompts to create the discs. If you are burning the recovery discs, you'll be prompted when to insert the next blank disc. Make sure you label the discs as you create them so you know which order they go in.
- Dell
- Launch "Dell DataSafe Local Backup" from the "Dell Data" folder in the All Programs section of the Start menu.
- Click "Backup" and select "Create Recovery Media."
- Select the media type you want to use. You can choose between blank DVDs or a USB drive. When you select one, you will be told how many discs you need or how large the USB drive will need to be. If using discs, you can use DVD+/-R, but not RW or DL.
- Follow the prompts to create your discs or USB drive. Label each of the discs as you create them so they don't get out of order.
- Acer/Gateway[2]
- Open the "Acer" folder in the Start menu and select "Acer eRecovery Management."
- Click the "Backup" option and select "Create Factory Default Disc."
- Insert your first blank DVD+/-R. You will need two blank discs. You cannot use DVD+/-RW or DL.
- Follow the prompts to create the recovery discs. Label them so that they don't get out of order.
- HP/Compaq[1]
-
 Download a Windows 7 ISO or insert a Windows 7 installation disc. In order to create your own disc that contains all of the drivers you need for your computer, you'll need either an ISO file for the Windows 7 installation disc, or an actual installation disc.
- You can download the Windows 7 ISO from Microsoft here. You'll need your product key in order to download it. See the first section of this article for details.
-
 Copy the entire contents of the installation DVD or ISO file into a new folder on your hard drive. You can create a new folder on your desktop and then just select and drag all of the files from the disc or ISO into it. To open an ISO file, you'll need either 7-Zip (7-zip.org) or WinRAR (rarlab.com), both of which are free. Once installed, right-click on the ISO file and select "Extract."[3]
 -
 Download and install the Windows Automated Installation Kit. This program is required in order to build your own Windows installation disc. You can download it for free from Microsoft here. The file is about 1.7 GB, so it may take a while to download.
 -
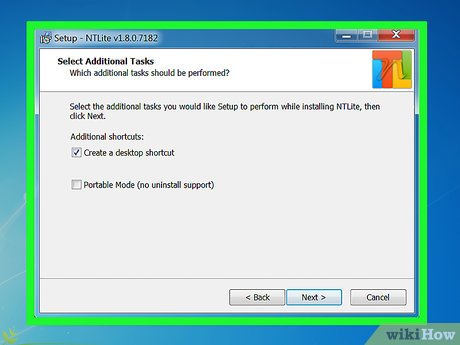
 Download and install NTLite. This program was designed by the Windows enthusiast community to make creating an installation disc much easier. You can download NTLite for free from nliteos.com. You can leave all of the installation settings at their defaults.[4]
 -
 Click the "Add" button in NTLite and select the folder you copied the Windows files into. You'll see your Windows 7 version appear in the "Source list."
 -
 Double-click the Windows 7 version in the Source list. Convert the files into an image file if prompted. This will likely take a while to complete.
 -
 Select the "Drivers" section of the menu. NTLite allows you to incorporate drivers into the installation, so that you don't have to worry about reinstalling them after recovery. On the right side of the window, you'll see a list of all the drivers that will be automatically included. Make note of the drivers that say "Missing."
 -
 Download all of the "Missing" drivers for your computer from the manufacturer's website. If you have the Premium version, you can simply import the drivers from your current computer by clicking "Import host." For free users, you'll need to download the driver files from the manufacturer and include them manually.
- Visit the support page for your computer and search for your computer's model number. If you built the computer yourself, you'll need to visit the Support page for each of your components.
- Download all of the "Missing" driver files from the Drivers or Downloads section. Driver files may be in INF or EXE format.
- Place all of your downloaded files into a single folder.
-
 Click the "Add" button in the "Drivers" section. Select "Folder with multiple drivers" and then browse for the folder that contains all of the driver files that you want to add to your installation. This will add all of the INF format files.
 -
 Select the "Post-Setup" section and click "Add." Add all of the driver installers that came in EXE format. These installers will be run automatically once Windows Setup completes.
 -
 Decide if you want to automate the installation process (optional). If you want, you can use NTLite to automate the entire Windows Setup process. This will allow you to start the install and then let your custom installation do the rest. This is optional, and if you don't enable it your Windows installation will proceed normally.
- Click the "Unattended" section and then select "Enable."
- Select each item in the list and then use the drop-down menu to the right to select your desired option.
- Click the "Add local account" option to have NTLite create accounts automatically as well.
- If you have the premium edition of NTLite, you can have it configure your disk partitions automatically as well.
-
 Click the "Apply" section in the left menu. Once you are satisfied with all of your settings, this section will allow you to finalize the new recovery image.
 -
 Check the "Create ISO" box. You'll be prompted to give the new ISO file a name. This will automatically create the disc image file that you can burn after completing the process.
 -
 Click the "Process" button. This will begin building your new image file, including any drivers and automation. This will likely take 20 or so minutes to complete.
 -
 Right-click the completed ISO file and select "Burn to Disc." Make sure that you have a blank DVD inserted in your burner. Windows will burn the ISO file to the disc, creating your custom recovery disc.
Share by
Samuel Daniel
Update 04 March 2020


