Build your own computer, build your desktop (P4): Install Windows and drivers
 Set up your own computer - Part 1: Choose hardware
 Set up your own computer - Part 2: Hardware assembly
 Set up your own computer - Part 3: Start software settings
In Part 4 of this series, I will show you how to install the operating system for my computer.Like the BIOS configuration, in the past, the new Windows installation sounds quite complicated and many people often have to resort to the help of computer technicians, but today, it has been arranged. surprisingly reasonable, thereby, the installation process is simplified to the maximum for users.Usually, you just need to follow the on-screen instructions, but if you get stuck, refer to this article to get more detailed information.
Before starting the Windows installation process, make sure you plug the Ethernet connection cord into the motherboard, or you can use Wi-Fi if your device supports it.

Step one: Prepare the installation disk or USB storage drive
For this tutorial, we will download the latest Windows 10 build and download it to the USB drive.Our computer will boot the installer in that USB to install Windows.Of course, you can do the same with a Windows installation disc purchased from a retailer, distributor or even write your own installation disc.However, this method will require your system to have a DVD drive.Obviously, using a USB drive will be more convenient, and of course you can skip this step if you already have an installation disc or Windows installer in the USB drive.
Next, you access this site on another Windows computer and download the Media Creation Tool from Microsoft.Plug in an empty USB flash drive or have at least 8GB of storage.Note that all data stored on this USB drive will be deleted during the installation process, so if important information is in the USB, back up or move the data to another location immediately .Now, double-click the downloaded program, then follow the steps below:
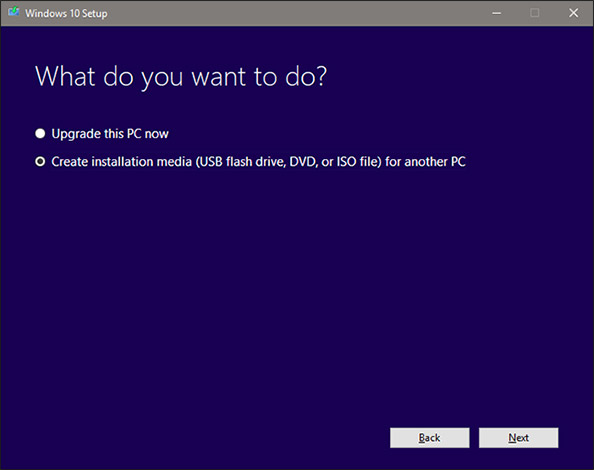
On the software use license page, click on Accept , then select Create installation media and click next .
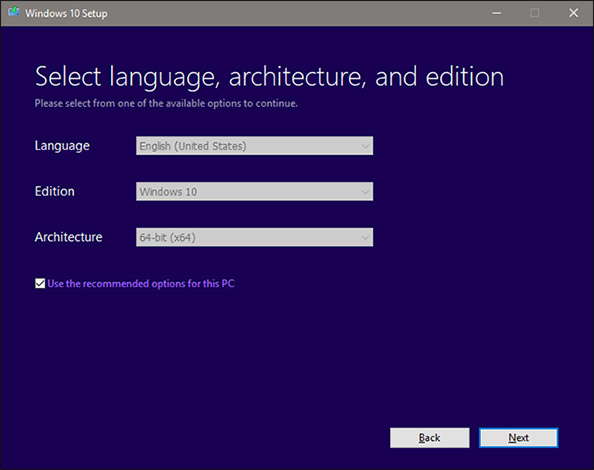
Proceed to select the language and version you want to use.
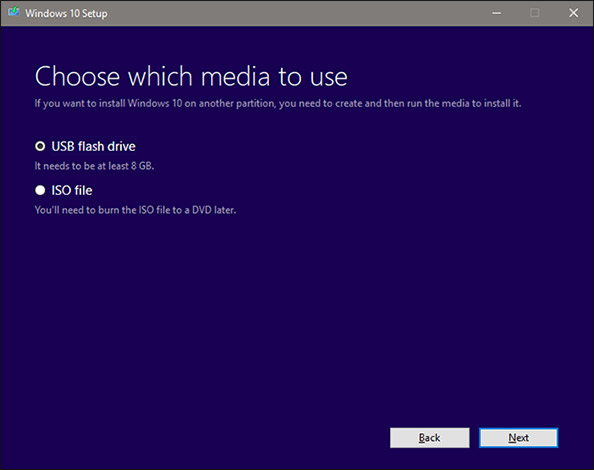
Next, click the USB flash drive and then click Next (if you are burning a DVD, you can select the ISO file and burn it to disk after downloading).
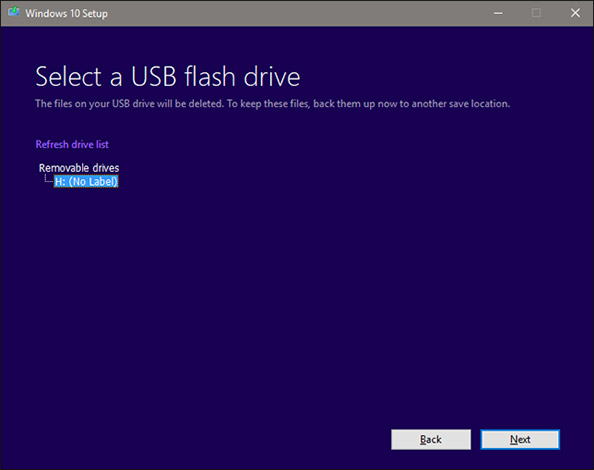
Select the blank USB drive you just connected to the computer (if you are not sure which drive it is, check in My Computer, or This PC and use File Explorer to determine).Then, click Next .
Operating system files are downloaded, then you download them on the drive and are ready to install.Note that the installation process will take about ten minutes to an hour depending on your Internet connection, while at the same time, you can completely perform other tasks if desired, such as watching movies, listening to music.
- How to fix when losing Internet connection
When the process notification tool is complete, click Finish and connect the USB drive from the working computer.
Step two: Install Windows on your main PC
First, connect the USB to the PC that you want to install Windows, then turn on the PC power and follow the on-screen prompts to start UEFI or BIOS (like we did in the third part).
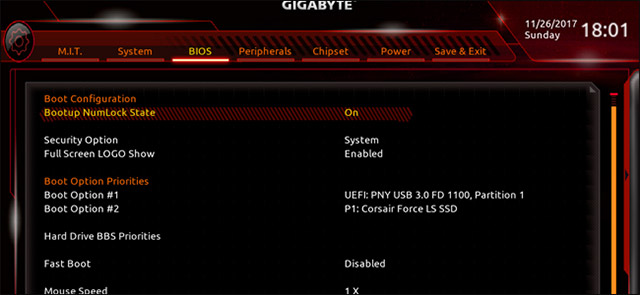
After you have access to UEFI / BIOS, you must find the section to control the boot order, this is the numbered order of hard drives, SSDs and different DVD drives in your computer, In order, the BIOS will perform a search for the bootable partition.Since the computer that was taken as an example only installed an SSD, we can see that the system says there is an empty SSD, plus the newly connected USB drive (containing Windows that we just downloaded.
- Instructions for entering BIOS on different computers
Select USB as the first drive to be booted (or if you use a retail Windows DVD, select the DVD drive).Save your settings in UEFI / BIOS, then restart the computer.
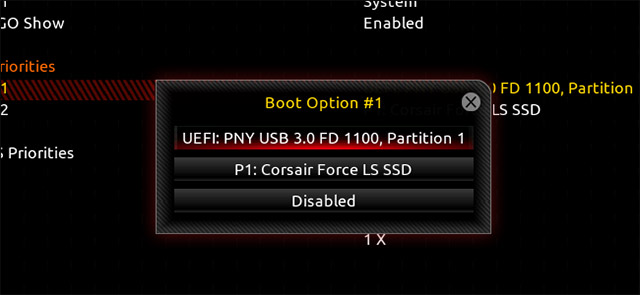
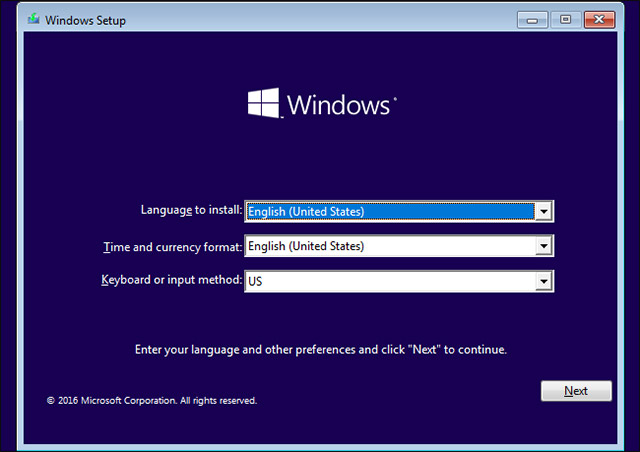
With the boot order placed in the BIOS above, you will see that the Windows 10 installation program starts automatically after you restart the system.Next, set the appropriate language and input options, then click Next . On the next screen that appears, click Install now .
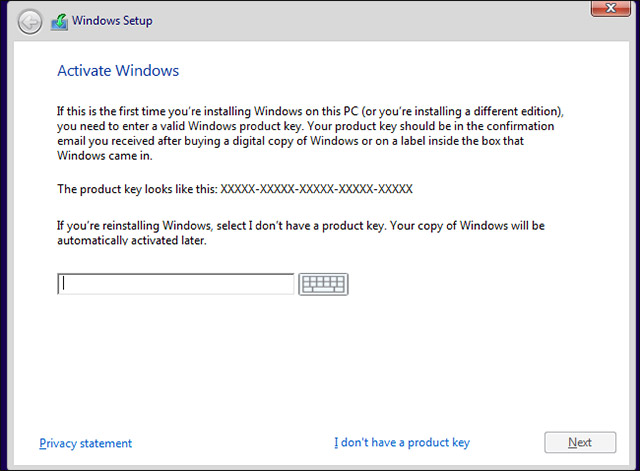
If you have a Windows key, enter the key and click Next . If you don't have a key, it's okay, just click I don't have a product key , then select the version of Windows you want to use.Later, during use, you can enter your key into Windows or buy a product key from Microsoft or you can even use Windows 10 without a product key.
- Windows Product Key Restore
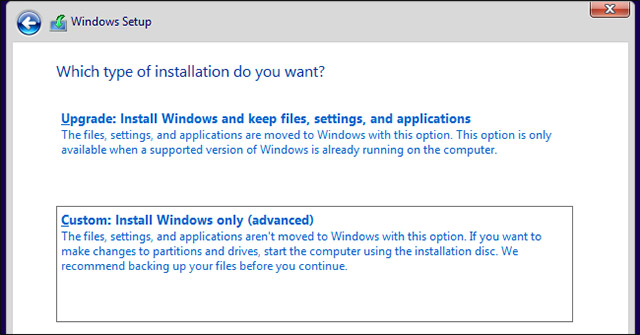
On the next screen, click Custom to proceed with manual installation.You will have to manually set up the Windows drive partition on your PC.
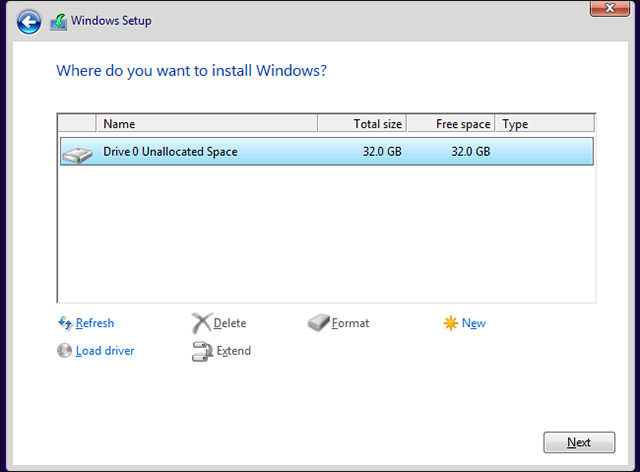
Suppose you use an HDD or SSD hard drive, your screen will look like the image below.If you have installed multiple drives, there will be many items with Unallocated Space, listed in order like Drive 0, Drive 1, Drive 2, . The order of these drives doesn't matter, it is arranged based on the order of SATA ports on your motherboard.
NOTE: If you use the old drive (used on the previous PC), you will have to highlight each partition and click Delete to delete and reassign data to the unallocated space group ( Unallocated Space).This will 'destroy' the data on the partition, so if there is anything important on it, you should delete or back it up.
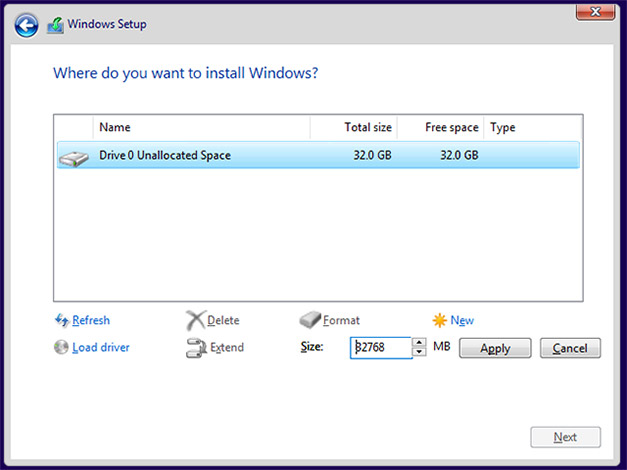
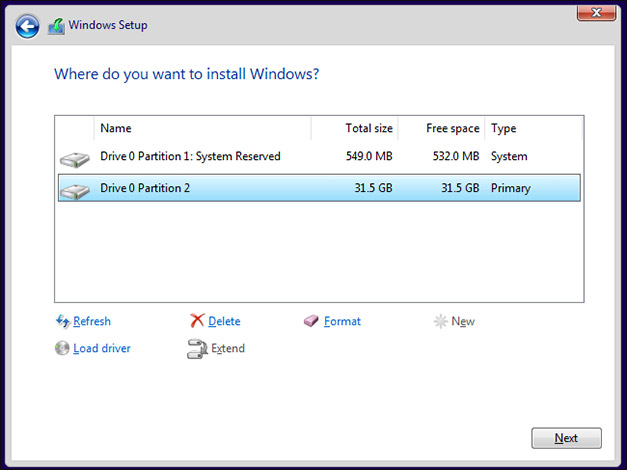
Next, select the drive you want to install Windows on and click New to create a new partition on that drive. Select the maximum amount of data available for your drive when prompted, then click Apply to create the partition, and click OK as soon as Windows notifies you that more partitions will be created.Some new partitions will be created.Windows will use these partitions for different pre-boot and recovery tools.
Click on the largest new partition (largest size and marked Primary in the Type column), then click Next .
Windows will now copy the files from the USB or DVD drive to your storage drive, then install the operating system and generally arrange everything for you.This process may cause your computer to be rebooted repeatedly, it's okay.The process will take from a few minutes to an hour depending on factors such as storage type, processing speed, USB drive speed, .
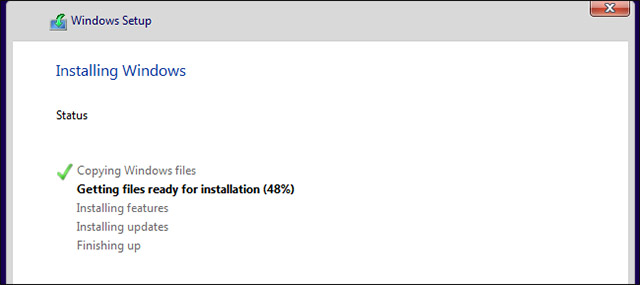
When you see the screen below, it means Windows is installed and ready to set up.Just follow the instructions and create your account.The process of setting up Windows will take about 15 minutes and then, the familiar Windows desktop will open before your eyes.

When the process is complete, you will see the login screen.However, there is one more thing you need to do, that is, turn off the computer, unplug the Windows installation USB drive, then turn on the computer and access the BIOS again.Go back to setting the drive boot order, then select Windows Boot Manager as the first boot option (boot option # 1).This will help your PC not rely on any USB drive or DVD to boot the operating system, you can also change this setting if you want to reinstall Windows in the future.
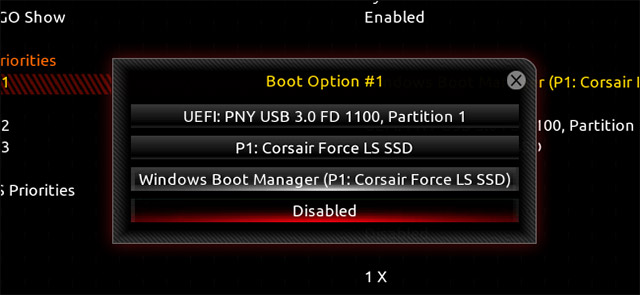
Accomplished!You can now restart your computer to start and ready to set up Windows!
Step three: Install the driver for all your hardware components
Unlike older Windows versions, Windows 10 comes preinstalled with thousands of different and specific drivers, so some of your hardware components like networking, audio, wireless connectivity and The video has been preinstalled with the driver and made at least a few basic functions.
- The best driver update software for computers
However, there are still some drivers that you may need to install:
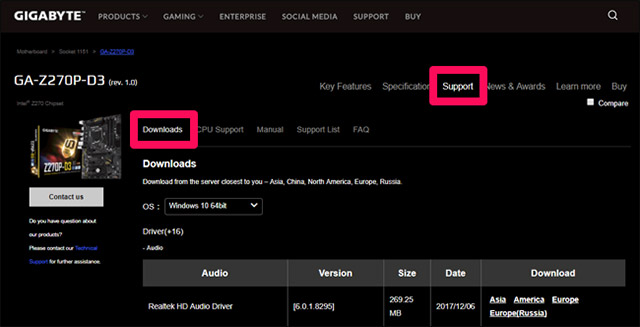
Motherboard, audio, LAN, USB and SATA chipset drivers: Windows drivers may still be fine, but your motherboard manufacturer may offer newer drivers, be better optimized or have more features, so what crime we don't use! Visit the support page for your motherboard and find the Download section, which is where you will find all the relevant drivers.You don't have to install everything on that page, but chipset, audio, LAN, USB and SATA drivers are usually the basic packages that should be installed.
NVIDIA and AMD graphics card drivers: Similarly, your discrete GPU will probably work well with the basic Windows drivers, but it usually won't be fully optimized without a driver. The latest driver from the manufacturer, especially when you often use your computer to play games or perform heavy tasks.(Note: You must download the driver directly from NVIDIA or AMD, not from card manufacturers like EVGA or GIGABYTE).
- How to update the driver for NVIDIA video card
Input devices such as high-end mice, keyboards and webcams: Peripherals manufacturers such as Logitech will often recommend installing a peripheral driver from the manufacturer to take advantage of the features. advanced, such as customizing keyboard shortcuts or adjusting sensors . And again, this is especially important for devices designed to play games.
High-end hardware devices and few users: if you are using some specialized or non-popular hardware devices, such as Wacom graphics tablet or PCI adapter for older generation ports You should find, download specific drivers and install them manually.
Again, almost all of these additional drivers will usually be found on the manufacturer's website, which can be downloaded and installed as a standard program through a web browser.
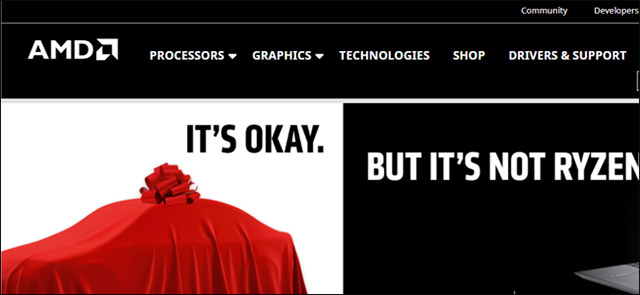
For example, the driver for AMD graphics card will be installed for our PC system shortly.The graphics card used in the example is the AMD Radeon RX 460. You can see from the AMD manufacturer's home page a link to DRIVERS & SUPPOR .
In this section, we will look for the appropriate driver for our graphics card, here is the AMD Radeon RX 460:
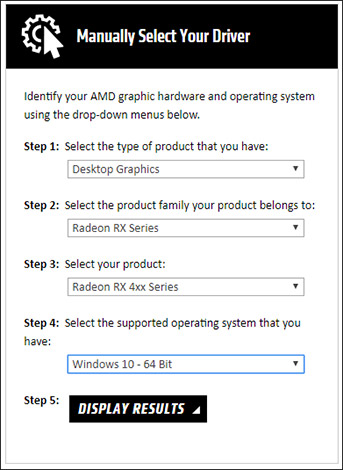
After that, you can choose the latest download (full version).
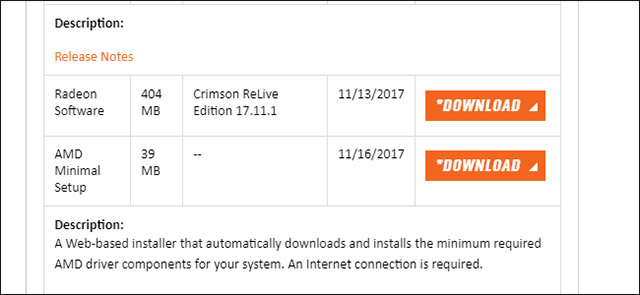
Click Download and save the latest driver package as an EXE file on your PC (note: The graphics card driver tends to be quite heavy, up to several hundred megabytes, so the download process is completed quickly. slow will depend on your network connection).
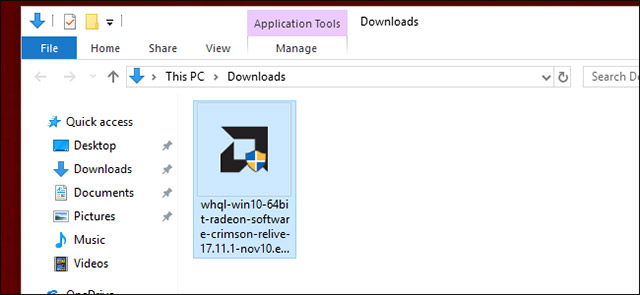
Double-click the program you just downloaded, follow the on-screen instructions and your driver will be installed in minutes.You may need to restart the PC to apply the changes.
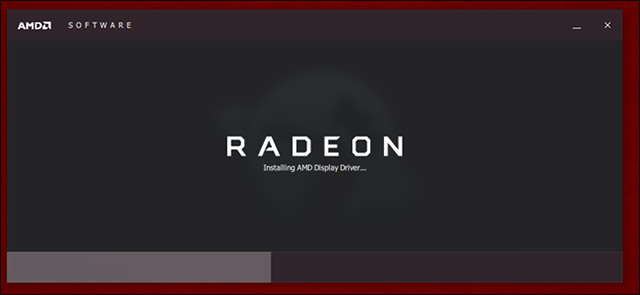
In exchange for other hardware components, the driver installation process is basically the same.
Above are the basic steps for installing Windows and drivers for your computer system.In the following section, we will discuss how to set up a new computer system.Good luck!
See more:
- This is how to reset network settings on Windows 10 with just one click
- How to set up your own email server on Windows PC
- How to turn off the history of opening applications in Windows 10
- How to turn on or turn off the logical pairing with Bluetooth peripherals in Windows 10