Install Windows XP from a USB Flash drive
If one day you want to install Windows XP but your computer does not have a CD-ROM drive, how will you solve it? The following article will show you in detail how to install Windows XP from a USB drive..
TipsMake.com - If one day you want to install Windows XP but your computer does not have a CD-ROM drive, how will you solve it? The following article will show you in detail how to install Windows XP from a USB drive.
In this tutorial, install the XP installation using Komku, you don't need the ISO file to install Win. If an ISO file of Win XP is available, you can create a bootable USB using Hiren's bootcd or use Rufus to install.

How to install Windows XP from USB
Step 1:
Prepare 1 USB Flash drive (at least 2GB).
Note: When following this tutorial, you need a computer with a CD-ROM drive working properly.
Step 2:
Download the Komku-SP-usb.exe software package here.

Step 3:

Double click Komku-SP-usb.exe . A window appears, click Install .

Step 4:
Plug the USB drive into the computer.
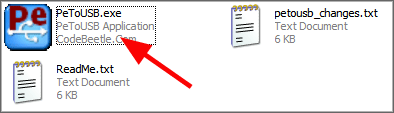
Find the directory C: KomkuPeToUSB . Double click PeToUSB.exe .
A window will appear as follows .

Destination Drive: select Removable USB
Check the box Enable Disk Format , Quick Format , Enable LBA (FAT 16x)
Drive Label: Set the USB drive label as you wish, in this case XP-KOMKU
Then click Start .

Click Yes to continue .

Click Yes

Wait a minute…
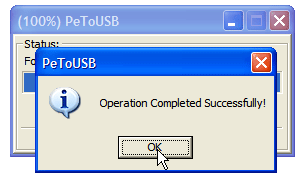
Click OK , then you can close the PeToUSB window
Step 5:
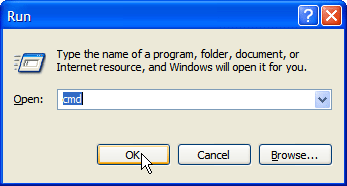
Open Command Prompt by going to Start > Run > type cmd > click OK
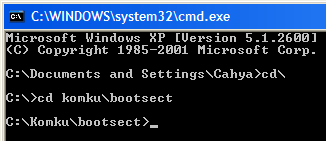
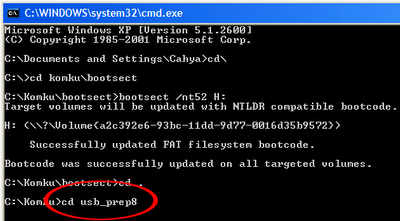
In the command window, go to folder C: Komkubootsect
Specifically: first, type cd and press Enter

Then type cd komkubootsect and press Enter
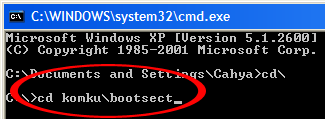
Result…
Do not close the Command Prompt window, continue to step 6.
Step 6:
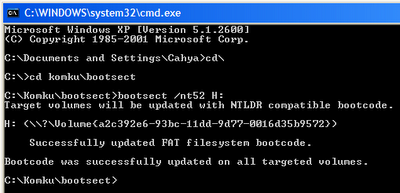
In the Command Promt window, type bootsect / nt52 H:
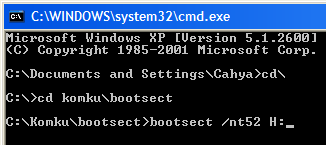
Where H is the name of the USB drive on the machine.

Then press Enter. Result
Step 7:
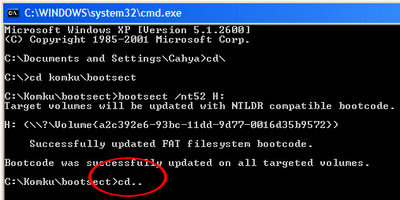
Continue typing cd . and press Enter
Then type cd usb_prep8 and press Enter
Type usb_prep8 again, press Enter

Step 8:
You should see the Command Prompt window as follows:
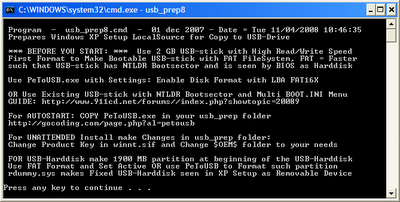
Press any key to continue.
Now insert the Windows XP disc into the CD / DVD ROM drive and return to the Command Prompt window.
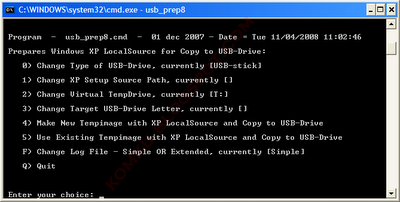
Type 1 press Enter Browse For Folder dialog box will appear. Select your CD / DVD drive, click OK .
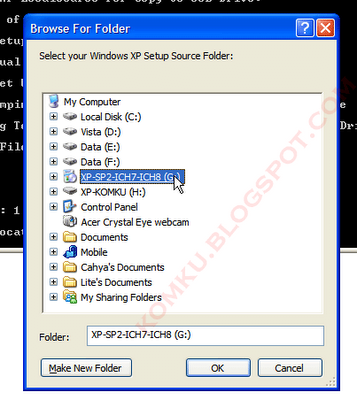
Result: 'XP Setup Source Path' will change to your CD / DVD drive name.
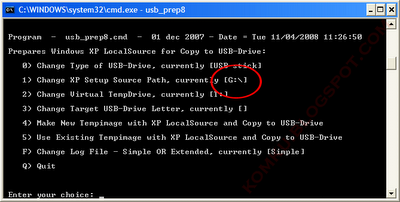
In section 2, if the letter T has been assigned to a drive on your computer, you need to change this entry. If not, leave it alone.
So how to change?
Type 2 then press Enter , then enter any letter that does not match the names of the drives on your computer. For example, you don't have S drive, enter S and press Enter .

Return to the usb_prep8 window, type 3 and press Enter .

Enter the name of your USB drive. In this case the USB drive is the H drive
so enter H and press Enter .
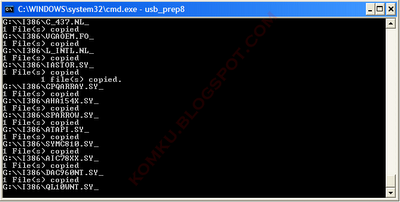
Next, enter 4 press Enter and wait a moment.
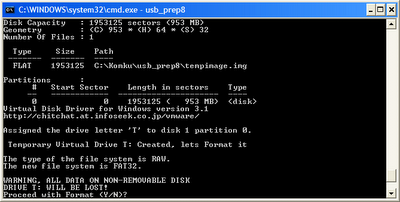
Type Y press Enter and continue waiting.
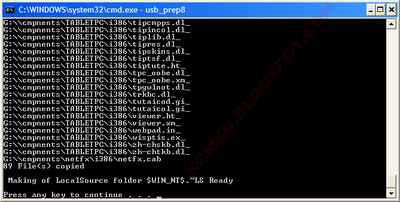
After the virtual drive format process completes, press any key to continue.
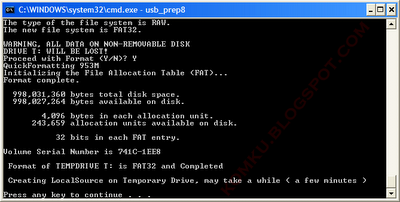
Continue waiting .
Press any key to continue
Select Yes
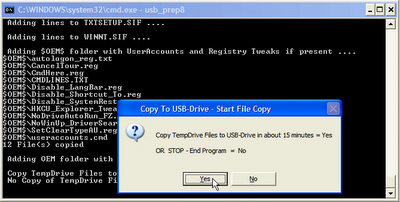
Continue Yes
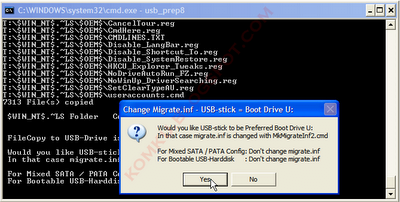
Select Yes , wait a moment and press any key 2 times to close the usb_prep8 window

Congratulations, finally your USB drive is ready.
Step 9:
Plug the USB drive into the computer that does not have the CD-ROM drive you want to install Windows XP. Enter BIOS, choose to boot from USB HDD (or USB ZIP depending on each device). Then restart the computer from the USB drive.
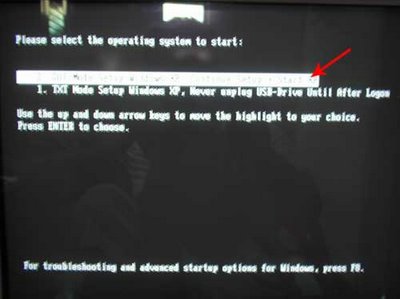
Select 'TXT Mode Setup .'
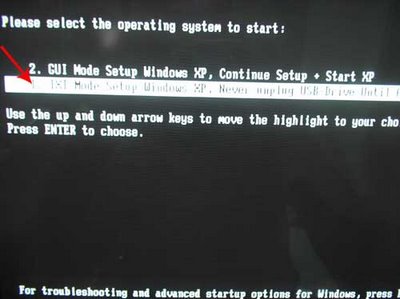
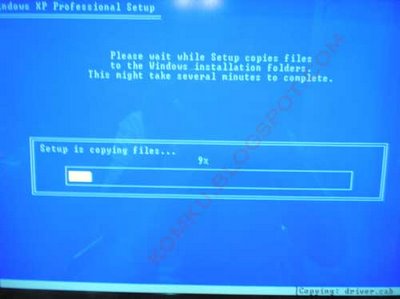
Continue installing Windows XP as usual.
When the text mode setting is finished, the computer will restart automatically. This time select 'GUI Mode Setup .'
Continue installing the steps to install Windows XP until it is completed!
See more:
- How to install Windows 7 from USB
- Instructions for creating a USB drive contain the Windows XP, 7, 8 and 10 installer
- How to install Windows 10 from ISO, USB, hard drive, DVD
Good luck!