Install Windows 10 with a super fast USB in just a few simple steps
There are many ways to install Windows 10 on your computer. In this article, Techz will guide you how to install Windows 10 with USB quickly and easily.
Table of Contents
Why should you install Windows 10 with USB Boot?
If you install Windows 10 with USB Boot, you will be able to move to install for more devices. Besides, this method is preferred by many people because it is simple and fast, but even people who do not understand much about computers can do it.
Installing Windows 10 with USB Boot need?
Some minimum configuration requirements if you want to install Windows 10 using USB:
Processor must have a minimum speed of 1 GHz, support PAE, NX and SSE2.
Minimum RAM capacity of 1 GB (with 32-bit version) and 2 GB (with 64-bit version).
Minimum memory must be 16 GB (with 32-bit version) and 20 GB (with 64-bit version).
The graphics card is Microsoft DirectX 9 with WDDM driver.
Things to prepare before installing Windows 10 with USB Boot
Download the Windows 10 installation file (ISO file).
USB has a capacity of more than 4 GB.
Create USB Boot for Windows 10 installation process.
How to install Windows 10 with USB Boot
B1: Plug USB Boot into the computer where you want to install Windows 10.

B2: Start the computer, when the screen appears, press the shortcut key to access the Boot menu.
Note: Each machine has a different Boot access shortcut, search the internet with the keyword: 'Boot shortcut + laptop brand name'. You can also try the following key combinations: F2 to F12 or Del and Esc keys.
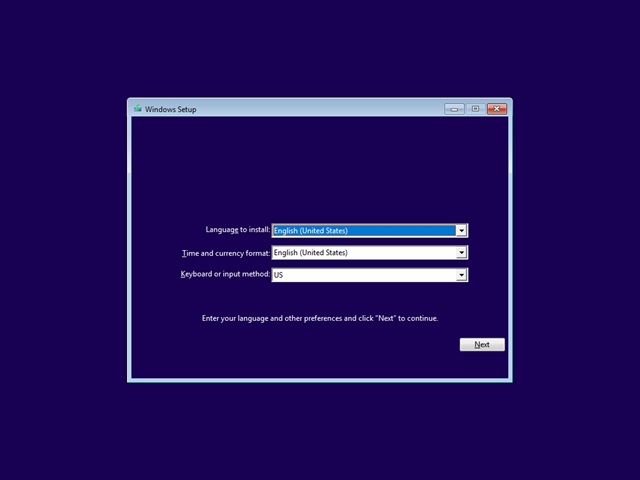
B3: Select the language (recommended to English). Continue to select the time format in the Time and curency format section (should keep English United States). Select the keyboard format in Keyboard or input method (should keep the US). Finally, click Next.
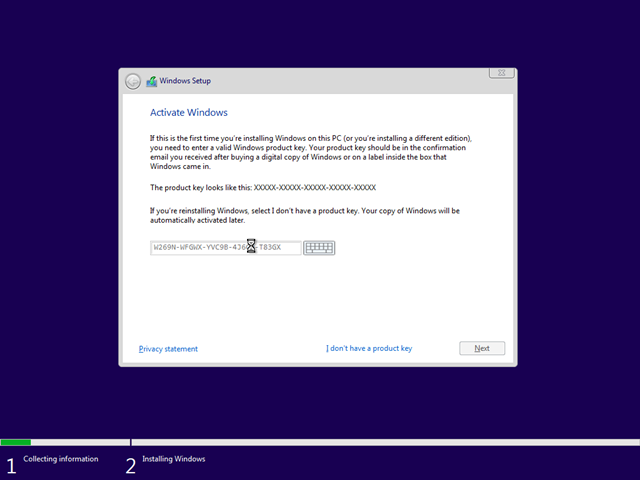
B4: Enter your Windows installation key. This key can be purchased at licensed Windows 10 stores. Click Next to continue.
B5: Agree to the terms and click Next.

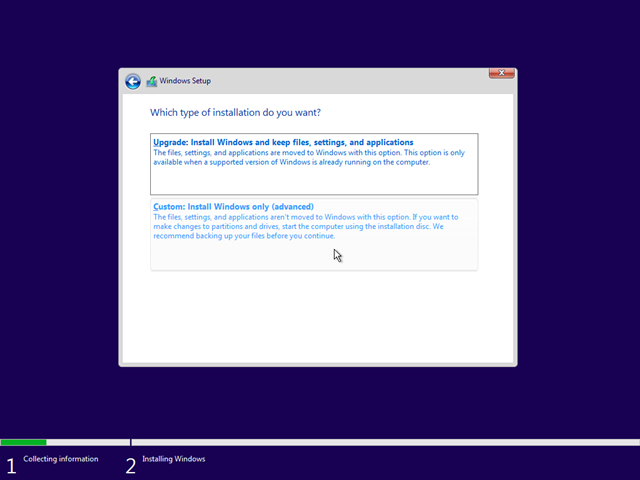
B6: Select Custom if you want to install a new Windows 10, select Upgrade to upgrade from the old version to the new version while preserving the previous files and software.
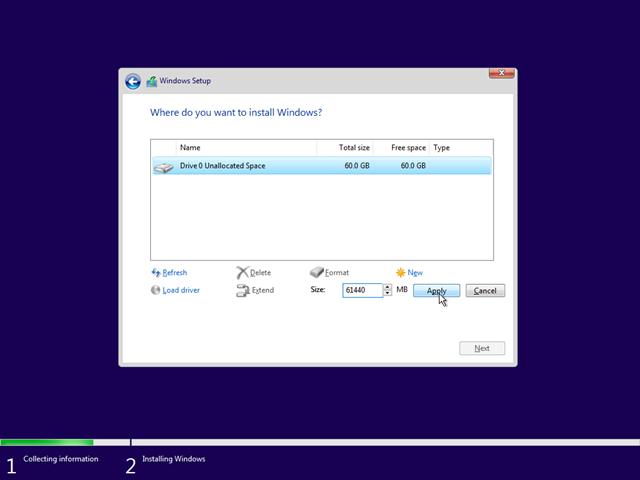
B7: Select the drive where you installed Windows. Remember, this drive will be formatted after installing Windows 10. You must select the correct drive to install, if selected wrong will cause the computer to lose data.
After selecting the drive, click New to create a new partition.
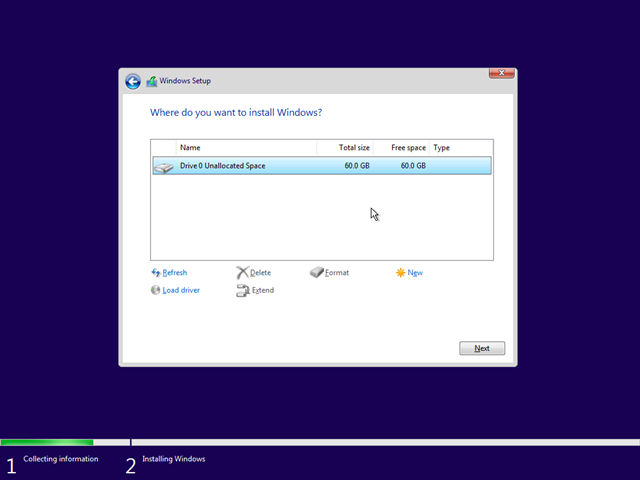
Enter the amount of space to create (1024 MB = 1 GB). If you want to create a drive containing the 60 GB operating system, enter 1020 * 60 = 61.4040 and press Apply to save.
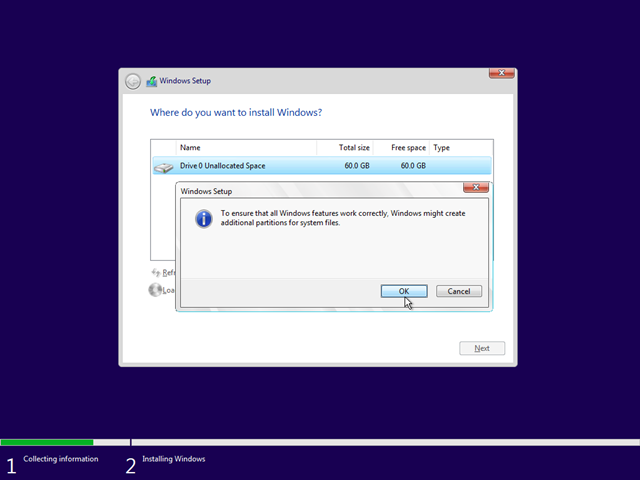
In some cases you will not be able to press New. At this point, you can press Format to delete the partition before installing Windows. The system will ask if you want to delete all data in the area before Format or not? You must click OK.
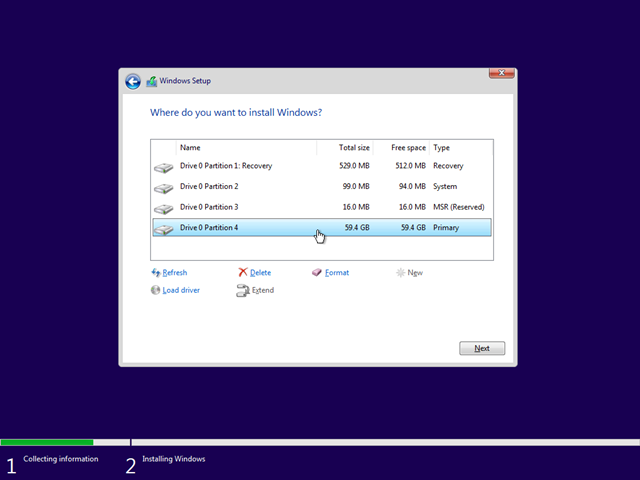
At this point, the system will generate a lot of small but important partitions. You cannot delete them, select the partition where you want to install Windows 10 and click Next.
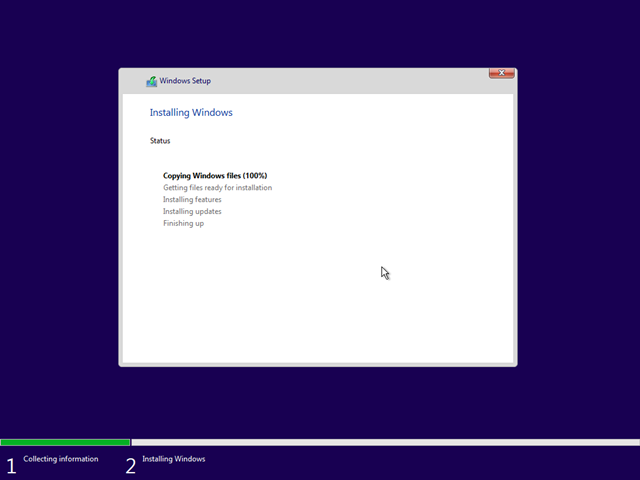
B8: The machine will automatically install Windows 10 for you.
B9: After finishing, the computer automatically reboots and asks you to set up some configurations such as language, movie table, use purpose .
B10: After completing all the above steps, the Desktop interface will display, everything is complete here.
Note: After installing Windows 10 with USB Boot, try connecting your device to a Wifi network to download Driver updates, software, security patches . This is essential for your device to work. Smooth operation, more efficient.
Was this article helpful?
Your feedback helps us improve.
Related Articles
 How to install Windows 8.1 from USB7 minutes read
 6 ways to fix computer not turning on error super fast, simple11 minutes read
 Scientists create cockroach robots that run super fast, step back and die, and weigh a million times more3 minutes read
 6 Important Steps to Take After a 'Clean' Install of Windows 117 minutes read
 Learn about WiGig, the new super fast WiFi standard6 minutes read
 Instructions on how to create USB install Windows 1010 minutes read
Reader Comments 0
Sign in with email or Google to join the discussion.