Table of Contents
This updated guide explains how to Watermark to Word File - Add Watermark to Doc File through clear steps, practical examples, and important checks that help prevent common errors.
this guide shows you how to stamp copyright into file content in Word 2013.
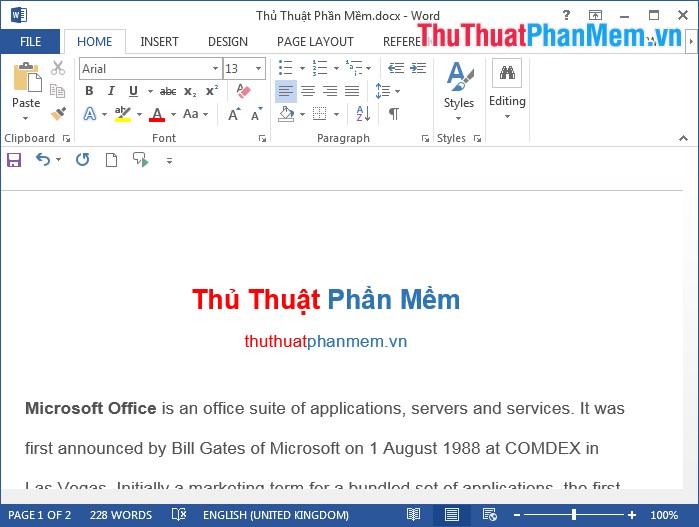
Step 1: First you open Word documents that need to be stamped.
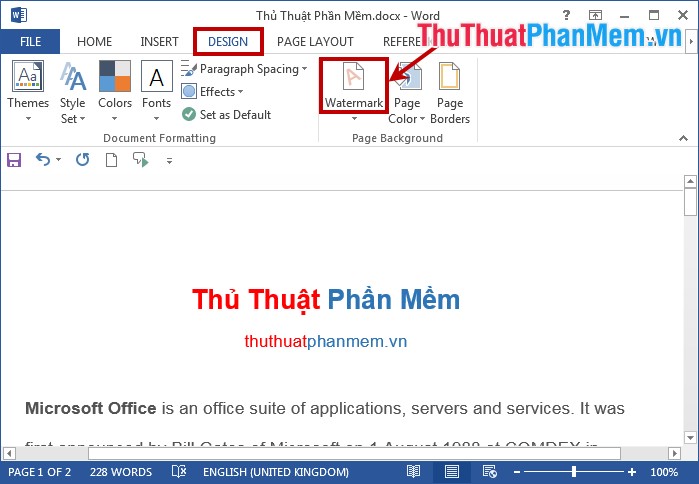
Step 2: Next, click the Design tab on the Ribbon and select Watermark in the Page Background section.
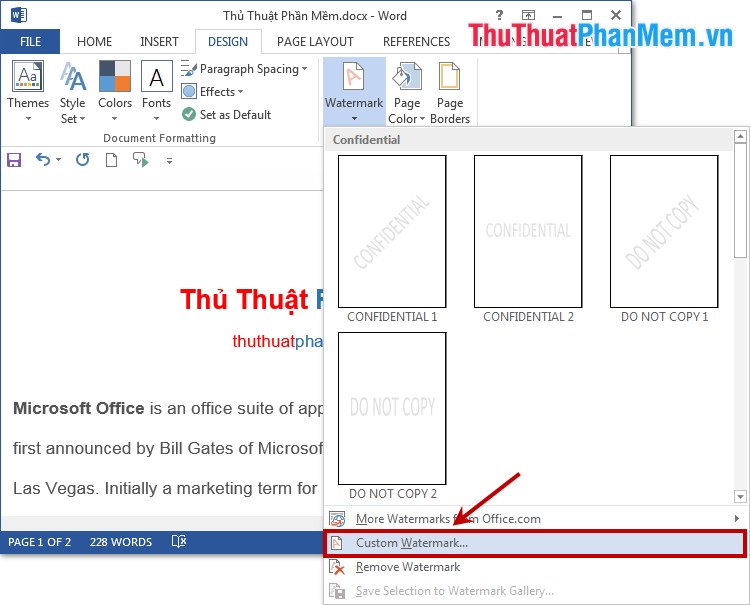
Step 3: Here you select the basic copyright seal that Word provides such as: confidential, do not copy. If you find the stamp pattern does not match, you can create your own stamp. rights yourself by choosing Custom Watermark .
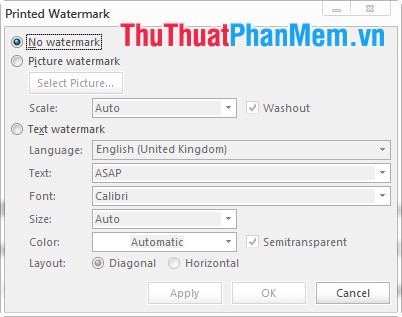
The Printed Watermark dialog box appears, where Microsoft Word supports you to stamp copyright with images or text.
1. Stamp Copyright with Images.
On the Printed Watermark dialog box, select Picture watermark , here you select the image you may need to be stamped in the Select Picture section.
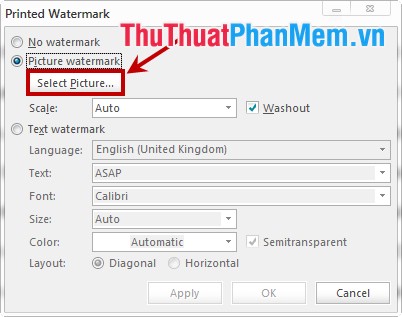
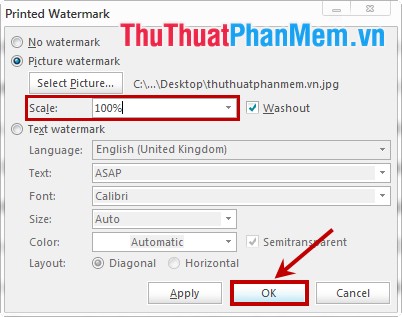
Then you select the scale of the image to stamp in the Scale section and click OK to stamp copyright.
Results after image stamping.

2. Stamp Copyright with Text.
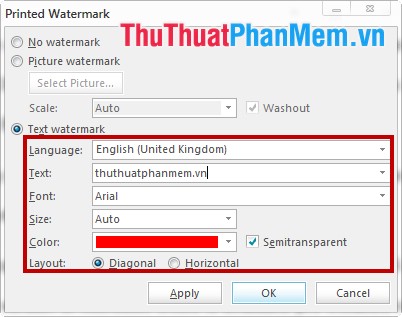
To stamp copyright with the text you select Text wartermark in the dialog box Printed Watermark . Then you set up for the text content:
- Language: select the language of the stamped text.
- Text: enter the text content.
- Font: choose font text.
- Size: text size.
- Color: text color of text.
- Layout: text layout, here you have 2 options Diagonal (diagonal) and Horizontal (horizontal).
When you are done setting up the text, click OK to stamp the copyright for the text.
Text after the copyright stamp:

Very quickly you created yourself a separate stamp and added it to the Word file. Good luck!
FAQ
What is the easiest way to Watermark to Word File - Add Watermark to Doc File?
Start with the requirements in this guide, then follow each step in order. Check the result after every major change so problems are easier to identify.
Can beginners follow these instructions?
Yes. The process is organized into practical steps, and you can repeat any step before moving forward.
What should I check if the method does not work?
Confirm your software or device version, permissions, settings, file format, and internet connection when the task depends on online services.
Related Articles
 How to Insert, Delete Watermark in Word Documents5 minutes read
 How to Add Copyright Watermark Text in Word 20134 minutes read
 How to Create and Delete Watermark in Word 20164 minutes read
 Inserting Letters, Logos Sink into Microsoft Word 20134 minutes read
 Highlight Copyright by Creating Watermark in Word3 minutes read
 10+ Easy Ways to Remove Logos from PDF Files14 minutes read
Reader Comments 0
Sign in with email or Google to join the discussion.