Table of Contents
This guide explains how to create and Delete Watermark in Word 2016, with clear steps, practical tips, and important checks before you begin.

I. Insert Watermark according to available form
In Word, the software gives us several Watermark protection marks for different content. You can use it fast, using Watermark quickly makes it impossible for you to edit the content of Watermark. If you want to create Watermark, you can go to section II.
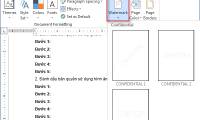
Step 1: Select the Design tab on the toolbar and navigate to Watermark . Then you can choose 1 of 7 available Watermark samples on the system to use directly.
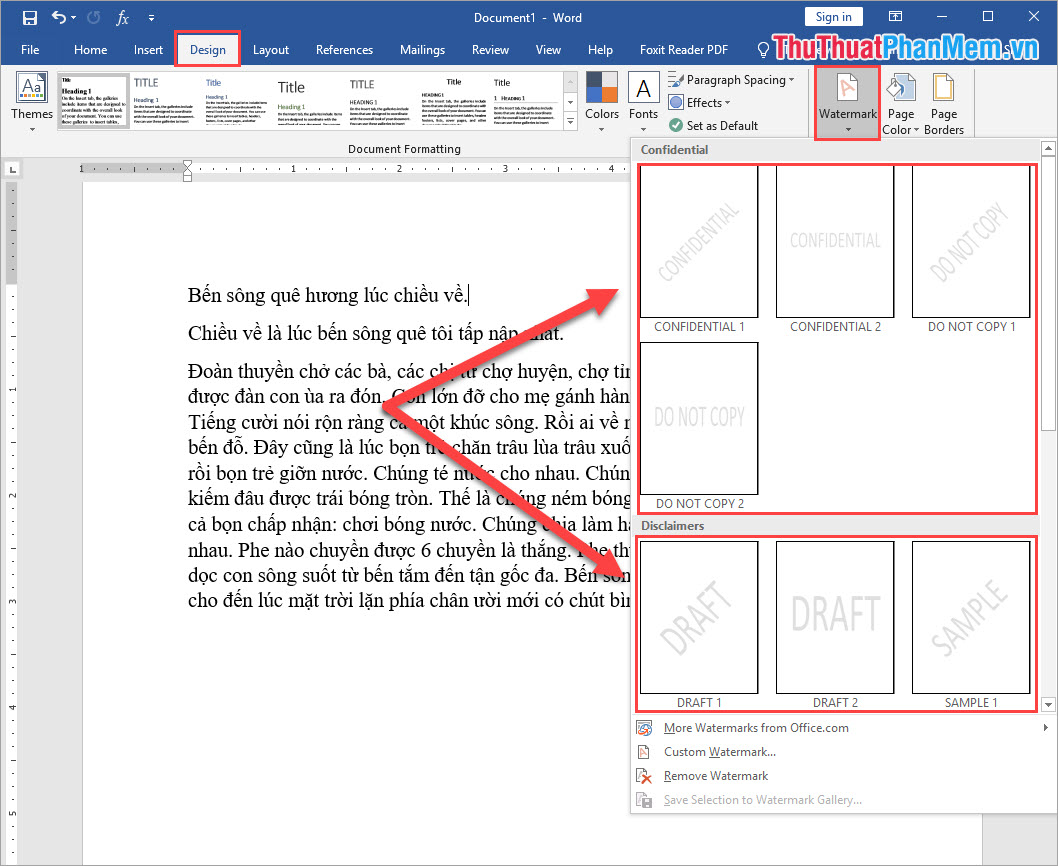
Step 2: Immediately you will have a Watermark mark on your writing page. This is an existing template so you can't edit them.

II. Create personalized Watermark options
By creating your own custom Watermark you can create Watermark with images, text.
1. Create Watermark with existing images
If you have watermarked markers already available, you can use them right away.
Step 1: Select the Design tab on the toolbar and navigate to Watermark . Then you choose Custom Watermark.

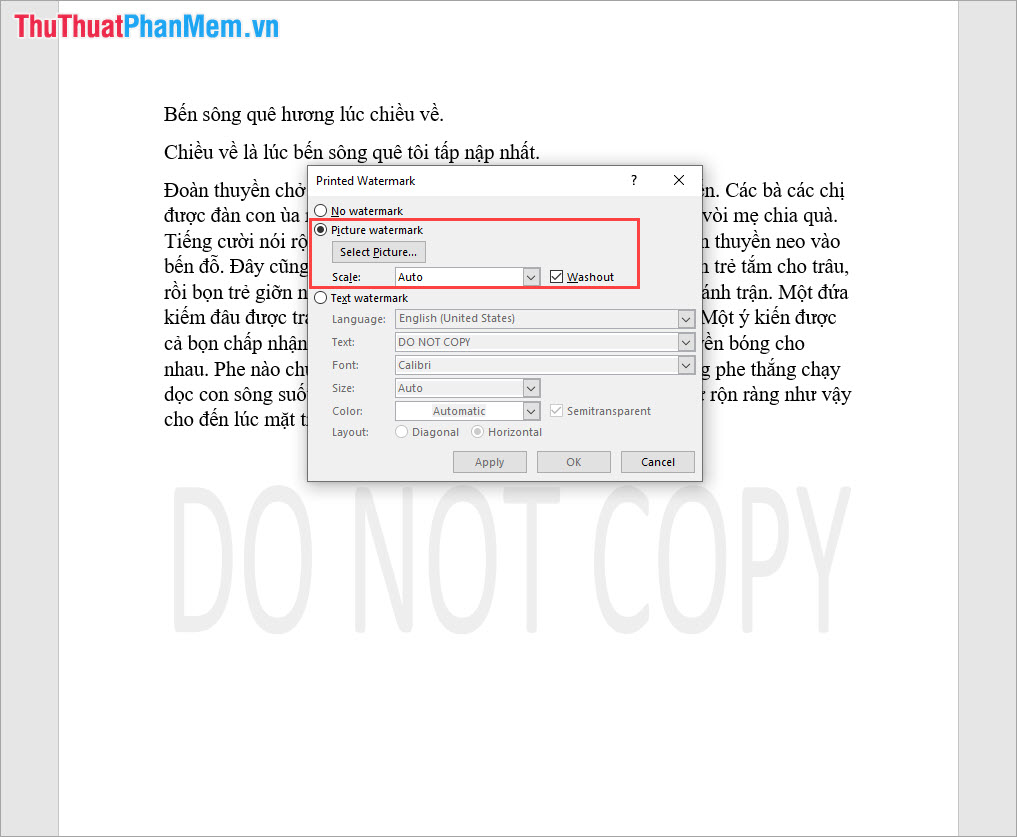
Step 2: Next you select the Picture Watermark . To open the Watermark image file, select Select Picture. and select the Watermark file available on the computer.
At the Scale , you should leave Auto to Word automatically adjust the size accordingly. If your Watermark file has a white background and has not yet been split, then select Washout so Word automatically deletes the white background. And Watermark file has been separated background, you uncheck the Washout .
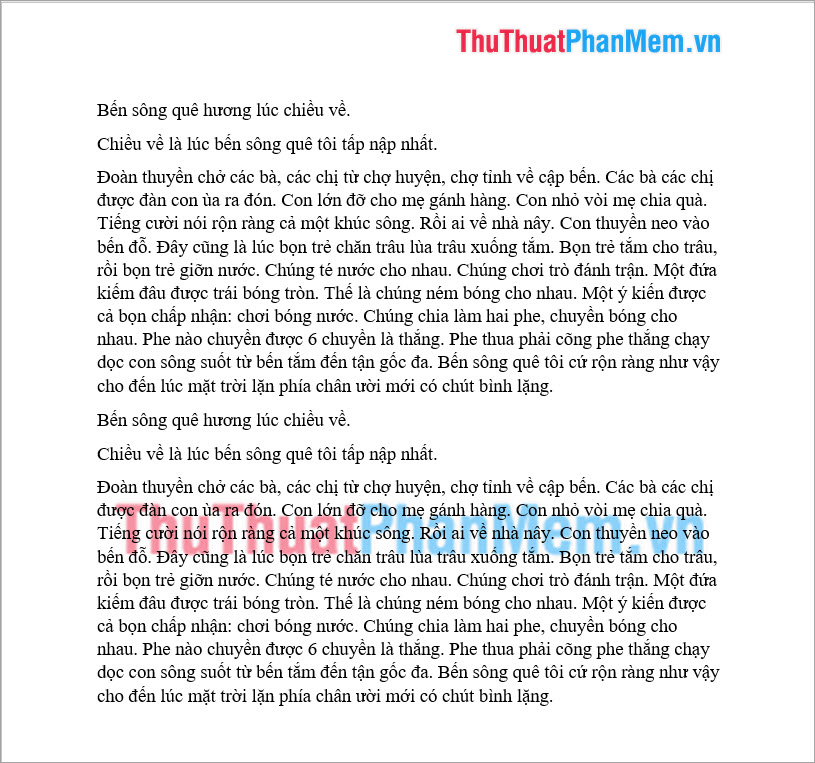
And this is our result after image watermarking. Please select the bold Watermark image file to fade out is medium.
2. Create Watermark with text
Step 1: Select the Design tab on the toolbar and navigate to Watermark . Then you choose Custom Watermark.

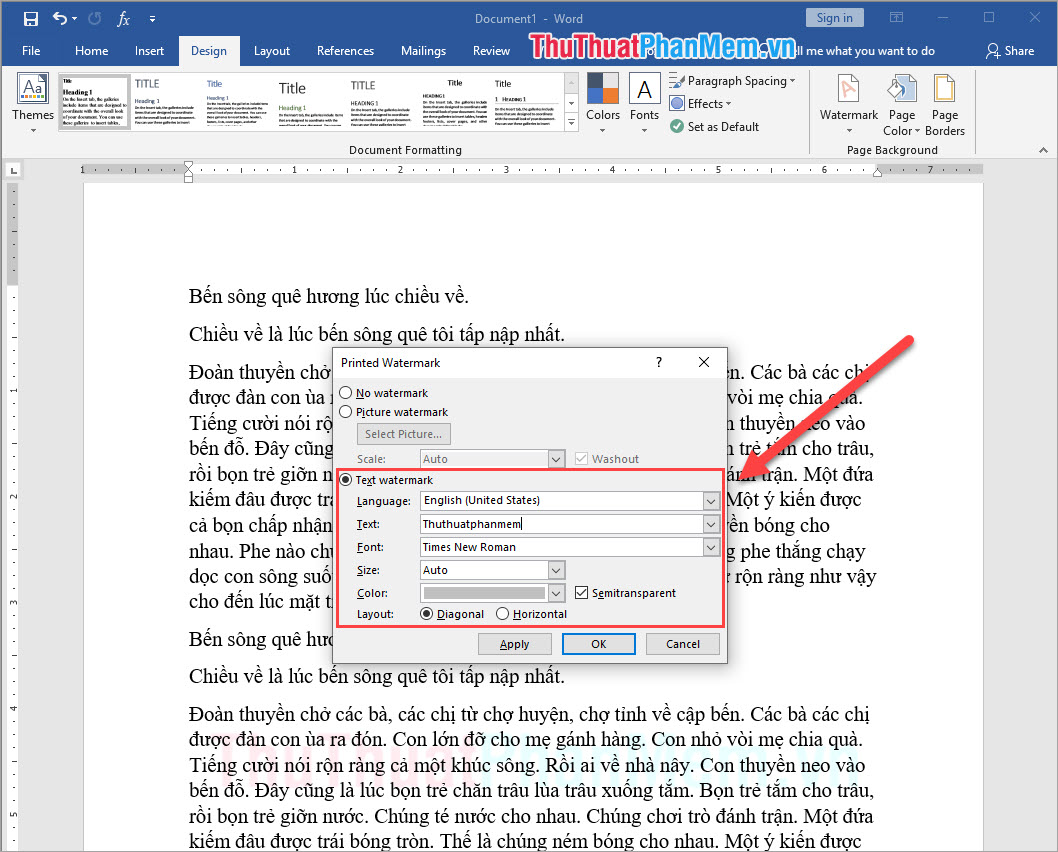
Step 2: Then you select the Text watermark item. Here you need to set the following information:
- Language: Language (default is English US)
- Text: Watermark content
- Font: The font for Watermark
- Size: Size (recommended for Auto)
- Color: Watermark color
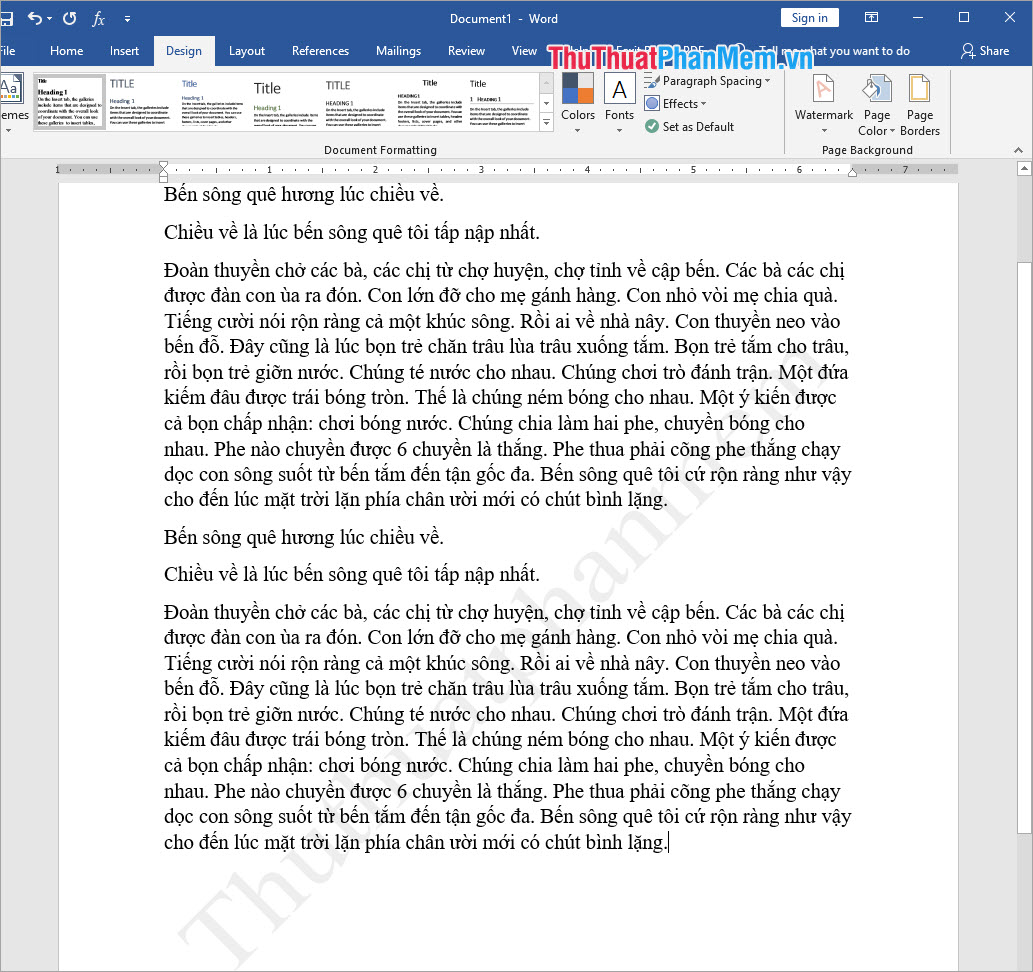
- Layout: Type Watermark. Diagonal : Diagonal . Horizontal : Horizontal line.
And here is our result:
III. How to delete Watermark
To delete Watermark you just need a few taps are done.
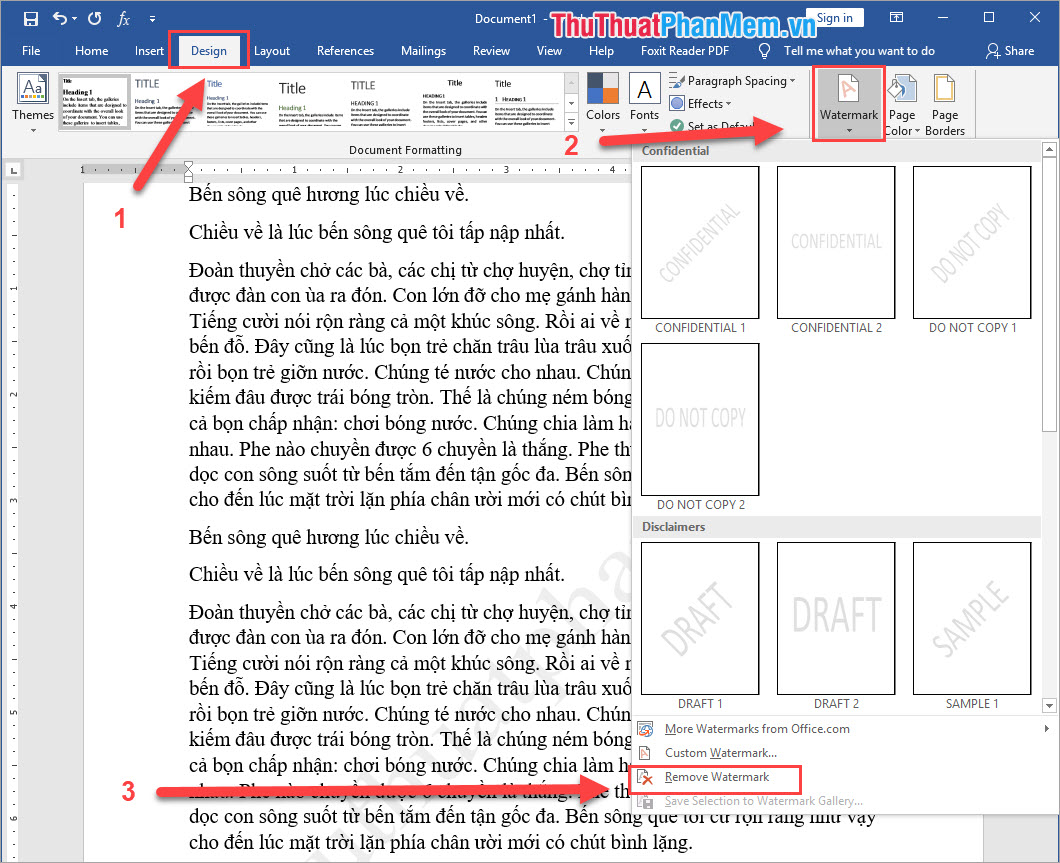
You choose Design and choose Watermark . Then you select the Remove Watermark line is done.
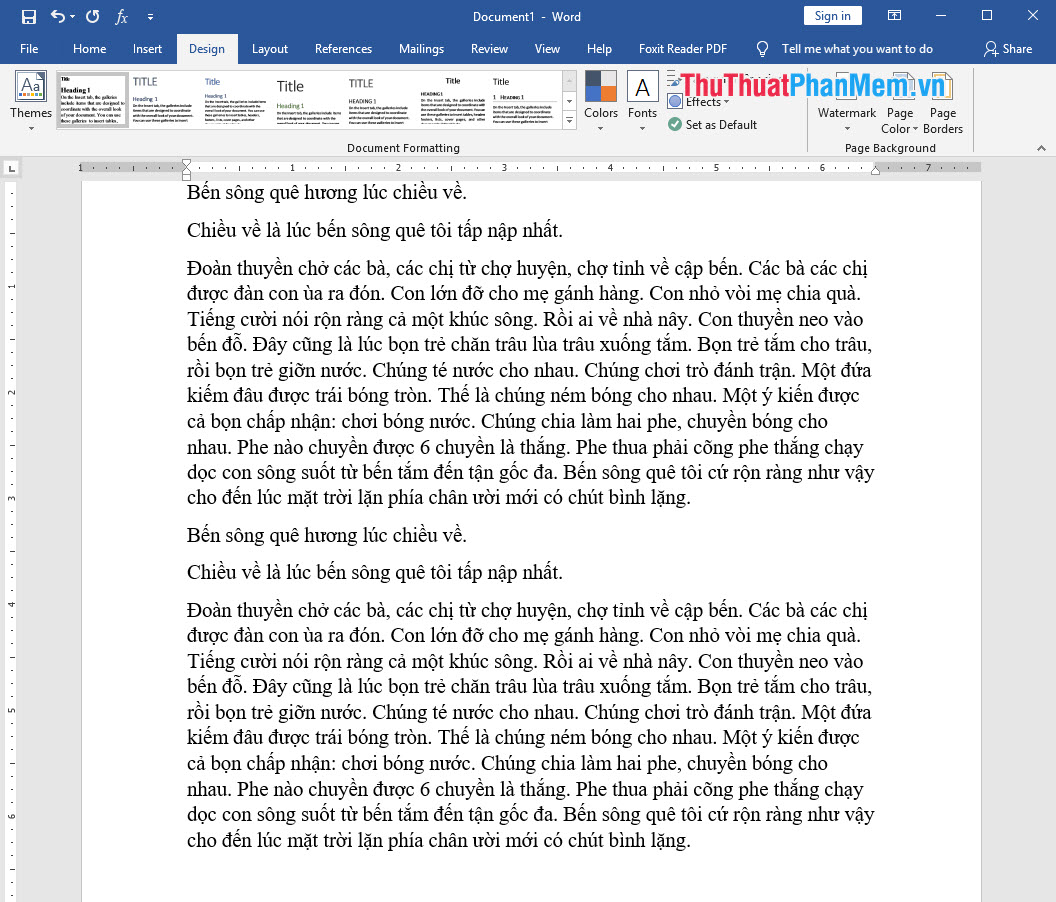
And immediately the Watermark will be deleted:
In this article, Software Tips have shown you how to create and delete Watermark marks on Word 2016. I wish you success!
FAQ
What should I know about Create and Delete Watermark in Word 2016?
Focus on the key features, requirements, limitations, and practical use cases explained in this guide.
How do I get the best results with Create and Delete Watermark in Word 2016?
Follow the recommended steps, use current software or information, confirm compatibility, and review settings before major changes.
Are there any risks or limitations?
Potential limitations depend on compatibility, data quality, cost, privacy, support, and how the product or method is used.
Related Articles
 How to Insert, Delete Watermark in Word Documents5 minutes read
 How to Delete Watermark, Delete Stamps in Word Documents3 minutes read
 Create Watermark for Word Documents: Complete Guide4 minutes read
 Inserting Letters, Logos Sink into Microsoft Word 20134 minutes read
 How to Add Copyright Watermark Text in Word 20134 minutes read
 Highlight Copyright by Creating Watermark in Word3 minutes read
Reader Comments 0
Sign in with email or Google to join the discussion.