How to insert, delete watermark in Word documents
The logo stamp, adding watermark to office documents is too familiar to users. When the document is stamped, the reader will easily identify the document coming from which website, especially the ability to edit the content will be greatly limited.
In the Word office tool, the built-in watermark and delete watermark functions are included in the text page, making it easy to create logo marks for documents. In the article below, Network Administrator will help you understand how to insert watermark in Word content.
- How to insert watermark, logo sink into Excel
- How to create Watermarks on PowerPoint
- How to stamp copyright PDF files
Method 1: Create Word watermark image format
Step 1:
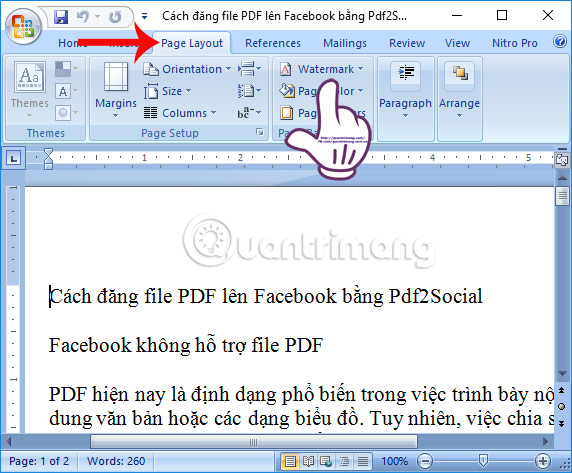
In the Word interface, first click on the position in the text you want to insert the watermark. Then click on the Page Layout tab and then click on the Watermark entry.
Step 2:
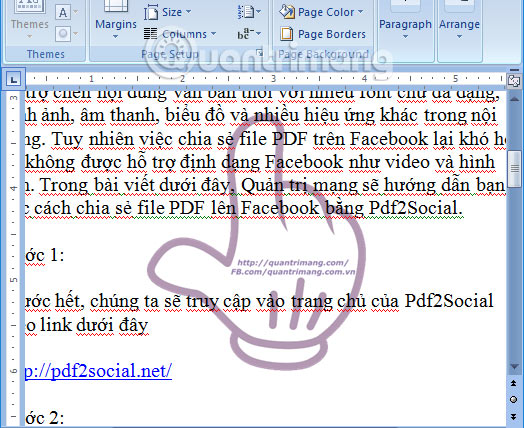
Here you will see the preview image of some types of watermark inserts in Word so that you can choose for your document. Click Customs watermark .

Step 3:
The Print Watermark dialog box appears. Here users will have 2 ways to insert watermark into content.
If you want to insert a watermark with an existing image, check the Picture watermark , then click Select Picture to open the watermark image stored on the computer.

Step 4:
Next to the Scale section, select the size for the selected watermark. Finally click Apply to preview how the watermark is inserted into the Word page.
Note to users , when removing the area in the Washout box, the watermark will be darker as shown below. If you like the way to insert this watermark, click OK to save it.

Finally, Word content will be inserted watermark as image as shown below.
Method 2: Insert Word watermark in Text
Step 1:
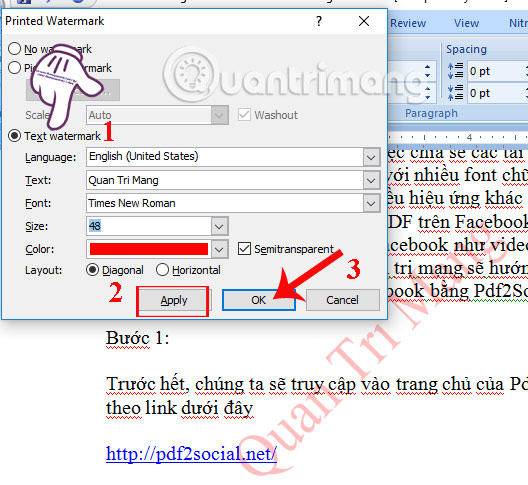
We also follow the above steps to open the Watermark item in Word. If you insert a watermark by entering text, click Text watermark . Then customize the watermark to include the following items:
- Language: select the language for the watermark.
- Text: enter the content for the watermark.
- Font: select the font for the watermark
- Size: select the size for the watermark.
- Color: select the color for the watermark.
- Layout: select watermark direction (diagonal type diagonal, Horizontal type is horizontal).
- Semitransparent: create a semi-transparent style for the watermark.
Step 2:
Once set up, click Apply to preview how the watermark will appear in Word content. Finally, users click OK to save this new text watermark.
Step 3:
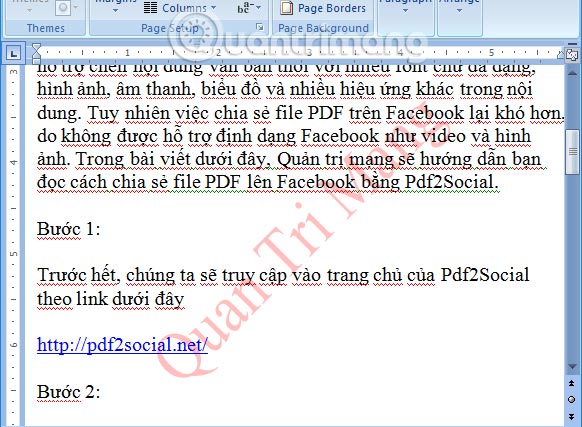
As a final result, we will get the watermark as text as shown below.
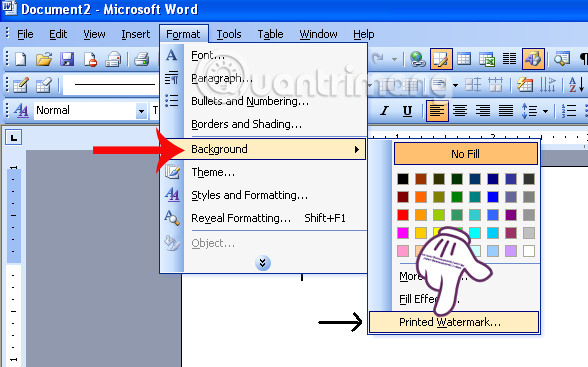
In the case of using Word 2003 , users access Format> Background> Printed Watermark . and then enter the watermark for the document.
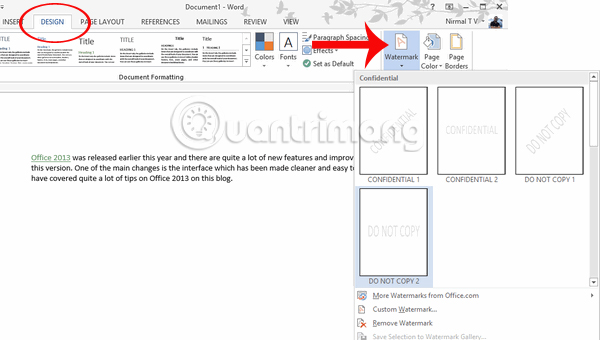
With Word 2013 , we will click on the Design tab and then click on the Watermark item. The rest of the users do the same according to the tutorial above.
3. How to remove the created watermark on Word:
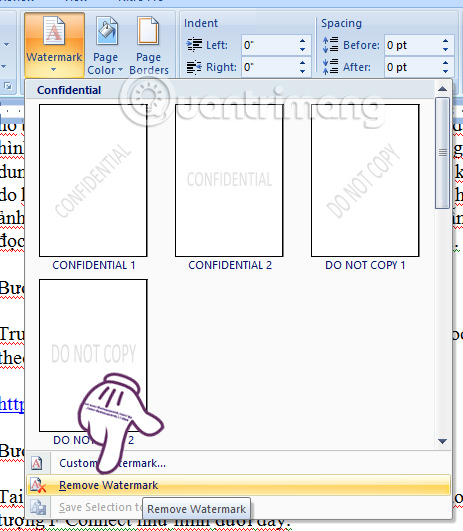
Word will support users to create a watermark and delete the watermark just created. To delete the created watermark, click on Page Layout to select Watermark and then select Remove watermark .
The above is a detailed tutorial on how to insert and delete watermark created in Word documents. Users can choose from 2 ways to insert logos with available images, or enter the content for the watermark. The Watermark section on Word versions will be in different locations, but the workflow is similar to the above article.
Video tutorial inserting watermark on Word
I wish you all success!