Instructions for creating tables in Notepad
Starting with version 11.2510.6.0 through the Windows Insider Program, the Notepad application has been supported for creating tables to insert content..
Starting from version 11.2510.6.0 through the Windows Insider Program, the Notepad application has been supported with the feature of creating tables to insert content, expanding the content so that you can easily handle more types of data. The option to create tables on Notepad is present right on the application interface for you to click to use. Below are instructions for creating tables in Notepad.
Instructions for creating tables in Notepad
Step 1:
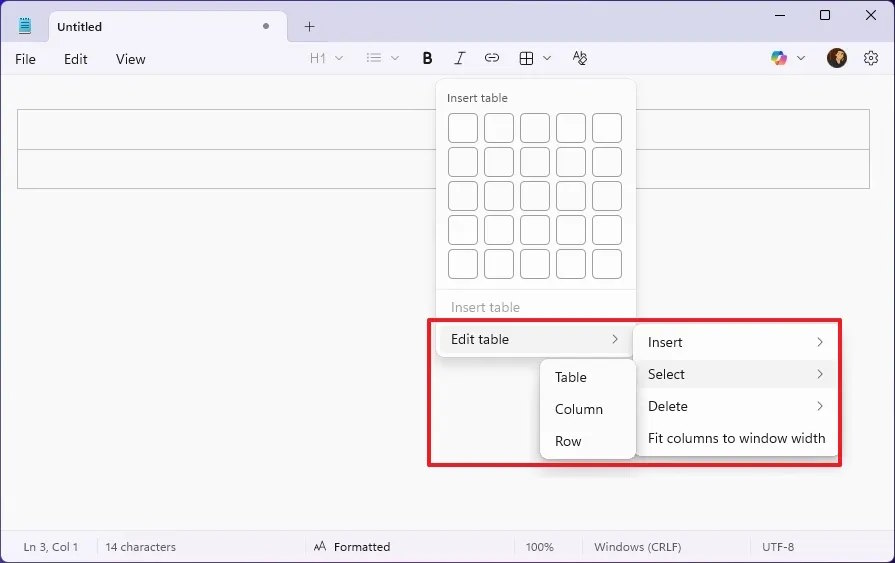
Users open the Notepad application that has been updated to the latest version as required. Next, you click on the table icon in the interface and then select the column and table to display to draw according to your needs to create a table in Notepad.

Step 2:
In case the number of columns and rows is more , click Insert table and then directly enter the number of columns and rows you need to insert into the content.

Step 3:
After entering, press the Insert button to insert. Continue adding data to the table. The data table can be edited after creation. Click on the table , then click on the table icon again , select Edit Table and select the edit you need.
Additionally, new Markdown support for creating tables on Notepad will be available starting with Windows 11 version 11.2510.6.0 through the Windows Insider Program.