Table of Contents
This step-by-step guide explains how to transfer photos from iPhone to Windows 10 PC. It covers the required setup, the main actions, and the checks that help prevent common problems.
But there's a free app for iOS that helps users easily Transfer iPhone photos to Windows 10 PC , all you need is to install the app, connect 2 devices with the same Wi-Fi network.
Step 1: Connect iPhone / iPad and Windows 10 computer with the same Wi-Fi network. Note that the network also does not need to operate.
Step 2: Find Voxeloid Kft's Wi-Fi Photo Transfer App on the App Store and install it on iPhone. App is free to use HTTPS: //iTunes. Apple. Com/us/app/Wi-Fi-photo-transfer/id380326191? Mt=8
Step 3 : Install and select OK When you see the request to access ' Wi-Fi Photo would like to access your photos '. The next time you use it, this request will not appear again.

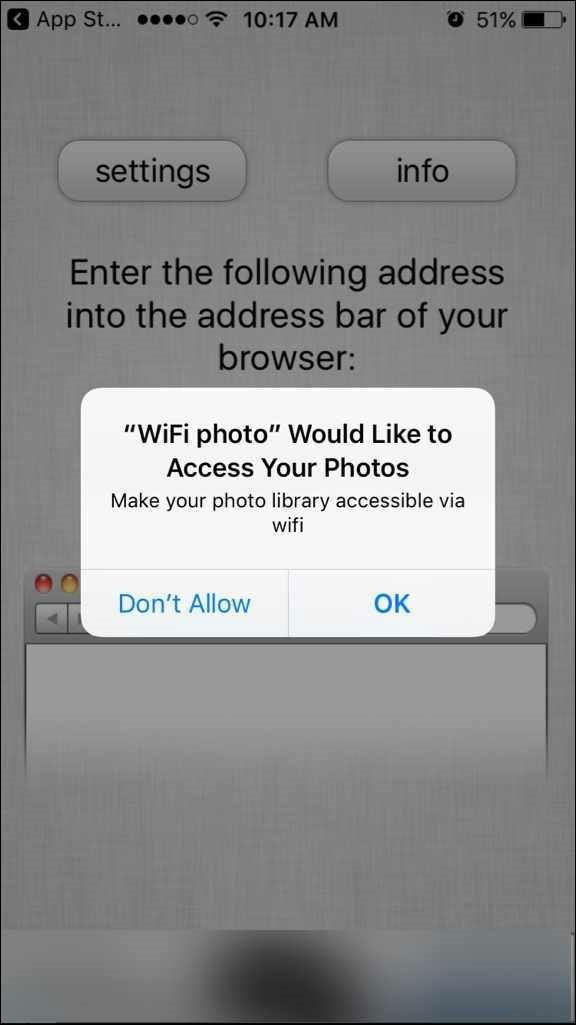 The app asks for only one time access when installing
Step 4 : You will see the web address on the app as shown below.
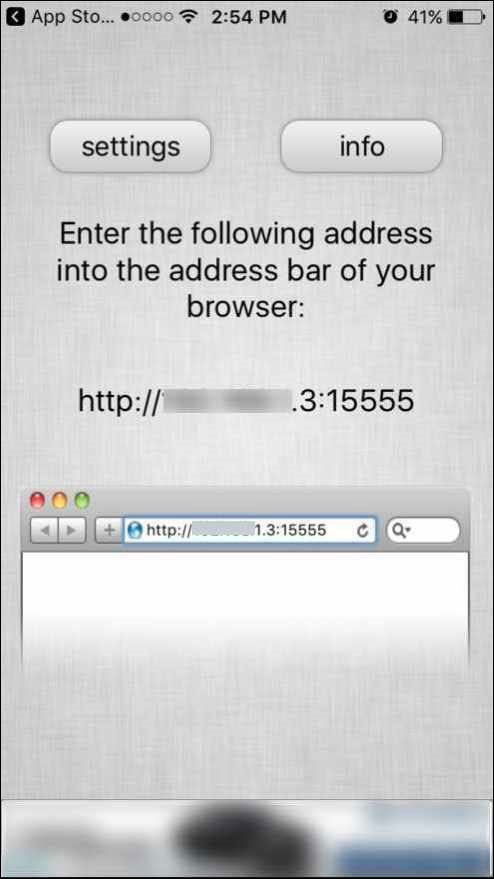 Web address on app
Step 5: Open the web browser on your PC and type the web address displayed on the app, then select Enter.
Step 6 : You will see the iPhone collection on your computer's web browser. Select Camera Roll or WhatsApp To view photos saved on camera roll and images / videos received via WhatsApp.
 Type the address on the browser to access the iPhone data store
Note: Always turn on the Wi-Fi Photo Transfer App on your iPhone until you transfer it to your PC.
Step 7: To view photos or videos, just select. Once opened, you will see a download option. To download all images, select Download in. Zip .
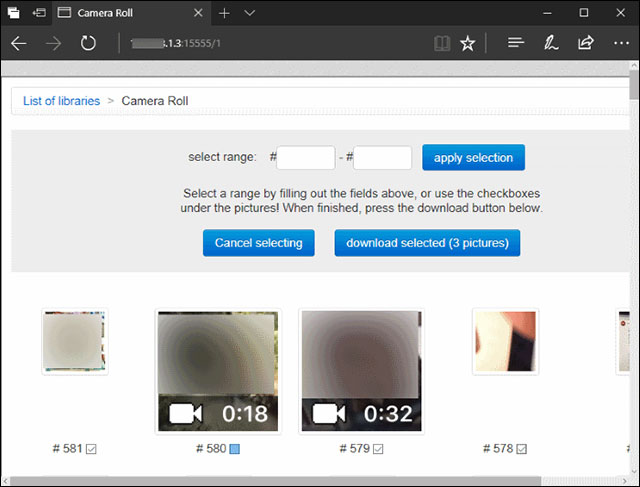 Select each photo or video you want to download or download all as a zip file
If not, you can select each image you want to download or select a certain image area and select Download selected To download the Selected Image as a zip file.
On the computer, just extract this file and you get the desired image and video.
FAQ
What should I check before following these steps?
Confirm device and software compatibility, save important data, and make sure you have the required permissions, files, and account access.
Why might the process not work?
Common causes include outdated software, missing permissions, incompatible hardware, an unstable connection, or completing a step in the wrong order.
Can I undo the changes if necessary?
That depends on the tool or setting. Use built-in restore options when available, keep a backup, and record the original configuration first.
Related Articles
 8 Ways to Quickly Transfer Photos from iPhone to iPhone11 minutes read
 No Software Needed, This Is the Fastest Way to Transfer Images Between4 minutes read
 Instructions to Transfer Photos from iPhone to Macbook Extremely Fast3 minutes read
 How to Transfer Photos from iPhone to Computer: Complete Guide5 minutes read
 How to Transfer Photos and Videos from iPhone iOS 11 to PC with5 minutes read
 How to Transfer Photos from iPhone to iPhone4 minutes read
Reader Comments 0
Sign in with email or Google to join the discussion.