Table of Contents
Learn how to cleaning up the Windows downloads folder with clear steps, practical tips, and troubleshooting guidance for a reliable result.
Delete unused files from Downloads
Step 1
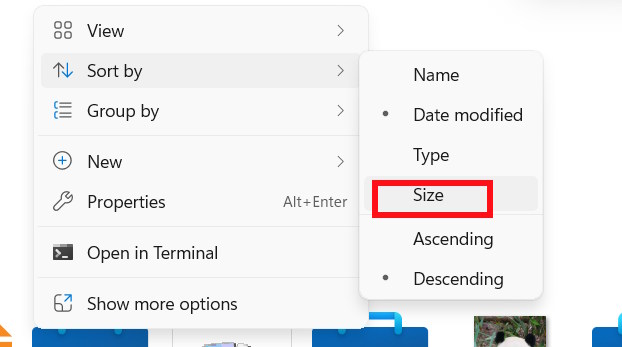
In the Downloads folder , right- click on a blank area , select Sort by, and then select Size to categorize the files.
Step 2
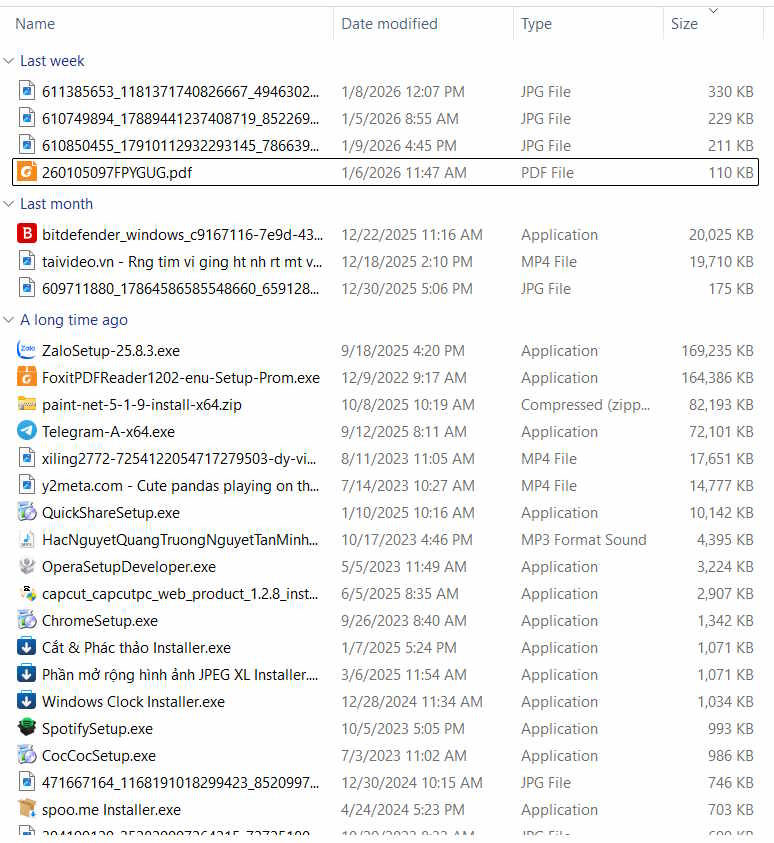
You will now see the largest downloaded files at the top of the list, and you can select which ones you want to delete to free up space in your Downloads folder.
Sort files by type
In addition to sorting folders by size, you can also sort them by type to find files in a specific format.
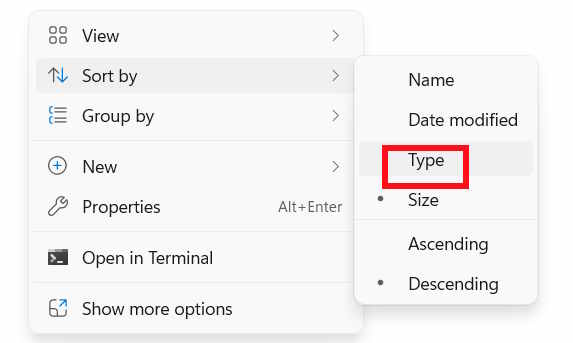
Right-click in the Download folder , select Sort by, and then select Type .
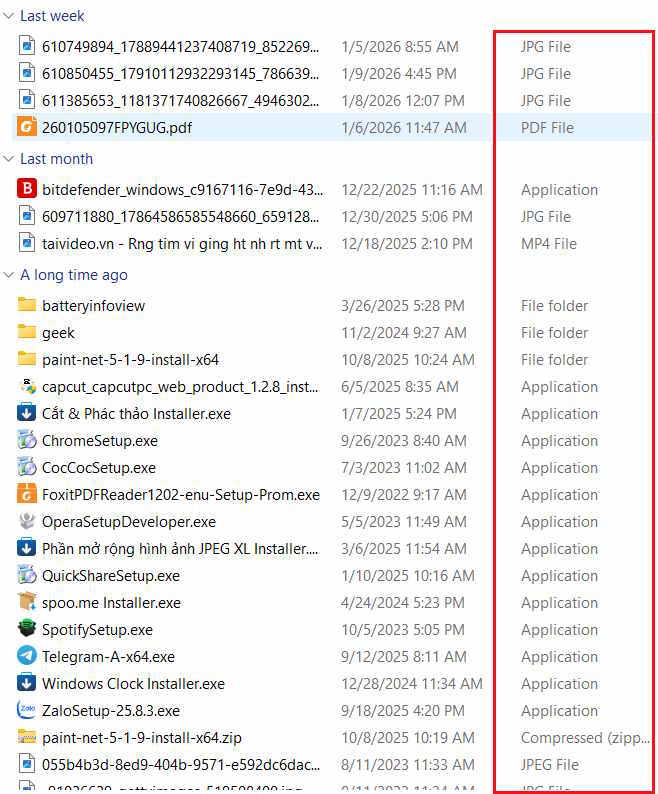
Now you will see all similar file types grouped together. You can select which files you want to delete after grouping them.
Use Storage Sense to clean up downloads
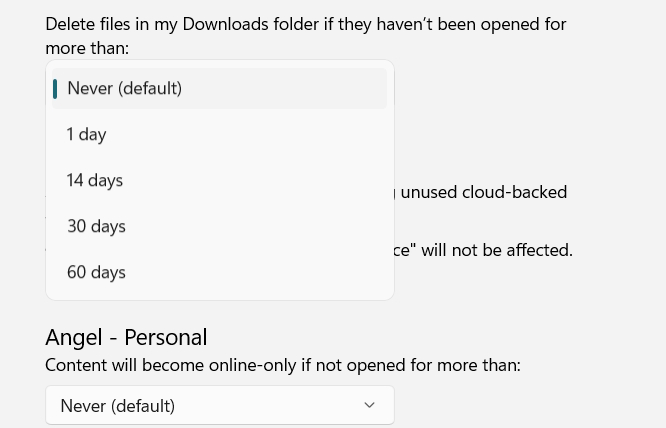
Go to Settings, select System , then tap Storage , and activate Storage Sense .
In the Storage Sense interface, users scroll down to the "Delete files in my Downloads folder if they haven't been opened for more than" setting and then select the time to automatically delete files in the Downloads folder after a period of inactivity.
Final Thoughts
Use this guide as a practical checklist for how to cleaning up the windows downloads folder. Work through the steps in order, verify each result, and adjust the options to match your needs.
FAQ
What do you need before following this How to Cleaning up the Windows Downloads Folder guide?
Review the required tools, accounts, settings, or materials mentioned in the article. Learn how to cleaning up the Windows downloads folder with clear steps, practical tips, and troubleshooting guidance for a reliable result.
What are the main steps for how to cleaning up the windows downloads folder?
Follow the sections in order, especially Delete unused files from Downloads, Step 1, Step 2. Complete each step before continuing and verify the result as you go.
What should you do if the process does not work as expected?
Recheck the prerequisites, update the relevant app or service, review the settings, and repeat the step that caused the issue. Use any troubleshooting notes included in the guide.
Related Articles
 How to Fix Unresponsive Downloads Folder on Windows6 minutes read
 How to Locate the Downloads Folder, Downloaded Files on4 minutes read
 How to Move the Downloads Folder to a Different Drive on Windows 10/113 minutes read
 Instructions for Changing Microsoft Edge Download Folder6 minutes read
 How to Create a Download Folder: Step-by-Step Guide3 minutes read
 Microsoft Will Delete the Downloads Folder in Disk Cleanup on3 minutes read
Reader Comments 0
Sign in with email or Google to join the discussion.