Table of Contents
This practical guide explains how to create a system image backup on windows 11 with clear steps and useful context. It also covers common requirements, potential problems, and the details that can help you get better results.
What Is System Image Backup?
In a Windows environment, a System Image backup is an exact copy of the entire 'C:' drive containing the system's working Windows installation folders, all installed applications, as well as all files configuration and data for those applications. They are stored 'frozen' as an important backup, ready to use when needed.
In the event of a system drive failure, you can restore this System Image to a new drive, back it up, and run it as if nothing changed — no need to reinstall Windows or apps. Of course, there can be a lot of extra data that you don't always need in a regular backup. Therefore, an ideal System Image will only play the primary role of maintaining the correct state of the Windows system.
Create a System Image Backup on Windows 11
To create a system image backup on Windows 11, you will need to use a tool called 'Backup and Restore (Windows 7)'. This tool comes with every version of Windows since Windows 7. To launch it, first access the Control Panel by opening the Start menu and typing the keyword 'Control Panel'. Then click the 'Control Panel' icon in the list of results returned below.

When 'Control Panel' opens, look under 'System and Security' and click on the 'Backup and Restore (Windows 7)' link.

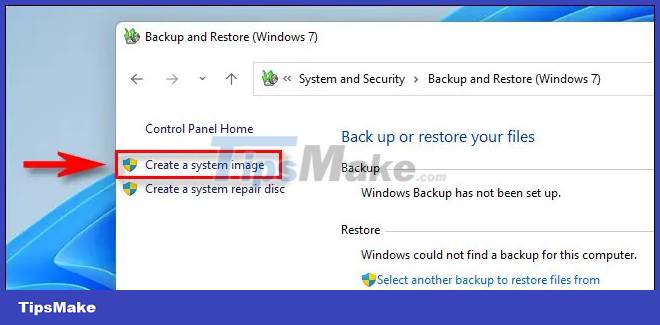
In the Backup and Restore section, click 'Create a System Image' in the sidebar.
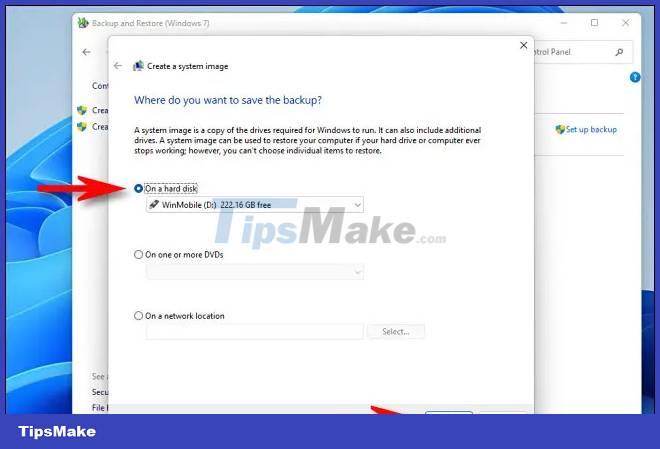
Next, Windows will ask where you want to save the backup. You can choose either a local hard drive or an external storage drive (not the one you're backing up), DVD, or network. Select an option and click 'Next'.
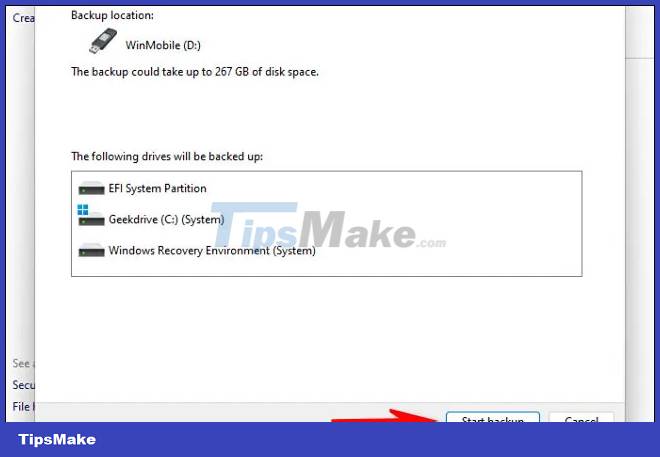
Next, you will see an overview of what will be backed up. Click 'Start Backup'.
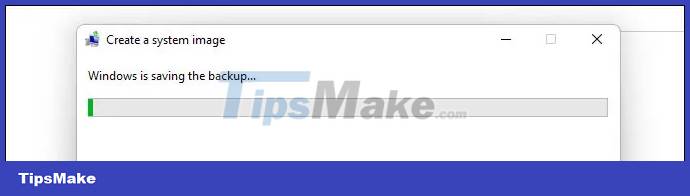
The system will show you a progress bar of creating a system image backup.
When the backup is complete, close the System Image tool. If you check the destination location, you will see the 'WindowsImageBackup' folder containing the backup files. Do not move or modify this folder.
In the future when you want to restore a backup, run the Backup and Restore tool (Windows 7) again, look in the 'Restore' section and select the location containing the system image you created. Windows will restore the backup, restart the PC and everything will be done.
Conclusion
Understanding Backup System Image makes it easier to compare options, avoid common mistakes, and apply the information in this guide more effectively. Review the relevant requirements before making changes or choosing a solution.
FAQ
How do you create a system image backup on windows 11?
Follow the steps in this guide in order, confirm the required settings or tools, and verify the result before making additional changes.
Is it safe to create a system image backup on windows 11?
It is generally safe when you follow the recommended instructions, use trusted tools, and avoid changing settings you do not understand.
What should you do if the process does not work?
Recheck the requirements, restart the device or application when appropriate, and review each step for missed settings or compatibility issues.
Related Articles
 How to Backup and Restore Windows 10 from System Image7 minutes read
 Create Backup System Image in Windows 75 minutes read
 How to Create and Restore System Image Backup with Macrium16 minutes read
 Complete How to Use All Backup and Restore Tools on Windows 1012 minutes read
 How to Backup and Restore Windows in Just 10 Minutes with Acronis5 minutes read
 How to Use Iperius Backup Free to Back up Windows Data4 minutes read
Reader Comments 0
Sign in with email or Google to join the discussion.