Design website with Adobe Dreamweaver CS5 software - Part 2
In Part 2, you will learn how to insert multimedia content such as photos (with effects when moving mouse cursor), flash clips, video clips. Also guide using SothinkDHTMLMenu software (integrated into Adobe Dreamweaver) to create dynamic menus ....
In Part 2, you will learn how to insert multimedia content such as photos (with effects when moving mouse cursor), flash clips, video clips.Also guide using SothinkDHTMLMenu software (integrated into Adobe Dreamweaver) to create dynamic menus .
- Link refer to part 1 of the article about how to design a website with Adobe Dreamweaver
7. Insert images into the website
- Insert still images
Before you want to insert images into the web page, you should copy all the images you need to insert into the Image folder of the web. The selection of images to insert into the website must also pay attention to the number and size of the image because if inserted too much or the image is too large, the site will have a large amount of use, the download will be slower. To insert images into a web page, do the following: go to Insert , select Image and navigate to the image you want to insert.
After inserting the image into the web page, proceed to set the properties for the newly inserted image in the Properties pane (Figure 8).

Figure 8. Properties of the image
- Create Rollover Images.
Rollover Images is an image that will change when the cursor goes over it. When creating Rollover Images , the two images must be the same size. If two images are of equal size, Dreamweaver will fix them equally.
First you place the cursor where you want to insert. Then select Insert > Image objects > Rollover Image .
The Insert Image Rollover dialog box appears, setting the following content:

Figure 9. Create animation effect when moving mouse cursor
- Image name: Name the Image.
- Original image : Click the Browse button to specify the first image to appear.
- Rollover Images : Click the Browse button to specify the image will change when moving the mouse over it.
- When Clicked, Go to URL : Click the Browse button to indicate the web page to link to when clicking on it.
Select OK to complete (Figure 9).
- Insert flash animations, video clips into web pages.
Go to Insert > media > choose SWF or FLV according to the file format to insert. Then browse to the Flash File or Video File and click OK.
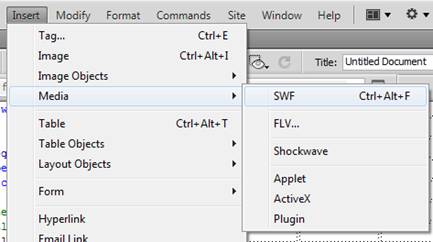
Figure 10. Insert multimedia file
8. Create a menu for the website.
Menu is an indispensable part for every website. It is a place to link discrete pages of webs together into one system. Creating a beautiful and professional menu is the desire of many web designers.
For Dreamweaver web design software, there is an integrated tool that supports creating very professional menus, SothinkDHTMLMenu . You can use that software to design menus for your website.
SothinkDHTMLMenu is provided with a trial version at http://www.sothink.com/product/dhtmlmenu. After successfully installing SothinkDHTMLMenu software, on the menu of Adobe Dreamweaver, there will be Sothink menu and with this menu you will create a polished menu for your website (Figure 11).
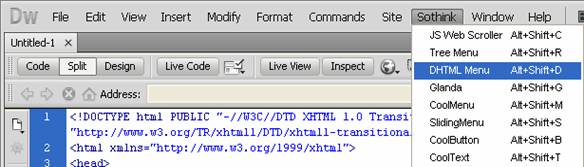
Figure 11. Start DHTML Menu
First open the website to create a menu using Adobe Dreamweaver software, place the cursor at the position where you need to insert the menu, select Sothink menu, in the pop- up panel select DHTML Menu (or press Alt + Shift + D). Note, you must save the website before proceeding to create the menu.
In the opening window of SothinkDHTMLMenu , select Blank Menu for new design, From Template if you want to select an available menu type. In the Menu Tree window (the menu is located on the left), you can perform operations such as cut, paste, . themes, categories for the menu through the buttons on the toolbar.
The entire design process in SothinkDHTMLMenu is done mainly by the feature framework: Popup Menu, Menu Item . In addition, during the design process, you can learn more about the window: Scrolling and Global Setting (Figure 12).
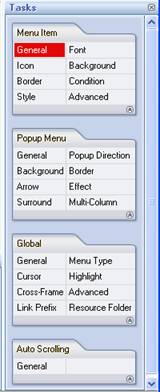
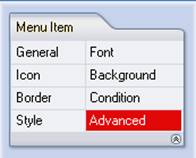
Figure 12. Design tasks
- Frame Menu Item:
This window allows you to format each theme, each item in the menu (Figure 13). In this window, you can adjust the following items:
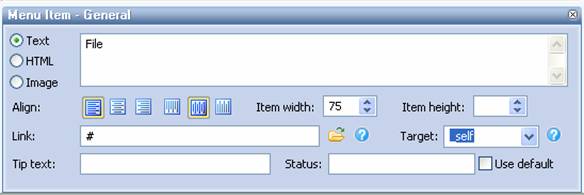
Figure 13. Menu properties
+ Select the General tab to enter items for the menu.
+ Select Text to enter the topic name.
+ Select HTML entry to enter formatted topic name in HTML tag pairs.
+ To insert image into menu, select Image , specify image from command button.
+ Align the position of content display on menu items with Align (left, right, center) or Valign (top, middle, bottom).
+ Set the link for menu items via Link section.
Also in the Menu Item window you can also format fonts, text colors, background colors, backgrounds, frames, styles for menus in the corresponding labels of the Menu Item window as Font , Icon , Background , Border , Condition , Style , Advanced .
- Popup Menu Frame
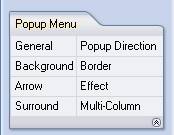
Figure 14. Popup Menu window
After creating the menu, this window will help us design colors, menu display styles . and it is important that you can create special effects for the menu (Figure 14).
The steps are as follows:
In the Popup Menu 's Genaral tab, select Horizontally in the Display frame to display the horizontal menu or select Vertically for the vertical menu style (Figure 15).
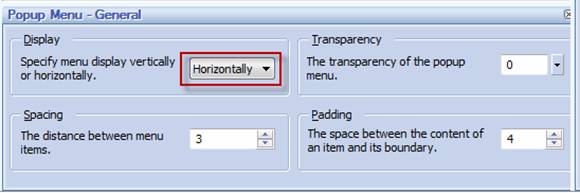
Figure 15. Select the display type
Next select the Background label, in the Bg color section, press the button and select the background color for the menu from the palette, and if you want the menu to have a transparent background, then click the Transparent check box . You can also select the background image of the menu by pressing the button in Bg image (Figure 16).
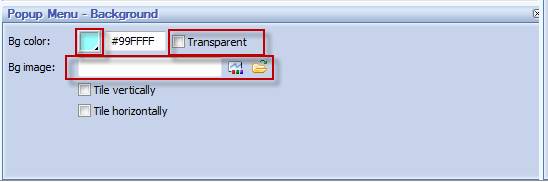
Figure 16. Select background color or wallpaper
To set the background color for the menu, select the Border tab , click the arrow button on the button to set the color for each side of the Menu. In the Effects label from the Popup Menu window, you will set the effect for the menu (Figure 17). The effects in the item are as follows:
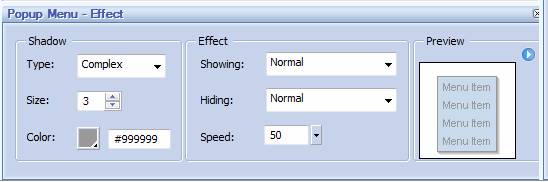
Figure 17. Select effect
+ Menu shadow: You can shade the menu by selecting Simple or Complex from the submenu of Drop shadow, choose the outline, the thickness for the shadow and the color for the shadow.
+ Effect menu display (Effects for showing): click select menu and select a special effect from the list.
+ Special effect to hide menu (Effect for Hiding): click to select arrow, select effect to hide menu.
+ Effect Speed: Enter the value in the text box to set the display speed for the menu effect.
- Scrolling frame
If there are too many submenus in the menu, you can make the submenus scroll by customizing in the Scrolling window when there is not enough space on the screen to display all of them (Figure 18).
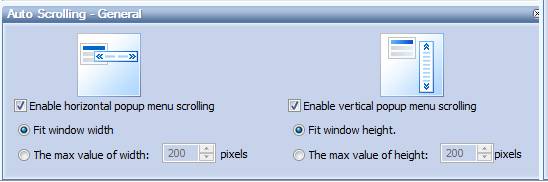
Figure 18. Customize the scroll bar style
+ Customize the style for the horizontal scroll bar (Horizontal Popup Menus) or vertical (Vertical Popup Menus).
+ Check Enable Scrolling.
After you have completed the settings for the menu, select the Save and close command to complete the task. SothinkDHTMLMenu will automatically put the menu you just created into your website without having to work with the code anymore. However, SothinkDHTMLMenu has a disadvantage of having Vietnamese Unicode font error when running the menu on the browser and the files created by the program are many and located in the same folder as the web file that has just been created. makes the design not scientific. But these two errors can still be easily overcome by working with the code.
First, you can fix the font error by entering the code generated by the program in Dreamweaver to find the wrong font and correct it. Next, to fix the files created by SothinkDHTMLMenu located ' disorderly ' in the folder containing the website you create a new folder in the folder containing the web page (Menu folder for example), next copy All files that SothinkDHTMLMenu creates into this new folder. Then go to the code editor window and add the ' menu ' section to the previous tutorials (the old paths are the names of the files created by SothinkDHTMLMenu).
9. Create links for websites.
A website is designed not only to contain information on the internal site, but it must also be linked to many other websites for richer content. It is possible to create links from an image to a web page or from a text depending on the preferences of the designer. The steps are as follows:
- Insert images or enter text to create links.
- Click to select picture or select the text to create link.
Enter in the Link box in the Properties box the address of the website to link to.

Figure 19. Link address attribute
Please note that the website link to the link should contain the full name of the website. For example, the link to the Quantum page should enter the correct address https://quantrimang.com.