How to add and remove folders in the Windows 11 Start menu
The Windows 11 Start menu displays all applications, settings, and files. You can also select folders you want quick access to within the Start menu..
The Windows 11 Start menu displays all your apps, settings, and files. You can also select folders you want to access more quickly directly from the Start menu. Adding favorite folders to the Start menu helps you open them faster without searching or performing extra steps. Below are instructions on how to add and remove folders in the Windows 11 Start menu.
Instructions on adding and deleting folders in the Start menu
Step 1:
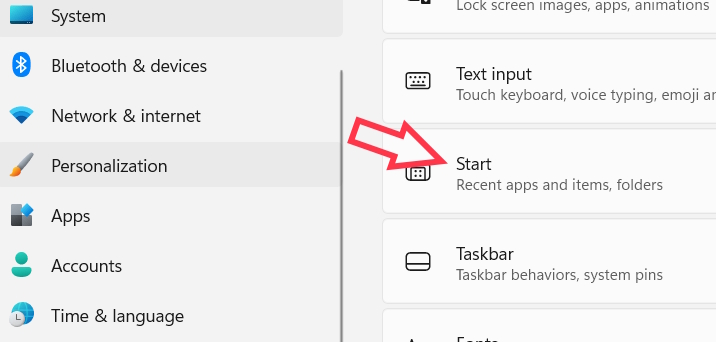
Open Settings on your computer and click on Personalization on the left side of the interface. Then, look to the side and select Start to customize the Start menu on Windows 11.
Step 2:
Moving on to the next interface, users select Folders to adjust the folders added to the Start menu.

Step 3:
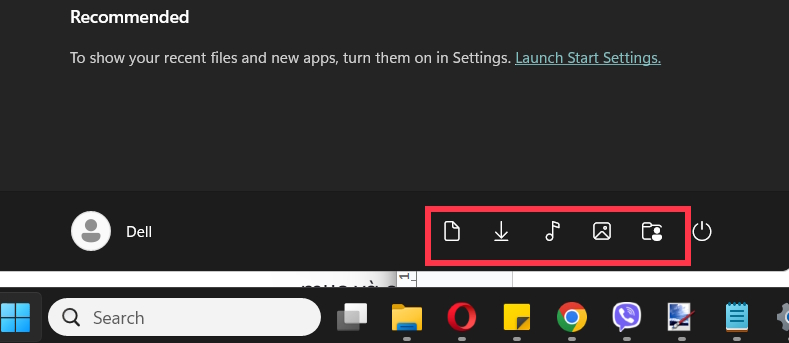
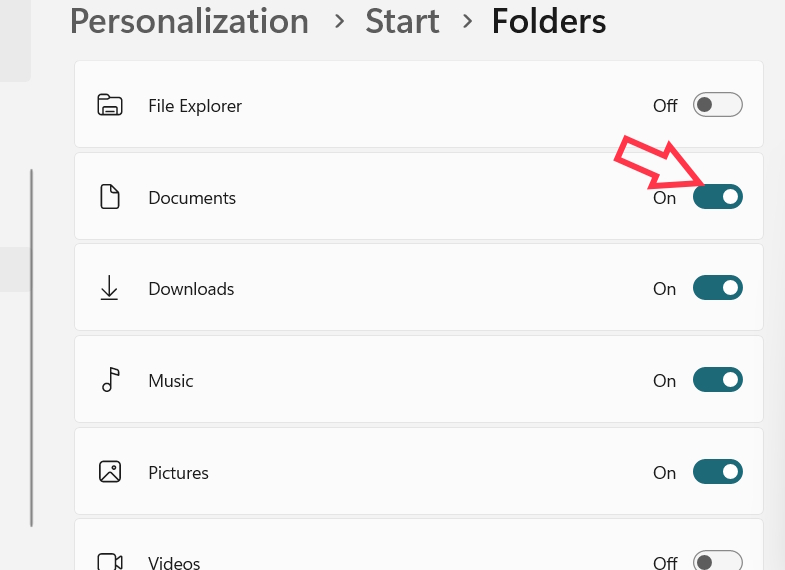
Here you will see a list of folders to display in the Start menu, next to the power button. Some folders include Documents, Downloads, Music, Pictures, etc.
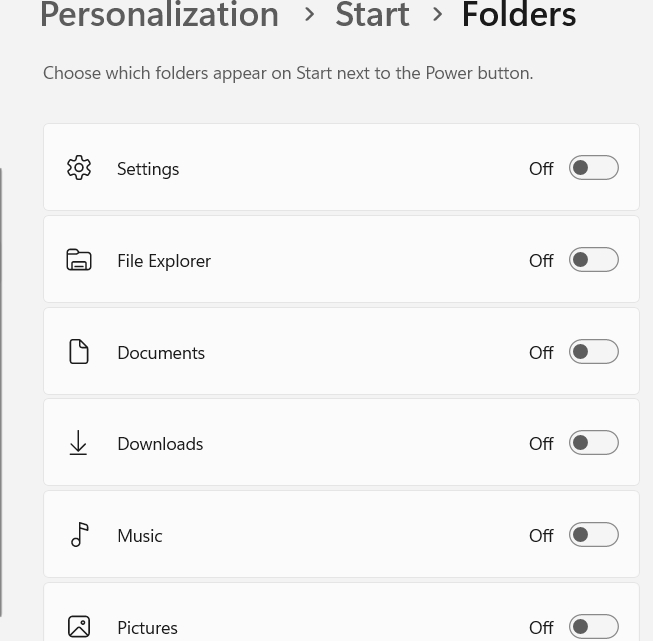
To add a folder to the Start menu, simply turn that folder's switch to the On position .
After selecting the folders you want to add to the Start menu, click the Start menu icon and you will immediately see the folder icons next to the power button, as shown below, for quick access when needed.