How to hide the All apps list in the Windows 11 Start menu
Many people dislike the new Start menu interface in Windows 11 because it currently groups applications by default. Below is a guide on how to hide the list of applications in the Windows 11 Start menu.
Table of Contents
Microsoft introduced a new Start menu layout, combining the Pinned and All views into a larger interface, along with the option to disable the Recommended section. Many people dislike this new Start menu interface because the menu now defaults to grouping similar applications by Category view. Below is a guide on how to hide the Start menu application list in Windows 11.
How to hide the "All apps" list on the Windows 11 Start menu.
Step 1:
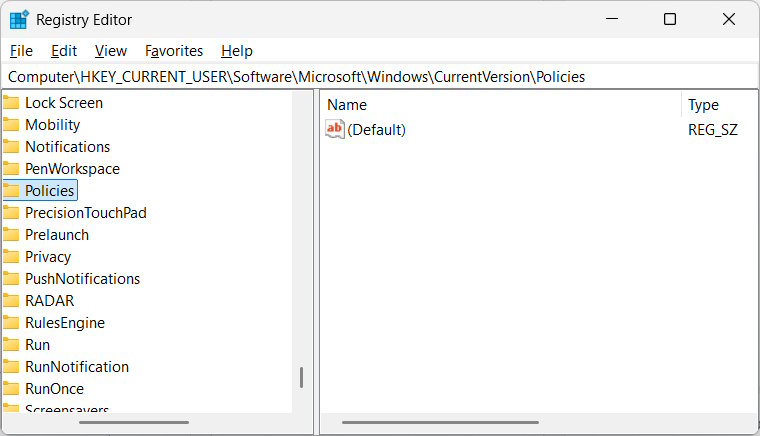
Type "regedit" into the search bar to access the Registry on your computer. Then, follow the path below.
HKEY_CURRENT_USERSoftwareMicrosoftWindowsCurrentVersionPolicies
Step 2:
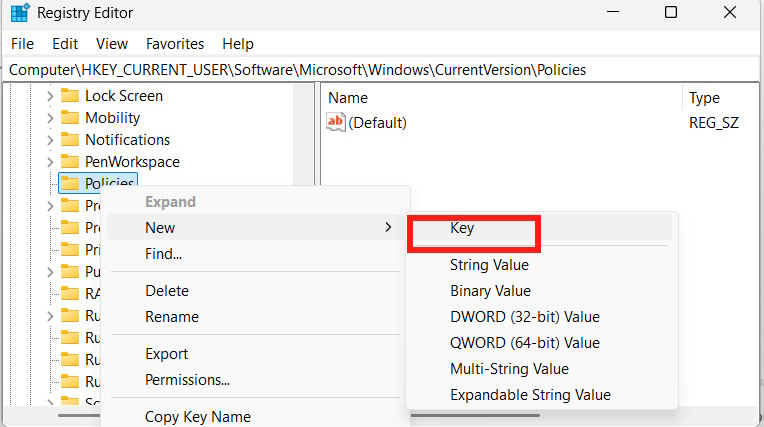
Right- click on the Policies key, select New , and then select Key to create a new key. We will name the new key Explorer .
Step 3:
Right -click the Explorer key again and select DWORD (32-bit) Value to add a new value.
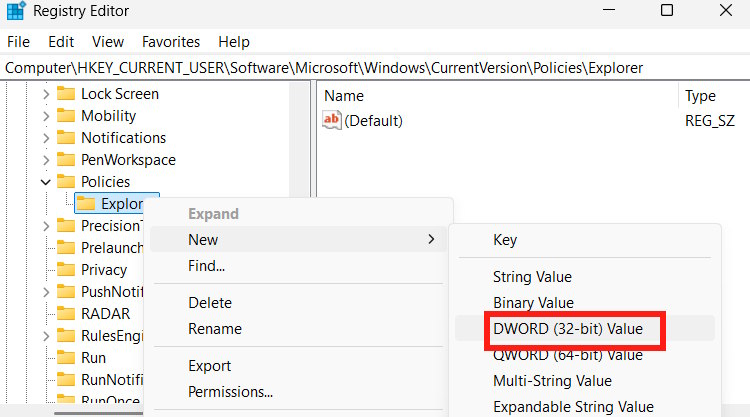
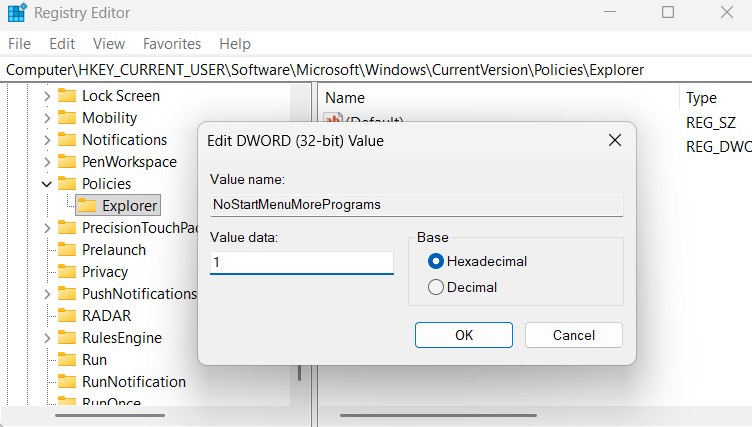
Now you name the new price as NoStartMenuMorePrograms .
Step 4:
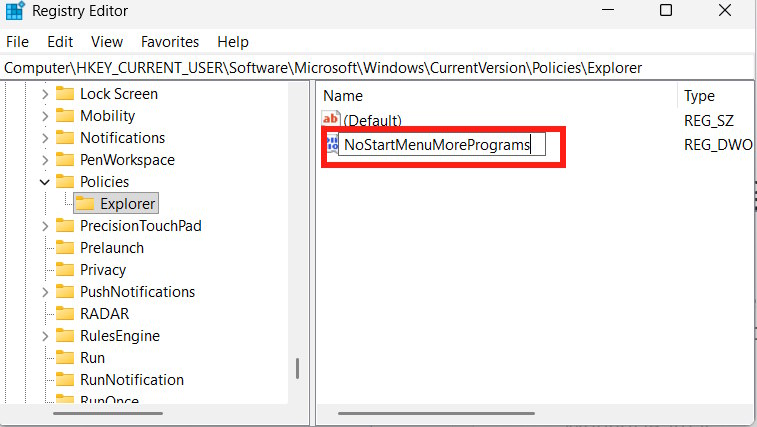
Double-click on the NoStartMenuMorePrograms value , set it to 1, and click OK to save.
Restart your computer for the changes to take effect.
After completing these steps, when you open the Start menu, the "All apps" list will no longer be displayed. Only pinned apps will be shown. You will have to use Windows Search to manually find apps if they are not pinned to the Start menu.
Was this article helpful?
Your feedback helps us improve.
Related Articles
 How to hide the list of most used applications in Windows 10 Start menu3 minutes read
 How to hide the application list on the Windows 10 Start Menu2 minutes read
 Instructions to remove the All apps option on Windows 10 Start Menu4 minutes read
 How to Hide Suggestions in Windows 11 Start Menu2 minutes read
 Windows 11 is hiding a second Start menu: Why should you use it?7 minutes read
 How to create a folder and hide the Start menu application list Windows 10 Creators4 minutes read
Reader Comments 0
Sign in with email or Google to join the discussion.