Add-ins in Excel: How to install and remove
The features in Excel are many but not enough, with complex functions or features in Excel without you, you can install Add-ins to manipulate and process data more easily. When not needed, you can remove Add-in from Excel.
Table of Contents
The features in Excel are many but not enough, with complex functions or features in Excel without you, you can install Add-ins to manipulate and process data more easily. When not needed, you can remove Add-in from Excel.
The following article shows you how to install and remove Add-ins in Excel 2010.
Install the Add-in
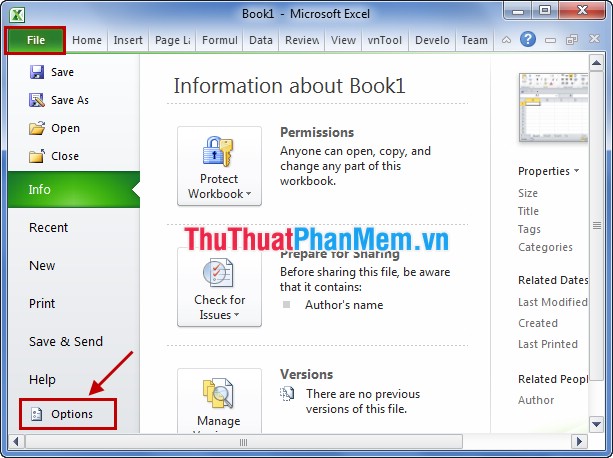
Step 1: Open Excel and select File -> Options to open Excel Options .
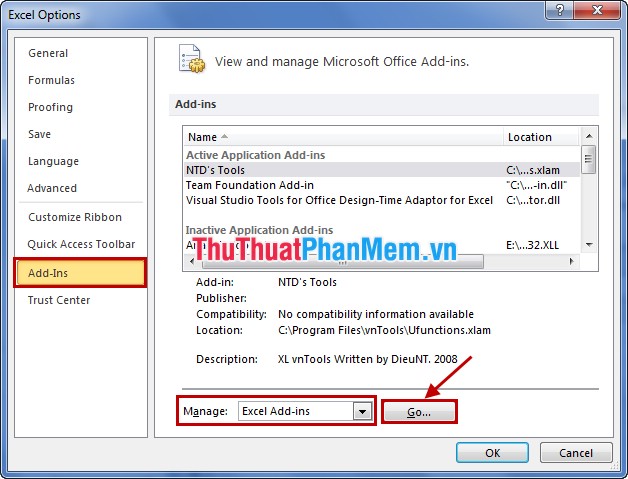
Step 2: In Excel Options, select Add-Ins in the left menu. In Add-Ins, go to Manage, select Excel Add-ins , and then click Go .
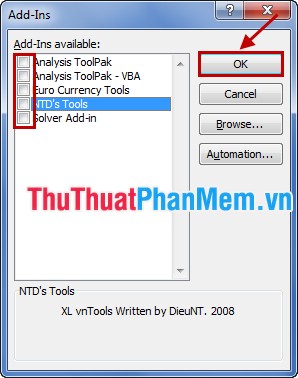
Step 3: In the dialog box Add-Ins you can select the default Excel Add-Ins by checking the box before the Add-Ins you want to add.

In addition, you can download other Add-ins to your computer and click Browse to select the Add-in .

Click OK to install the Add-in in Excel, then you restart Excel.
Uninstall the Add-in
Follow the same steps above to open the Add-Ins dialog box. In the dialog box Add-Ins, if you want to remove any Add-in you deselect in the box before that Add-in. Then click OK to remove.
Close all Excel files and restart.
The article has shown you how to install and remove Add-in in Excel, you can easily use advanced features that Excel does not yet support. Therefore, the processing of data in Excel will be faster and more efficient. Good luck!
Was this article helpful?
Your feedback helps us improve.
Related Articles
 MS Excel - Lesson 14: Install and remove free Excel Add-ins2 minutes read
 Instructions on how to remove table formatting in Excel5 minutes read
 How to remove spaces in Excel5 minutes read
 How to remove duplicates in excel5 minutes read
 How to delete dots in a series of numbers on Excel3 minutes read
 How to install Word and Excel in Office 2016 only3 minutes read
Reader Comments 0
Sign in with email or Google to join the discussion.