Snipping Lens
If you love Google's Circle to Search feature on Android, you'll love using Snipping Lens, a free Windows app that turns the Snipping Tool into a visual search tool.
If you love Google's Circle to Search feature on Android, you'll love Snipping Lens, a free Windows app that turns the Snipping Tool into a visual search tool. It uses Google Lens to quickly analyze screenshots, extract text, translate languages, or identify objects, all from your default Windows browser.
Snipping Lens: Bring Google Circle to Search on Windows
For those familiar with Android's Circle to Search, this is a feature jointly developed by Google and Samsung that, when enabled, reverse searches images online. Snipping Lens is a similar free, open-source app on GitHub, but for Windows 11 and 10 (and Linux).
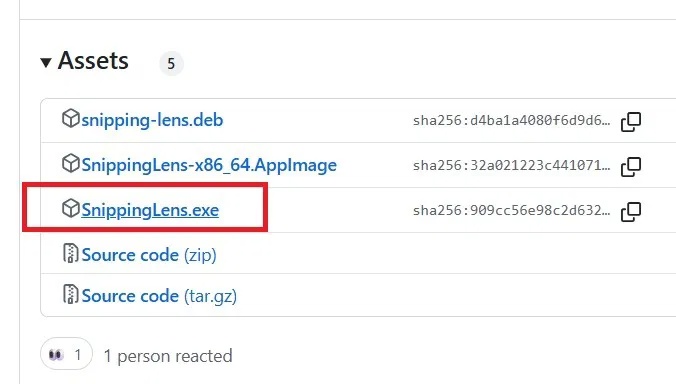
You can install the app from the GitHub Release page. Windows users should select the asset file named "SnippingLens.exe". You will receive a SmartScreen warning because this is an open source, non-Windows application. Proceed with the installation to complete.
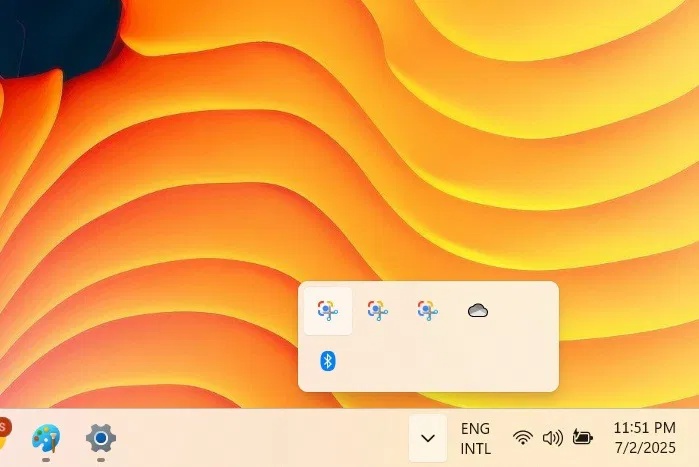
The way Snipping Lens works is simple. Open the Snipping Tool as usual – with the keyboard shortcut Win + Shift + S , or activate it from the system tray.
Take a screenshot as usual, except this time it doesn't just save to your Windows desktop. The Snipping Lens app runs in the background, uploading the screenshot to Litterbox, a server that automatically deletes it after an hour. A Google Lens window will then open in your default browser, such as Google Chrome , providing more detailed information, as listed below.
Instant image search with Google Lens
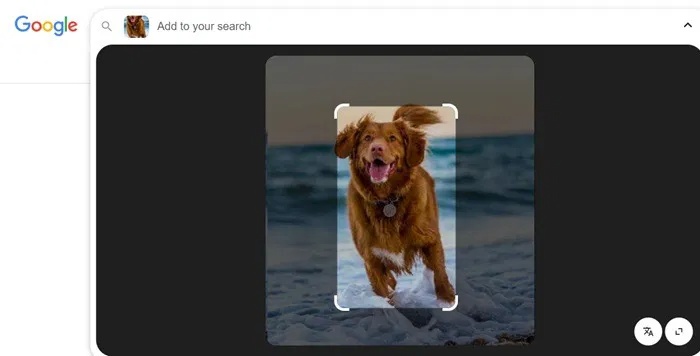
After you take a screenshot, a Google Lens tab will open in your browser, highlighting the image. You can drag the borders around a specific area for further analysis using the circles in the lower right corner. Once you adjust the selection, the instant results will appear below.
Windows Snipping Tool offers Bing image search, but its interface is clunky and images don't upload automatically because it requires an extra step. No one likes to upload screenshots manually, which is why most users hesitate to use the advanced features of the Snipping Tool.
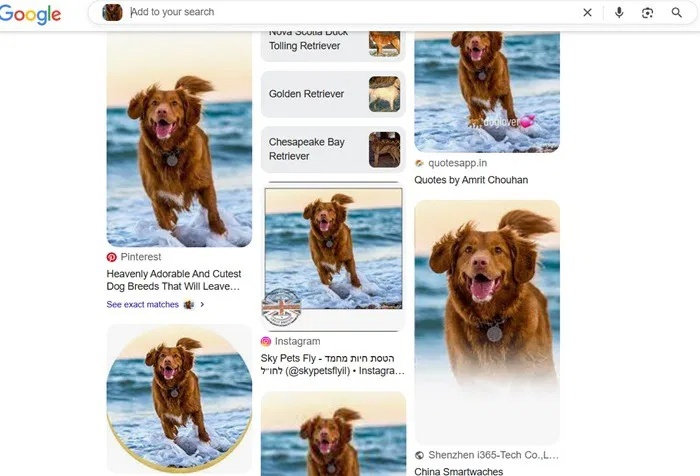
Furthermore, with Bing Search, search results appear on the right side, which feels unnatural when browsing image search results. With Snipping Lens using Google Lens, results appear below the screenshot or selected area, giving a more intuitive feel.
Identify and describe screenshots
With Snipping Lens integrated into the Snipping Tool, Google Lens text prompts help you identify objects. You can focus on a specific part of the screenshot to determine exactly what it is. Combined with Google's AI Overviews, this feature provides detailed results without leaving the website.

When you have multiple browser tabs open, this feature has many uses. For example, you can decipher complex code or analyze a circuit diagram. All of this information is now just a screenshot away.
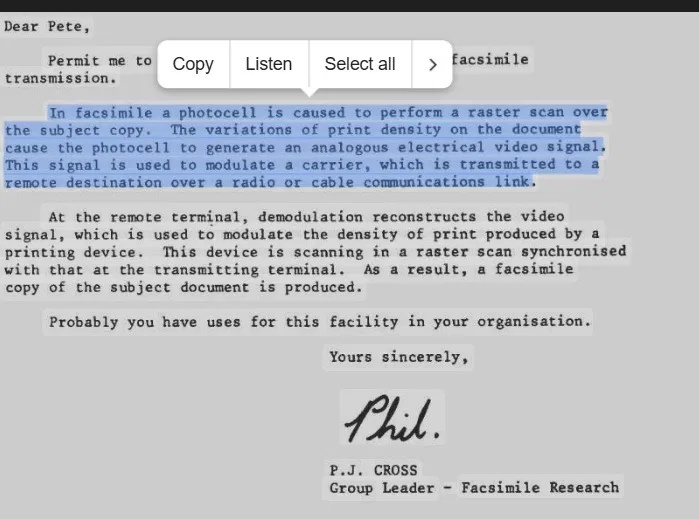
Get OCR directly in Snipping Tool
Snipping Tool's Text Actions feature recognizes text from obvious sources but struggles to extract OCR text from images, especially scanned documents. With Snipping Lens, you can easily extract text from images, handwriting, scanned documents, and PDFs whenever you want.
Multilingual translation in screenshots
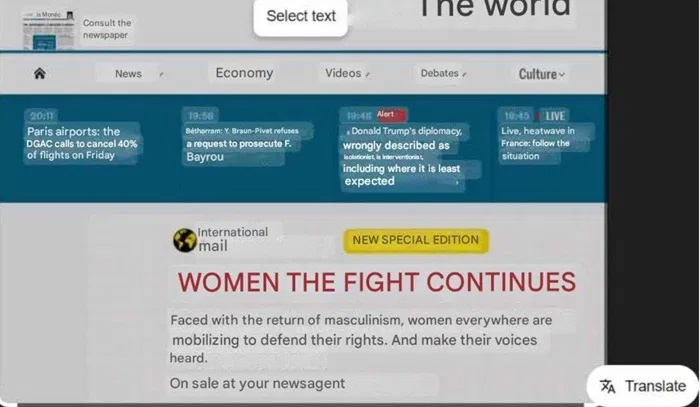
Circle to Search's translation feature in Windows may seem simple at first, but it really comes in handy when you come across websites or documents in an unfamiliar language. This is the first time such a useful feature has been introduced in a screenshot utility application on Windows.
All you have to do is take a screenshot and use the Translate option to see the results instantly without leaving the website tab.
Product Identification in E-Commerce
If you use the Circle to Search feature on Windows on a site like Amazon, you don't have to copy-paste product information anymore. It's much faster to zoom in on an interesting section and instantly get a Google search result that tells you what it does and where it is. Depending on how the Snipping Tool is set up in Windows, you can hit the Print Screen key or just crop the desired section to get the content you need.
Did you know that you can also record your screen as a GIF using the Snipping Tool in Windows 11 ?
- How to use Snipping Tool on Windows 10 full set
- Steps to Fix Snipping Tool Not Working Error On Windows
- Cannot find Snipping Tool on Windows 10? This is how to fix it
- How to fix Snipping Tool keeps showing error
- Why choose a 50mm lens for newbies?
- Snipping Tool cannot be used, summarize effective ways to fix it
- Instructions for enabling or disabling Snipping Tool in Windows 10
- How to annotate screenshots using Snipping Tool
- 5 new Snipping Tool features that make it even more useful.
- Why do people abandon Snipping Tool on Windows to switch to ShareX?
- How to transfer the Microsoft Authenticator app to a new phone
- How to install and run Arduino IDE on Raspberry Pi
- Things to know about CHIA the 'green Bitcoin' craze
- How to set up a motion detection webcam in Ubuntu
- Instructions on how to add and use HTTP Request Nodes in n8n
- 5 Best Dark Web Browsers for Your Device
- Accessibility check prompt for code
- 10 essential LLMOps tools every AI team should have.
- 7 ways to turn a smartphone into a PC
- Core commands in Claude Code
-
 How to fix Snipping Tool keeps showing error
-
Snipping Tool finally supports GIF files
-
Instructions for recording screen using Snipping Tool on Windows 11
-
Instructions for editing screen recording videos on Snipping Tool
-
How to Edit Photos in Paint from the Snipping Tool
-
3 simple and effective ways to fix Snipping Tool not working error
 How to fix Snipping Tool keeps showing error
 Snipping Tool finally supports GIF files
 Instructions for recording screen using Snipping Tool on Windows 11
 Instructions for editing screen recording videos on Snipping Tool
 How to Edit Photos in Paint from the Snipping Tool
 3 simple and effective ways to fix Snipping Tool not working error