Steps to Fix Snipping Tool Not Working Error On Windows
The Snipping Tool is an important feature of any Windows operating system; it allows users to capture, edit and save screenshots directly to PC.
Table of Contents
However, since Windows Vista, the program began to behave unstable. Even when switching to Windows 10 and 11, Snipping Tool still tends to run into strange problems. Such incidents over and over again make the Snipping tool not working error to appear more and interfere with the workflow.
TipsMake found out some reasons why Snipping Tool stops working and how to solve them easily. Let's find out more details through the article below!
1. Restart Windows File Explorer
Let's start by getting to the root of the problem. Since the Snipping Tool is a subset of the File Explorer service, it's very likely that the problem stems from there. If File Explorer is unresponsive, neither is the Snipping Tool.
As a result, restarting File Explorer can nullify anything that prevents the Snipping Tool from working properly. To do this, press Ctrl + Alt + Del, then select Task Manager. Alternatively, you can press CTRL + Shift + ESC to jump directly into the Task Manager.
Scroll down until you find Windows Explorer and right click on it. In the drop-down menu that appears, select Restart.
You'll notice your desktop undergoes some weird changes while File Explorer restarts. For example, the taskbar will disappear and the desktop will go completely black. However, this is completely normal, as all these elements rely on File Explorer. When you restart the service, all of these elements are also forced to restart.
When everything is fine again, try to open the Snipping Tool and use it.

2. Run Windows Update Troubleshooter
Restarting Windows File Explorer should solve the problem for 90% of users. If not, try running Windows Update Troubleshooter. You can run it by following the instructions below:
Step 1: Open the Settings menu by pressing Win + I.
Step 2: Select Update and Security.
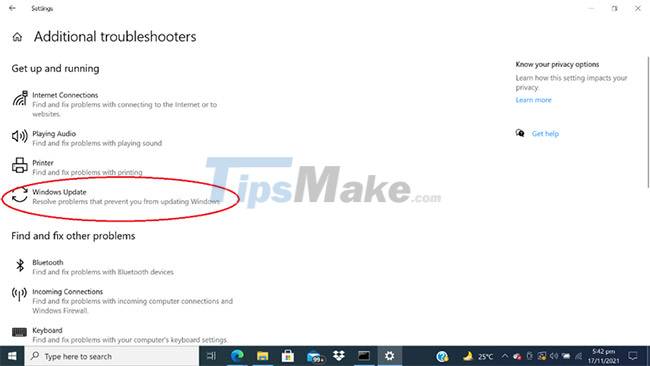
Step 3: From the panel on the left, go to Troubleshoot > Additional Troubleshooters.
Step 4: Then, select Windows Update Troubleshooter.
3. Look for the third-party software causing the problem
Sometimes, a program you have recently downloaded can interfere with the smooth operation of the Snipping Tool. If you want to find out what is causing this problem, follow the steps given below:
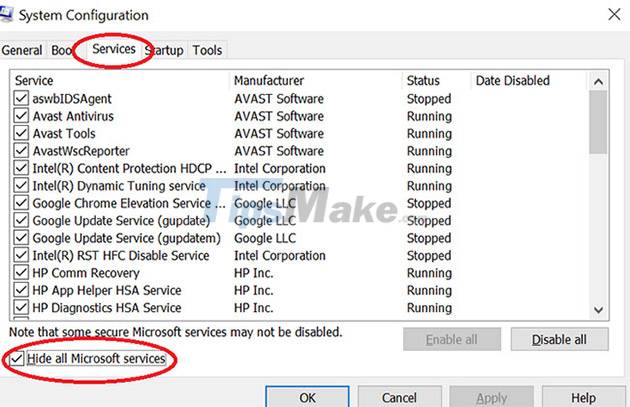
Step 1: Type System configuration in the Windows search bar and open the System Configuration control panel.
Step 2: Switch to the Services tab at the top, then select the option to hide all Microsoft services at the bottom.
Step 3: Disable any services that you think might interfere with the Snipping Tool.
Step 4: After disabling them, try running the Snipping Tool again. If it works properly, it means that the above application is in conflict with the Snipping Tool. It should be disabled to keep the Snipping Tool on Windows working properly.
4. Run the Scannow . tool
If all else fails, you can still use the scannow command to repair and recover damaged files that caused the Snipping Tool to not work properly. You can do this with the help of the Command Prompt tool.
Since the Snipping Tool is associated with taking screenshots, its importance cannot be underestimated. Screenshots are an easy way to communicate data, and not being able to use this function can be frustrating.
There is no doubt that the Snipping Tool is an integral part of the Windows operating system, so knowing how to fully utilize this functionality is also essential.
Was this article helpful?
Your feedback helps us improve.
Related Articles
 How to fix Snipping Tool keeps showing error3 minutes read
 Cannot find Snipping Tool on Windows 10? This is how to fix it7 minutes read
 3 simple and effective ways to fix Snipping Tool not working error2 minutes read
 How to use Snipping Tool on Windows 10 full set9 minutes read
 Snipping Tool cannot be used, summarize effective ways to fix it5 minutes read
 Instructions for enabling or disabling Snipping Tool in Windows 102 minutes read
Reader Comments 0
Sign in with email or Google to join the discussion.