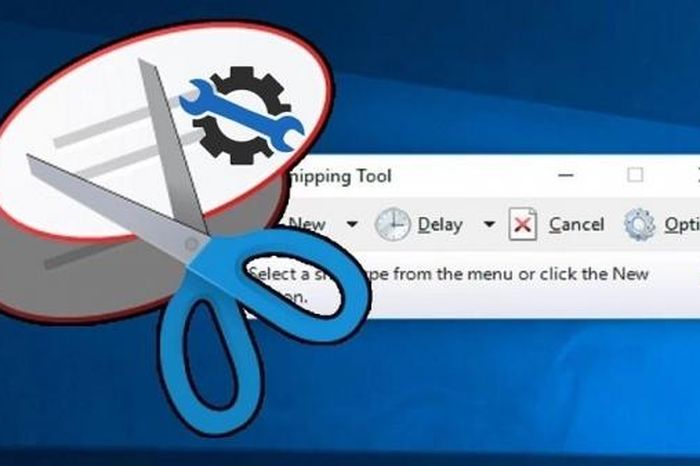
Snipping Tool cannot be used, summarize effective ways to fix it
Snipping Tool is a convenient screen capture tool on Windows and is loved by many users. Most of the time, the Snipping Tool works smoothly and is easy to use. But sometimes this tool still encounters some problems, especially after Windows Vista version.
Table of Contents
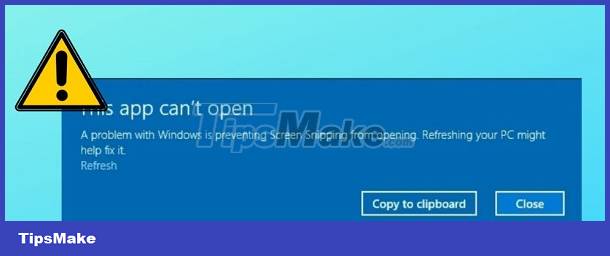
Specifically, there have been countless users experiencing the Snipping Tool not being able to be used . TipsMake will immediately take measures to help you fix it.
Detailed instructions on how to fix when the Snipping Tool cannot be used
If you are looking for a way to fix the error of missing Snipping Tool in Windows 10/11, immediately refer to my article ' Fix the error of missing Snipping Tool in Windows 10, 11 quickly and effectively '. Particularly in today's tips section, the admin will mention the problem of the Snipping Tool not being able to take screenshots and not working. To fix this error, users apply the following solutions:
1/ Restart Windows File Explorer to fix the error
One of the first quick ways you should apply is to restart Windows Explorer. Because Snipping Tool is a subset of the File Explorer service, it is possible that the problem arises from here.
You just need to press the key combination Ctrl + Alt + Del > Select Task Manager . Or an even faster way is to press the key combination CTRL + Shift + ESC to directly open the task manager. Scroll down and right-click Windows Explorer > Select Restart > After this process is complete, reopen the Snipping Tool and check to see if the problem has been fixed or not!

Note: If the Snipping Tool was working normally before and it only malfunctioned after you just downloaded a 3rd party application. There is a high possibility that this software has interfered and prevented Snipping Tool from working. So, try uninstalling this software and checking for errors.
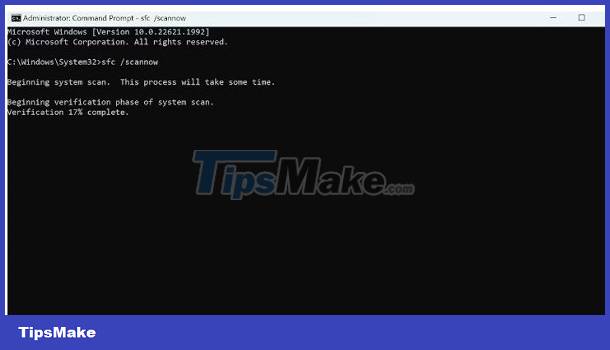
2/ Run Scannow tool when Snipping Tool Win 11/Win 10 fails
- Step 1 : Click the Start button or click the magnifying glass search icon on the taskbar > Type cmd > When the Command Prompt results display, click the Run as Administrator line to open as an administrator.
- Step 2 : Enter the command sfc /scannow and press Enter to run this command.
- Step 3 : Continue entering the snippingtool.exe command and press Enter to launch the Snipping Tool manually > After the process is completed, see if the error still exists or not!
3/ Turn off focus (Focus)
Focus, formerly known as Focus Assist could be the 'culprit' preventing the Snipping Tool from working. You should disable it if this feature is enabled.
Press the Windows + I key combination to open settings > Select System > Focus Assist > Turn off all Focus assist features > Check to see if the Snipping Tool is working again or not.

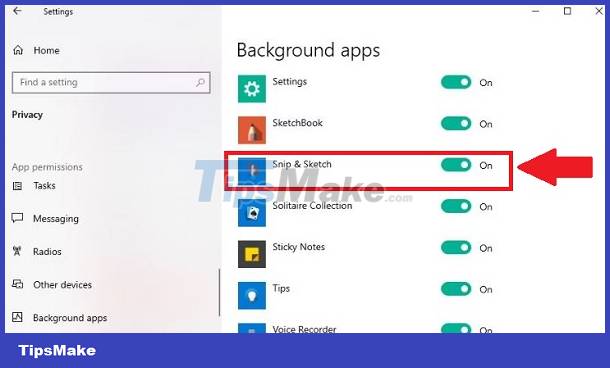
4/ Install Snipping Tool to run in the background
Snipping Tool may also not work if it lacks the necessary permissions to run in the background on Windows. Therefore, you also press the key combination Windows + I to open settings again> Select Privacy .
Then, click on Background apps in the list on the left > In the right area, search for Snip & Sketch > If you see it is in Off mode, press the switch to turn it ON .
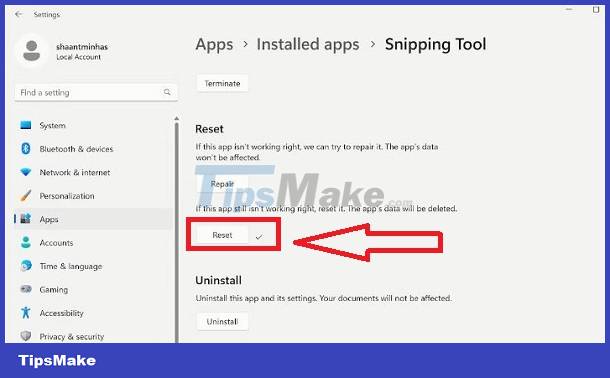
5/ Reset Snipping Tool
- Step 1 : Open Settings (Windows + I) > Select Apps > Select Installed apps .
- Step 2 : Find the Snipping tool application > Click on the Advanced options line .
- Step 3 : Find the Reset section > Click Reset in this section and continue to follow the instructions on the screen to complete the reset process.
In addition to the remedies for Snipping Tool not being able to be used as I shared above. If the error still cannot be fixed, try other basic solutions such as updating Windows, updating the video card driver, or trying another screen capture tool. Wishing you success in fixing the error!
Was this article helpful?
Your feedback helps us improve.
Related Articles
 3 simple and effective ways to fix Snipping Tool not working error2 minutes read
 How to use Snipping Tool on Windows 10 full set9 minutes read
 Steps to Fix Snipping Tool Not Working Error On Windows4 minutes read
 Cannot find Snipping Tool on Windows 10? This is how to fix it7 minutes read
 How to fix Snipping Tool keeps showing error3 minutes read
 Instructions for enabling or disabling Snipping Tool in Windows 102 minutes read
Reader Comments 0
Sign in with email or Google to join the discussion.