5 new Snipping Tool features that make it even more useful.
For someone who has been writing about technology for many years, taking screenshots is an indispensable part of the workflow..
For a seasoned tech writer, taking screenshots is an indispensable part of their workflow. Their screens are constantly flashing with captured images throughout the day. Initially, some people used the built-in Snipping Tool in Windows. However, because it lacked some basic tools like highlighting or adding elements, many tried the best screenshot applications for Windows – PicPick , Snagit , Greenshot , ShareX , and many others.
Quick markup for instant editing
Take notes even before you save the screenshot.
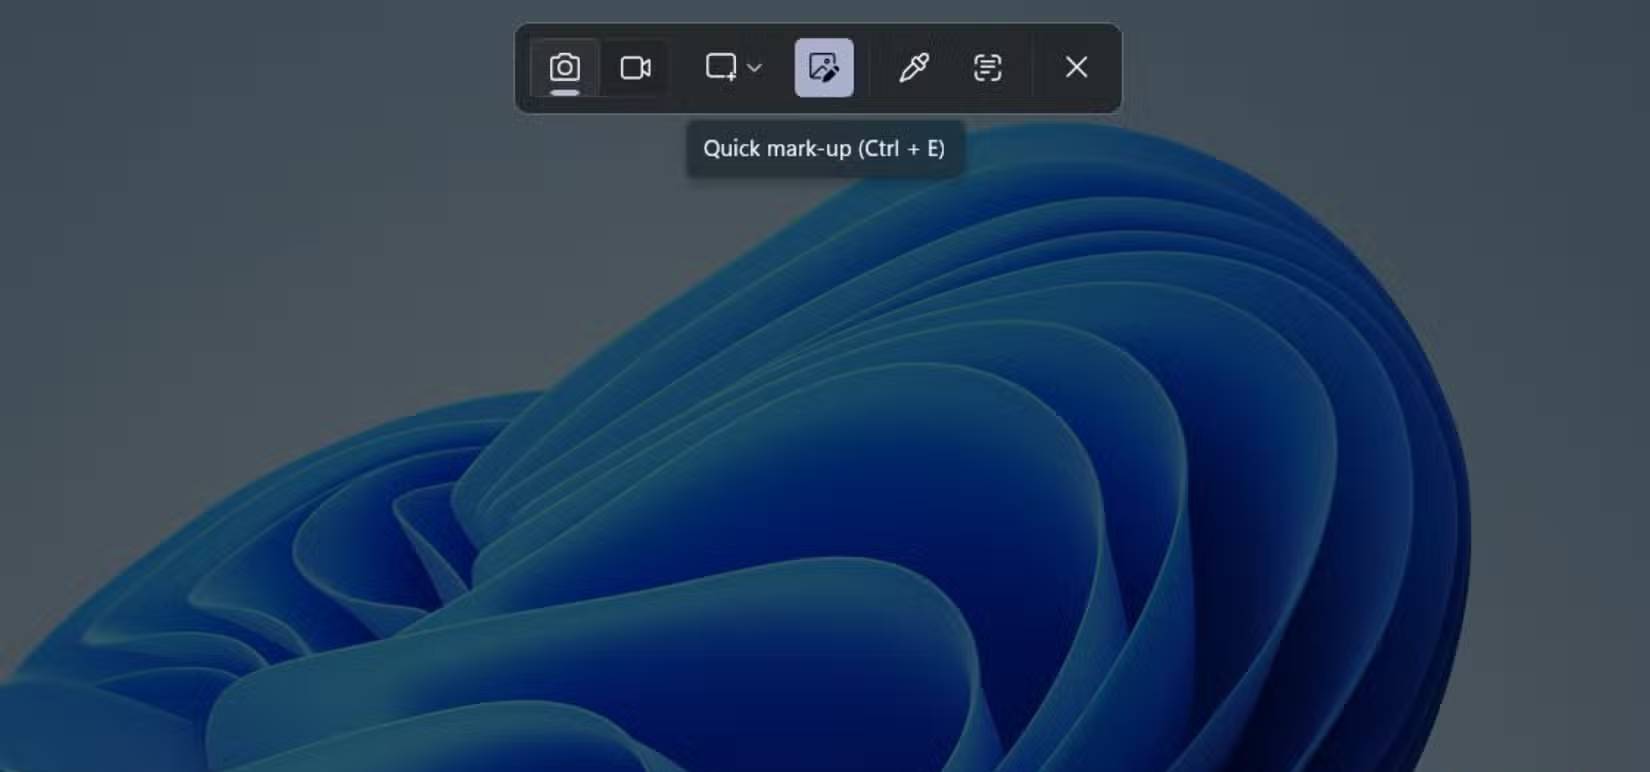
Currently, Snipping Tool has a new feature called Quick Markup, which essentially eliminates the intermediate step, in this case, a third-party editor. This means that when you press the Win + Shift + S shortcut to launch Snipping Tool, you can now edit and annotate directly within the selection before taking a screenshot.
You'll see an image icon with a pencil. Make sure you select the Rectangle option from the Snipping area options, then the Quick Markup option will appear. Now you can press Ctrl + E and then select the area you want to capture. You will be given image editing options such as eraser, add shapes, highlight, pen, visual search with Bing, and share.
Built-in color picker tool
Choose the perfect shade now!
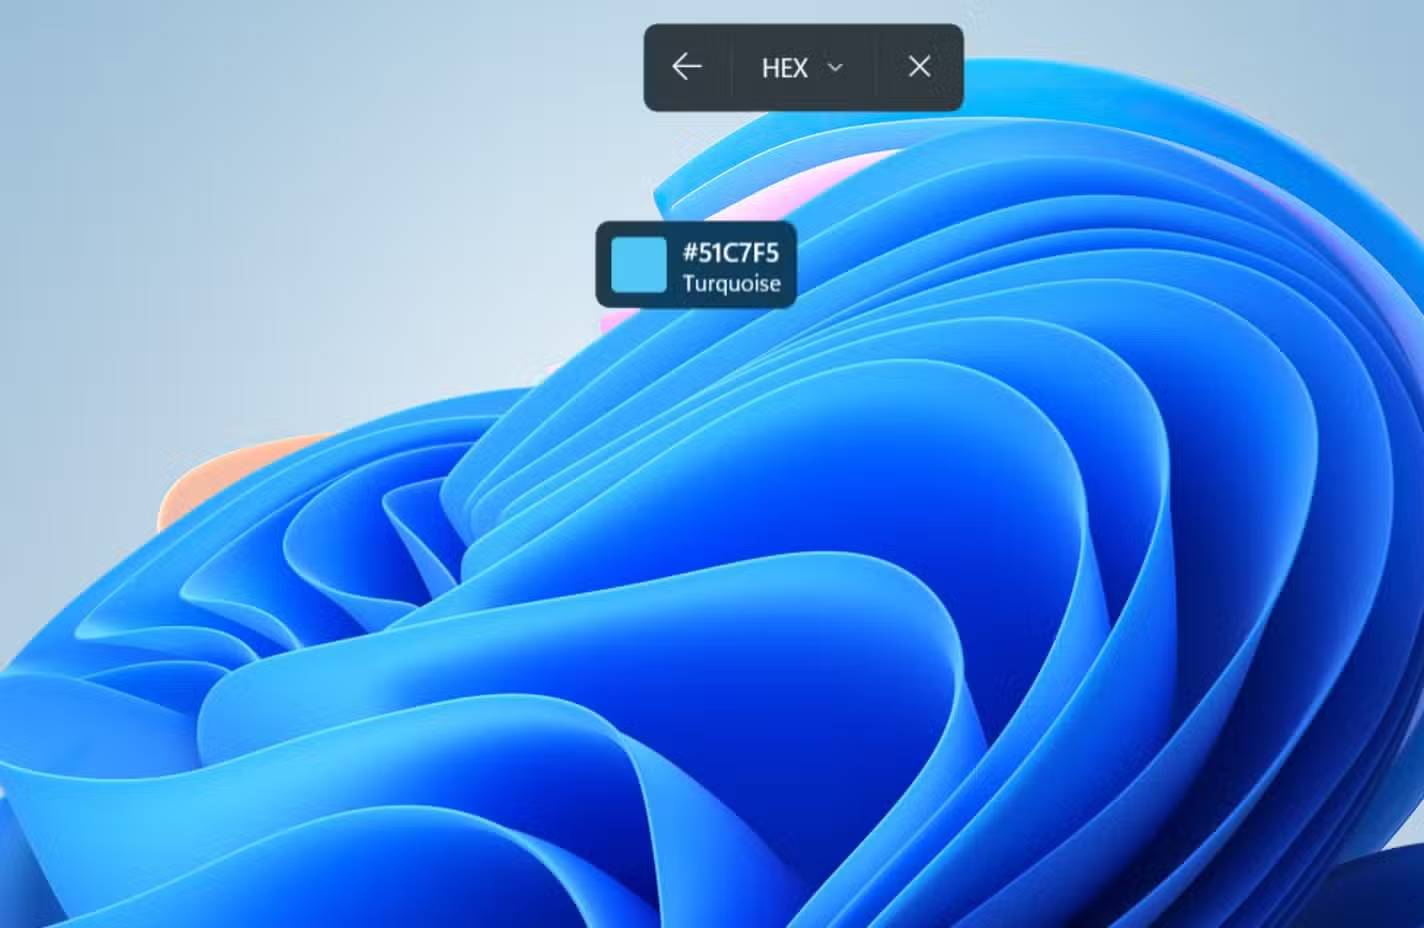
Now, you no longer need to rely on third-party tools to extract colors from your screen. Additionally, formatting posts and editing layouts that require finding the precise color shades of a logo or element can now be done using the built-in Snipping Tool.
When you launch the Snipping Tool (by pressing the Win + Shift + S keys or its icon on the Start menu), you'll see a dropper icon. Clicking on it allows you to hover over the desired color shade. Once you click on the color, it will be instantly copied to the clipboard, ready to be inserted into your CSS file.
Optical Character Recognition (OCR)
Extract and hide text easily.
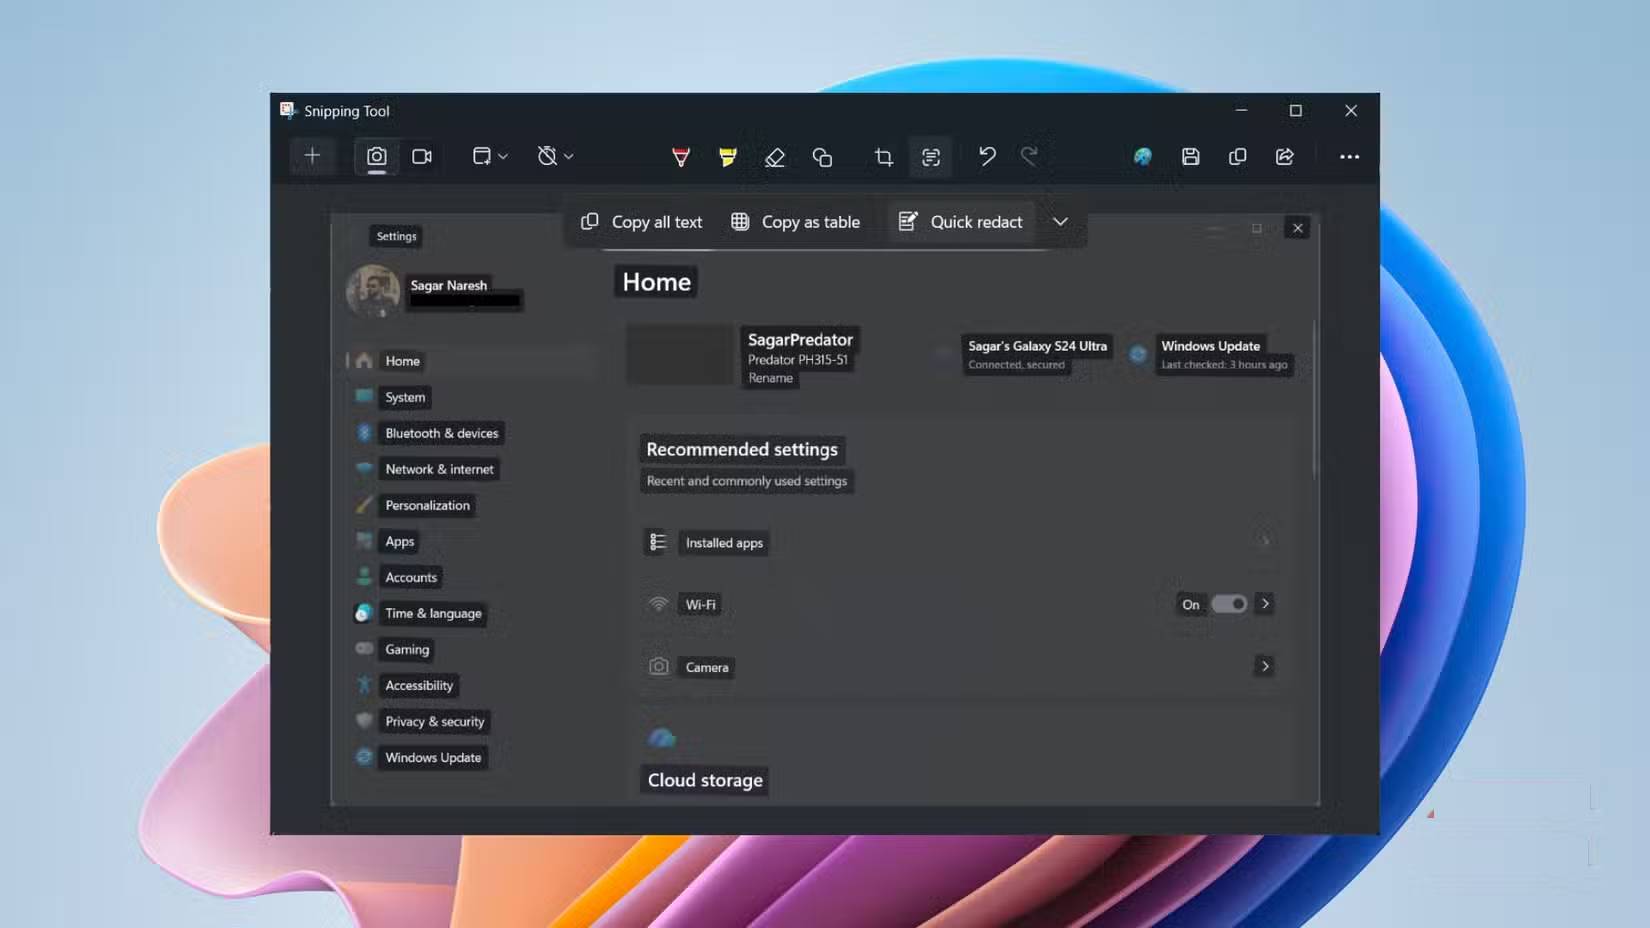
If you take a screenshot or a locked PDF file containing text, you can click the Text Actions button to copy the entire text to your clipboard. The best part is that it remembers the text's structure. For example, if you're trying to copy text from a table, the entire table will be copied, ready to paste into Word or Excel.
But that's not all. The Snipping Tool also has a Quick Redact function. With just one click, the software will automatically detect and blur sensitive information. This saves you time and effort compared to manually blurring personal information using third-party tools.
Simply take a screenshot of the software or page containing your personal information, open the Snipping Tool editor, press the OCR button , and select the Quick Redact button . All your personal information will be obscured by a black frame.
Publish recordings as animated GIFs.
Allows you to transform static instructions into dynamic images.
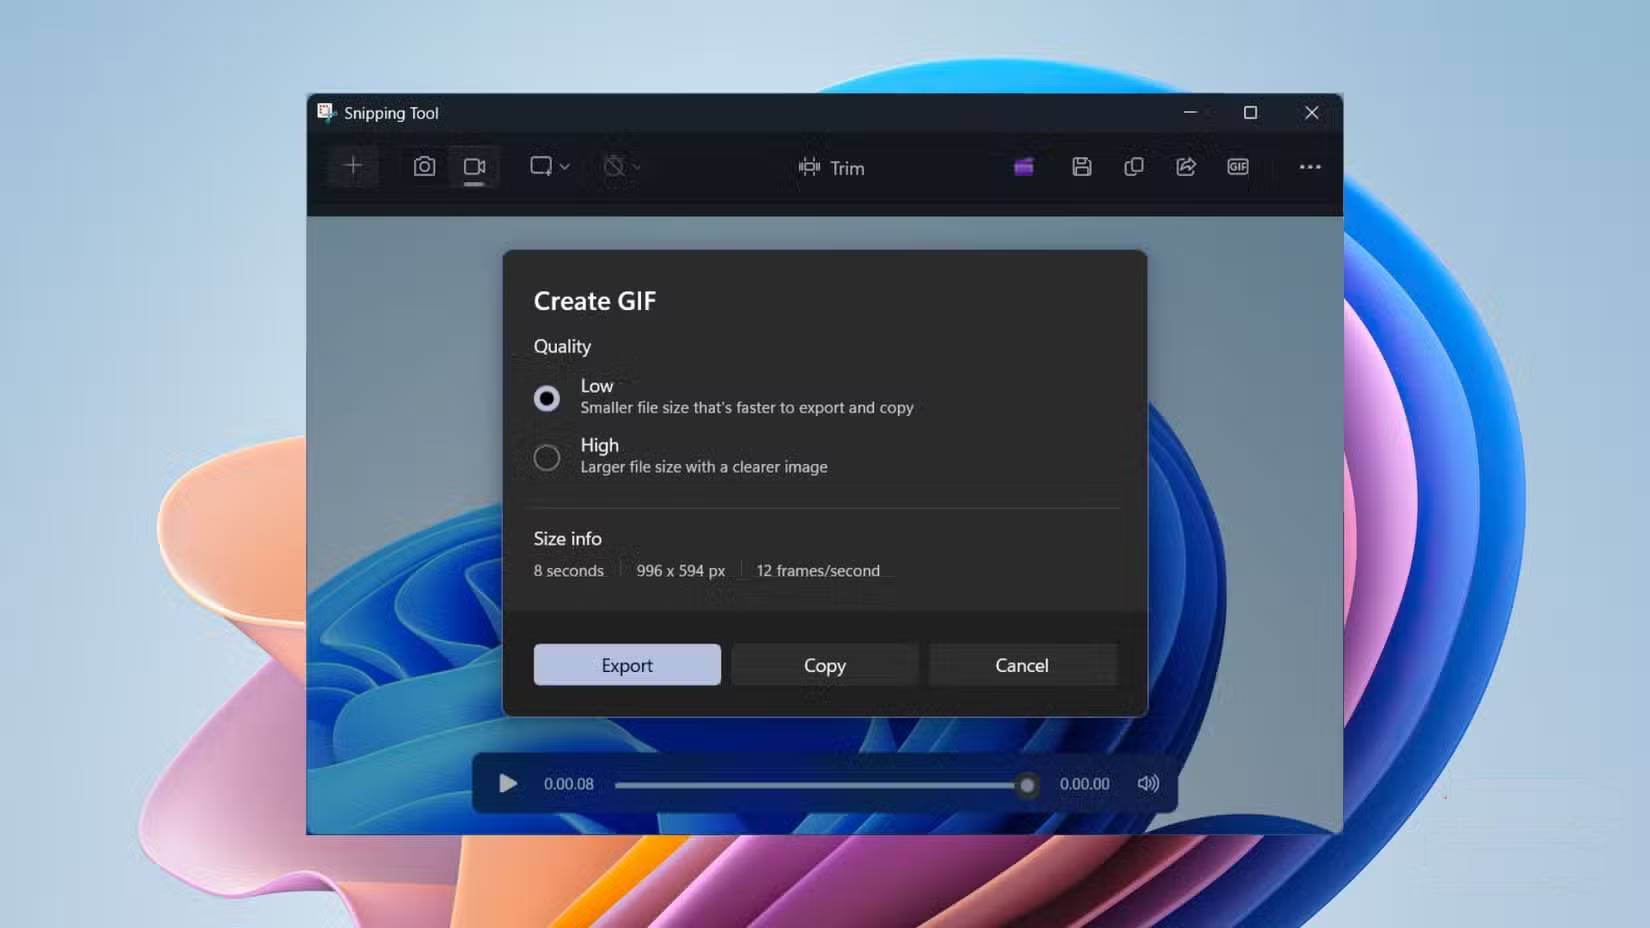
For those who frequently write guides and tutorials, static images often don't convey the full picture. They're not good enough to explain the navigation steps through complex software. Being able to quickly capture a 10-second GIF of the operation in a drop-down menu and add it directly to the document makes things much more convenient.
To do this, simply open Snipping Tool, switch to screen recording mode, select the area you want to capture, and press Start . Perform the action you want to show, and when finished, press the Stop button .
In the playback window, find the GIF icon, usually labeled " Save as GIF" . Select a quality, and you're ready to share your GIF.
A screenshot is the perfect way to keep everything in the frame.
AI automatically adjusts the capture area to create a tighter frame for the content.
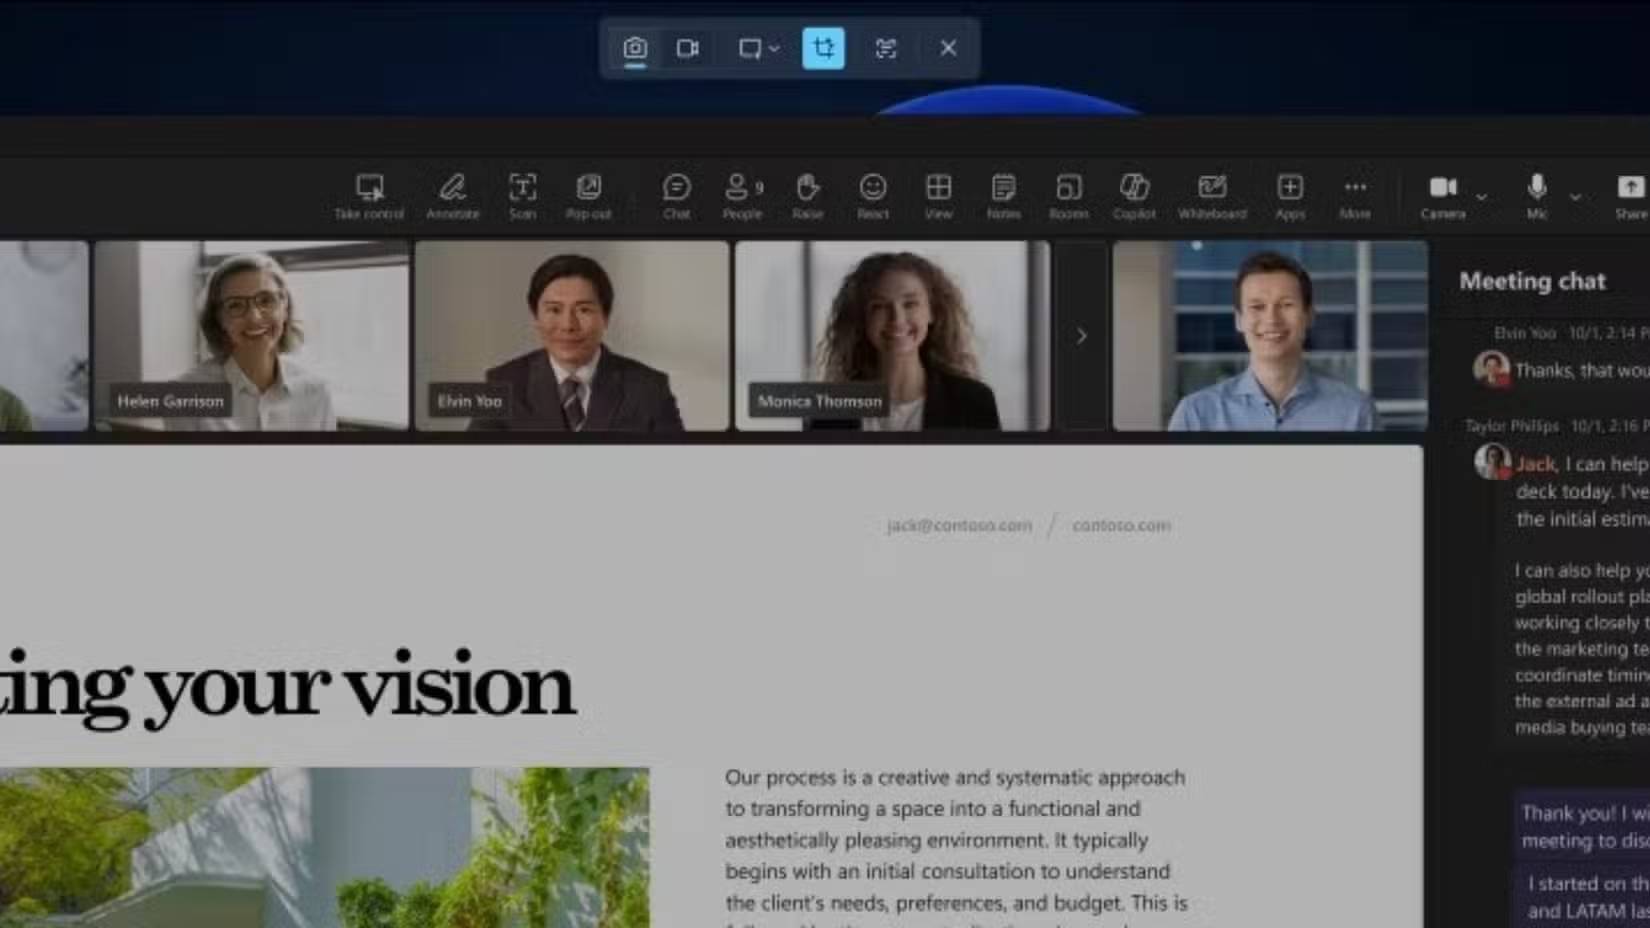
With Perfect Screenshot, when you select an area on the screen, the built-in AI analyzes the content and automatically crops the edges to perfectly frame the subject. Whether it's a specific application window, a dialog box, or a piece of text.
This eliminates the need to review screenshots and edit them to look more professional. You'll get a perfect image every time, eliminating the trial-and-error process of manual cropping. According to ASUS, supported processors include Snapdragon X Elite/Plus, Intel Core Ultra 200V series, and AMD Ryzen AI 300 series.