How to turn off automatic saving of Snipping Tool screenshots
Snipping Tool saves all screenshots. Here's how to turn off automatic screenshot saving on Snipping Tool..
By default, Snipping Tool saves all screenshots in the Screenshots folder, or a folder you specify. This is sometimes unnecessary because the images you capture will be saved to the clipboard for pasting into other content. Here's how to turn off automatic screenshot saving on Snipping Tool.
Instructions to turn off saving Snipping Tool screenshots
Step 1:
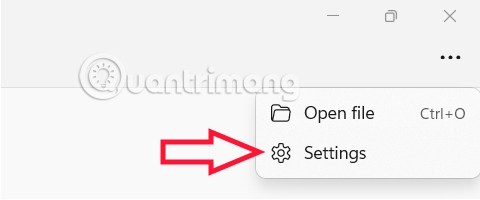
Open Snipping Tool on your computer, then select the 3-dot icon and click Settings to adjust the settings.
Step 2:
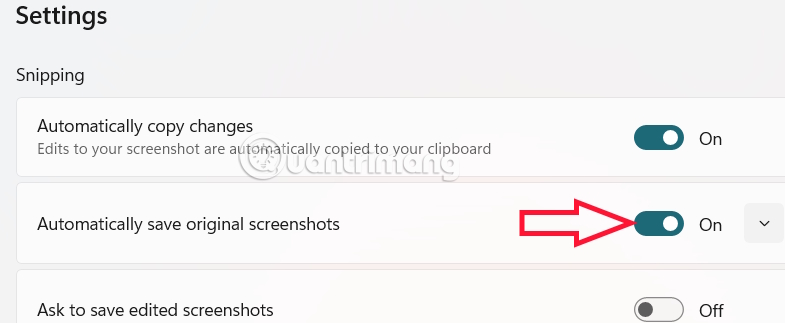
Switch to the settings for the screenshot program on your computer. Now you will see that the automatic saving mode of screenshots from Snipping Tool is enabled .
Turn off the Automatically save original screenshots setting to turn off saving screenshots on Snipping Tool.
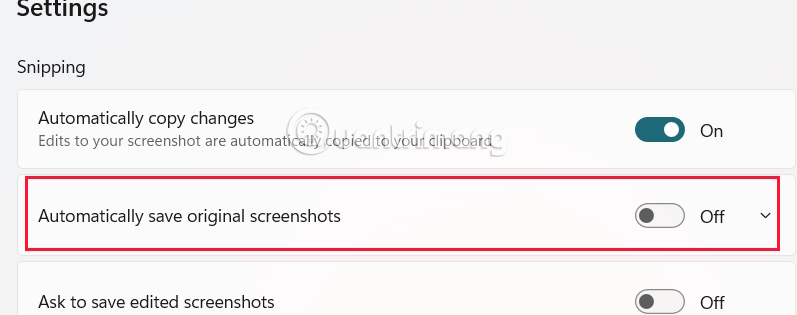
This setting will prevent Snipping Tool from automatically saving unedited screenshots, instead of copying them to your hard drive, you can just copy them to your clipboard instead. To keep a permanent copy, you can edit the image using any of the editing options and press the Save button on the application's toolbar.