PowerPoint 2019 (Part 31): Rehearsing and Recording Your Presentation
PowerPoint offers several tools that can help you practice creating slideshows.
Table of Contents
There are many things to consider when preparing a presentation. How long will it last? What will you say? Fortunately, PowerPoint offers several tools that can help you practice your slideshow. You can even record a transcript with narration, allowing the audience to watch the presentation for themselves.
Rehearsing the slide presentation time
Rehearsal time can be useful if you want to set up your presentation to play at a specific speed without having to manually click through slides. It also gives you a chance to elaborate on your points. Using this feature, you can save the time for each slide and animation. PowerPoint will then automatically play the presentation using these pre-set timers.
Rehearsing is often one of the final steps in creating a polished presentation. If you've never given a slideshow presentation before, you might want to revisit the article: Presenting a Slideshow to get familiar with the basics.
Practice your presentation time.
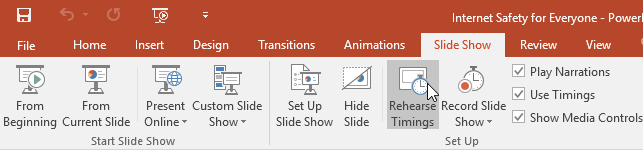
1. Go to the Slide Show tab , then click the Rehearse Timings command.
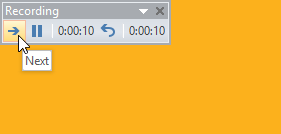
2. You will be taken to full-screen view of the presentation. Practice presenting the slideshow. When you are ready to move to the next slide, click the Next button on the Recording toolbar in the upper left corner. You can also use the right arrow key on your keyboard.

3. When you reach the end of the program, a dialog box will appear showing your total presentation time. If you are satisfied with that time, click Yes.

4. The time will be saved. The next time you give a presentation, PowerPoint will use this time to automatically transition between slides.
If you need multiple attempts to adjust the timing, the Recording toolbar can be used to restart on a slide. To pause the timer, click the Pause button. No actions taken while the timer is paused count toward the recording time. To record the timing on the current slide, click the Repeat button.

Record the slideshow.
The Record Slide Show feature is similar to the Rehearse Timings feature , but it's a bit more comprehensive. If you have a microphone for your computer, you can record narration for the entire presentation. This is very useful if you plan to use your slideshow as a self-running presentation or video.
How to record a slideshow
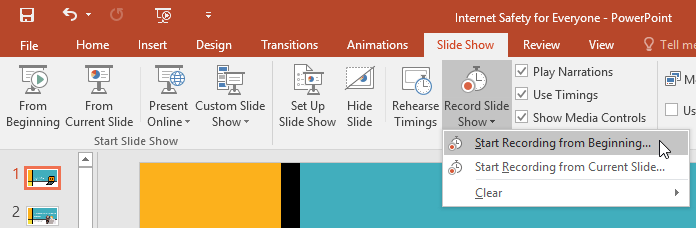
1. From the Slide Show tab, select the Record Slide Show drop-down arrow , then choose Start Recording from Beginning or Start Recording from Current Slide .
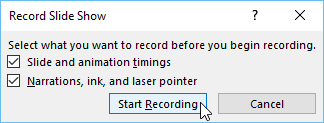
2. A dialog box will appear. Select the desired options, then click Start Recording. Remember that you can only record narration if you have a microphone connected to your computer.
3. Your presentation will appear in full-screen mode. Proceed with the presentation. Make sure to speak clearly into the microphone if you are recording your narration.
4. When you're ready to move to the next slide, click the Next button on the Recording toolbar or use the right arrow key.
5. When you reach the end of the program, PowerPoint will close full-screen mode.
6. Your slide time and narration are now part of the presentation. Slides with narration will be marked with a speaker icon in the bottom right corner.

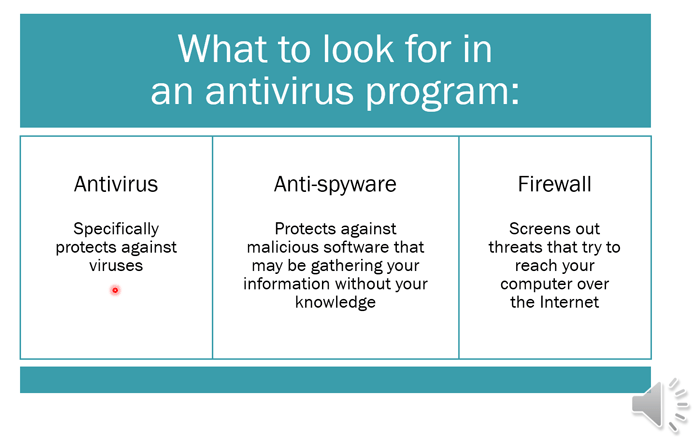
In recorded slideshows, the mouse cursor doesn't appear in the final product; therefore, if you want to specify something, you'll need to use the laser pointer feature. Simply hold down Ctrl on your keyboard while you click and hold the mouse. The cursor will appear as a small red dot.
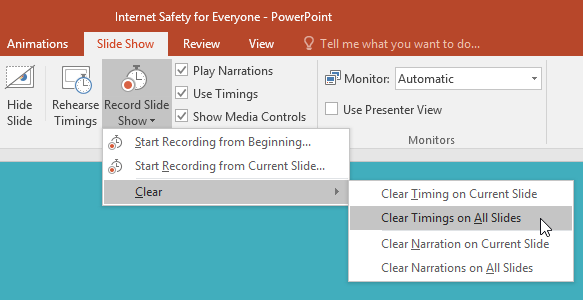
How to remove timestamps or narration from a slide
If you change your mind about including timestamps or narration in a slide, you can easily remove one or both of these elements. You can delete them from the entire presentation or just the current slide.
To do this, simply go to the Slide Show tab, click the Record Slide Show drop-down arrow , hover over the Clear option , and then select the desired option from the menu.
Was this article helpful?
Your feedback helps us improve.
Related Articles
 PowerPoint 2019 (Part 25): Evaluating Your Presentation4 minutes read
 PowerPoint 2019 (Part 3): Saving your presentation9 minutes read
 PowerPoint 2019 (Part 2): Creating and Opening Presentations5 minutes read
 How to record and record a PowerPoint presentation3 minutes read
 PowerPoint 2019 (Part 11): Presenting Slideshows7 minutes read
 How to Create a PowerPoint Presentation11 minutes read
Reader Comments 0
Sign in with email or Google to join the discussion.