Table of Contents
Explore powerpoint 2019 (part 11): presenting slideshows, including the key concepts, practical examples, important considerations, and useful guidance.
Present a slideshow
Before presenting your slideshow, you'll need to think about the type of equipment that will be available for your presentation. Many presenters use projectors while giving presentations, so you might want to consider using one as well. This allows you to control and preview the slides on one screen while presenting them to your audience on another screen.
How to start a slideshow
There are several ways you can start your presentation:
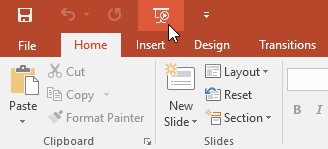
- Click the Start From Beginning command on the Quick Access Toolbar or press the F5 key at the top of your keyboard. The presentation will then appear in full-screen mode.
- Select the Slide Show view command at the bottom of the PowerPoint window to start the presentation from the current slide.

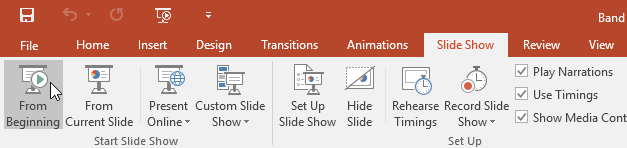
- Go to the Slide Show tab on the Ribbon to access additional options. From here, you can start your presentation from the current slide and access advanced presentation options.
How to move forward and backward through slides
You can move to the next slide by clicking the mouse or pressing the spacebar on your keyboard. You can also use the arrow keys on your keyboard to move forward or backward in the presentation.
You can also hover your mouse over the bottom left corner and click the arrow to go back to the previous slide or move to the next slide.

How to stop a slideshow
You can exit presentation mode by pressing the Esc key on your keyboard. You can also click the Slide Show Options button in the bottom left and select End Show.
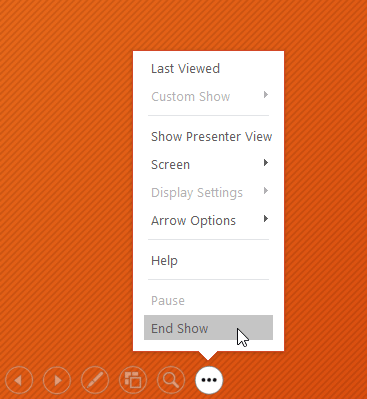
The presentation will also end after the last slide. You can click or press the spacebar to return to Normal view.

Presentation tools and features
PowerPoint provides convenient tools that you can use while presenting your slideshow. For example, you can change the mouse cursor to a pen or highlighter to draw attention to items on the slide. Additionally, you can navigate to slides in your presentation or access other programs from the taskbar if needed.
How to display the taskbar
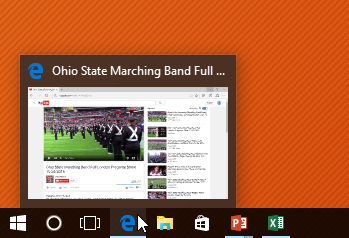
Sometimes you may need to access the internet or other files and programs on your computer while giving a presentation. PowerPoint allows you to access your taskbar without ending the presentation.
1. Locate and select the Slide Options button in the bottom left corner.
2. Select Screen , then click Show Taskbar.
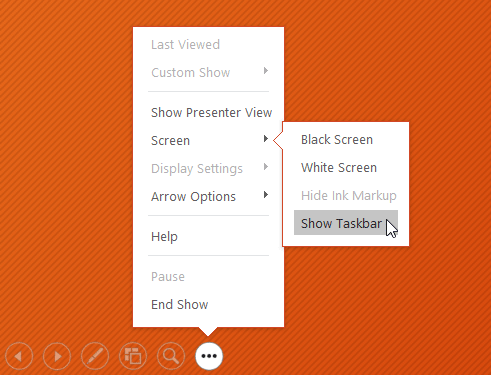
3. Your taskbar will appear. Choose a program you want to open, such as a web browser. When you're finished, close the window or click the PowerPoint icon on the taskbar to return to the presentation.
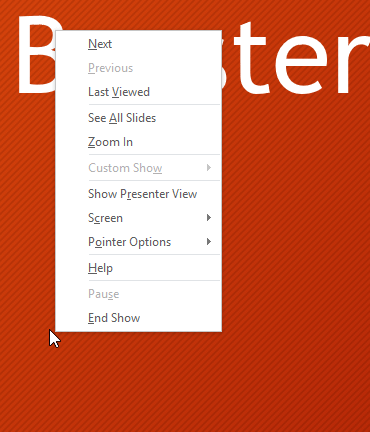
Slide options
You can also access any of the menu items above by right-clicking anywhere on the screen during the presentation.
How to move to a non-contiguous slide
You can skip to the slides out of order if needed.
1. Find and select the See All Slides button in the bottom left corner.

2. Thumbnail versions of each slide will appear. Select the slide you want to move to.
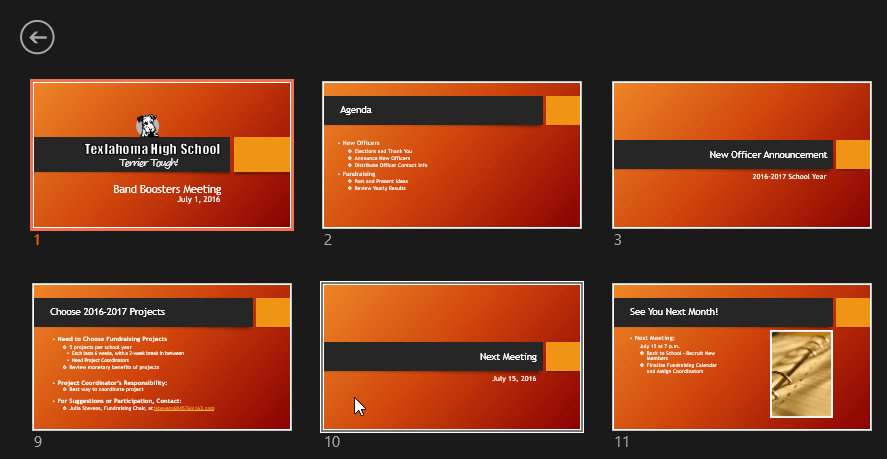
3. The selected slide will appear.
How to access drawing tools
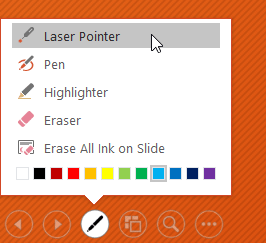
Your mouse cursor can act like a pen or highlighter to draw attention to items on a slide.
1. Locate and select the Pen Tools button in the bottom left corner.
2. Choose either Pen or Highlighter according to your preference. You can also select a different color from the menu.
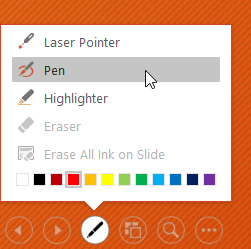
3. Click and drag your mouse to select slides. You can also press Ctrl + P on your keyboard to access the pen tool while presenting slides.

You can also use the laser pointer feature to draw attention to certain parts of the slide. Unlike pens and markers, a laser pointer will not leave marks on the slide. To use the laser pointer, select it from Pen Tools or press and hold the Ctrl key along with the left mouse button.
How to remove markers
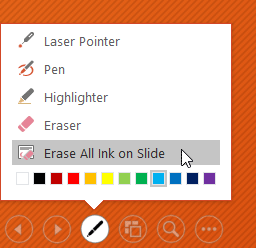
1. Locate and select the Pen Tools button in the bottom left corner.
2. Select Eraser to delete individual marks or select Erase All Ink on Slide to delete all.
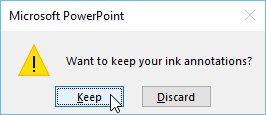
At the end of the slideshow, you will also have the option to Keep or Discard any marks made during the presentation. If you keep the marks, they will appear as objects on the slide in Normal view.
Presenter view
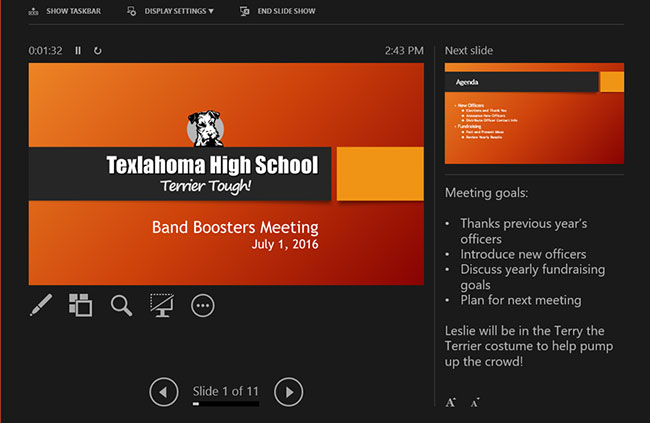
If you're presenting your slideshow using a second screen—like a projector—you can use Presenter View. Presenter View gives you access to a special on-screen control feature that your audience won't see, allowing you to easily refer to slide notes, preview upcoming slides, and so on.
How to access Presenter view
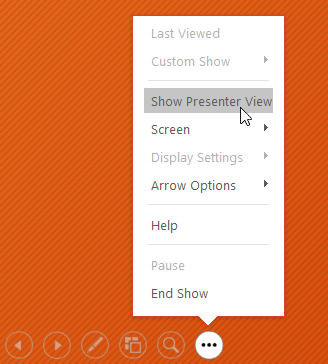
Start the slideshow as usual, then click the Slide Options button and select Presenter View. You can also press Alt + F5 on your keyboard to start the slideshow in Presenter View.
Presenter view:
Slideshow setup options
PowerPoint offers many different options for setting up and playing slideshows. For example, you can set up an unattended presentation that can be displayed at a kiosk and have the slideshow loop continuously.
How to access slideshow settings options
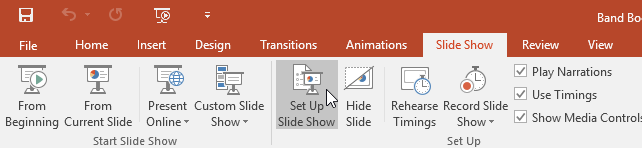
1. Select the Slide Show tab, then click the Set Up Slide Show command.
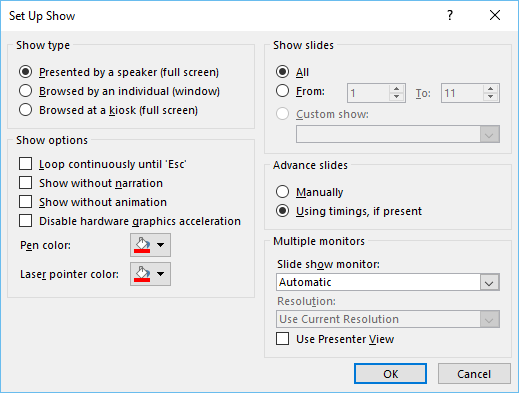
2. The Set Up Show dialog box will appear. From here, you can select the desired options for your presentation.
These are the different options for setting up and playing a slideshow.
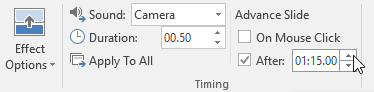
To customize the slides in a more advanced way, you will need to adjust the display time of each slide on the Transitions tab.
Final Thoughts
Understanding powerpoint 2019 (part 11) makes it easier to evaluate the information and apply the most relevant recommendations. Focus on the key points above and verify details that may change over time.
FAQ
What is powerpoint 2019 (part 11)?
Explore powerpoint 2019 (part 11): presenting slideshows, including the key concepts, practical examples, important considerations, and useful guidance.
What key points does this article cover?
The article focuses on Present a slideshow, How to start a slideshow, How to move forward and backward through slides, with practical explanations and examples.
How can you use this information in practice?
Use the explanations to compare options, verify important details, and make a more informed decision. Apply the recommendations that best match your goals and situation.
Related Articles
 10 Useful Tips for You When Presenting with Powerpoint15 minutes read
 PowerPoint 2019 (Part 32): Sharing Presentations Online: Explained5 minutes read
 PowerPoint 2019 (Part 31): Rehearsing and Recording Your Presentation6 minutes read
 Create PowerPoint Slideshows from Word Documents2 minutes read
 Shortcuts in Powerpoint Need to Know3 minutes read
 PowerPoint - 5 Ways to Put PowerPoint Presentations on the Web4 minutes read
Reader Comments 0
Sign in with email or Google to join the discussion.