Table of Contents
Instructions to Enable Admin Share on Windows 10/8/7 is easier to understand when the core ideas are paired with practical examples. The sections below explain the topic clearly, highlight useful steps, and point out details that can prevent common errors.
In some cases, users need to enable Admin Shares on the local hard drive. Admin Shares is the default share account of all hard drives (C $, D $,.) on Windows computers. By default, Admin Shares are hidden and cannot be accessed on the network.
On Windows Vista and newer Windows versions prevent Local accounts from accessing Admin Shares through the network. And if you try to connect from another computer on the system to Admin Shares, you will get an error message 'Logon unsuccessful: Windows is unable to log you on. Make sure your user name and password are correct '.
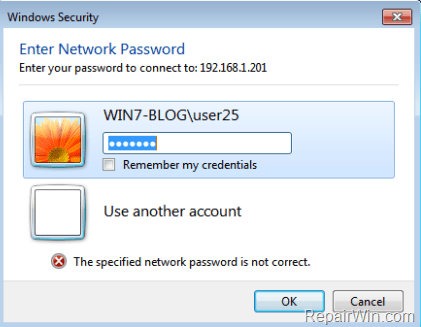
1. How to enable Admin Share by default on Windows 10/8/7?
Note:
To access Admin Share, make sure that the Host and Guest computers must be in the same Workgroup or Domain (both must be the same Workgroup name or Domain name). To find this information, open Windows Explorer, then right-click the Computer icon, select Properties to view (or change) the Workgroup name.
- Host computer: The computer has enabled Admin share.
- Guest computer: computers on the network will connect to Admin share on the host computer (host computer).
Step 1: Activate the Admin account and set up a password
If you want to access Admin share on the computer (Host - server), you must first activate the Admin account, then set a password for the Admin account on the computer. To do this, follow the steps below:
1. Press the Windows + R key combination to open the Run command window.
2. On the Run command window, type lusrmgr.msc there and press Enter.
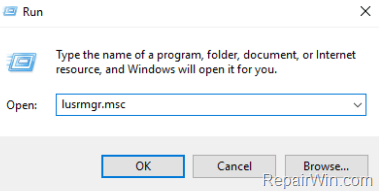
3. Next open Users.

4. Right-click Administrator , select Properties.

5. Remove the Account is disabled item then click OK.
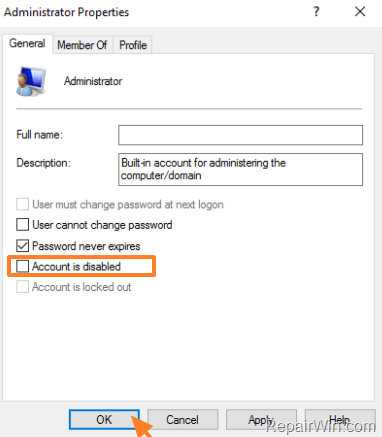
6. Next, right-click the Administrator account again and choose Set Password .

7. Set a password for the Admin account and then click OK.
Step 2: Activate File and Print sharing on Windows Firewall
The next step is to enable File and Print Sharing via Windows Firewall (at the server).
1. Press the Windows + R key combination to open the Run command window.
2. Enter the control panel in the Run window and press Enter to open the Control Panel.
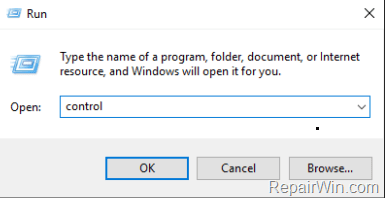
3. On the Control Panel window, click System and Security .

4. Select Allow an app through Windows Firewall.

5. Click Change Settings .

6. Uncheck the check box, then check File and Printer Sharing again, then click OK.

Step 3: Add the value LocalAccountTokenFilterPolicy to the Registry
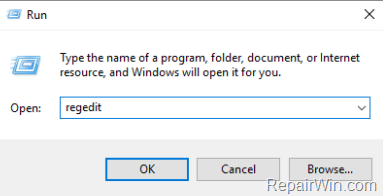
1. Press the Windows + R key combination to open the Run command window.
2. Enter regedit there then press Enter or click OK to open the Registry Editor.
3. In the Registry Editor window, navigate to the key:
HKEY_LOCAL_MACHINESOFTWAREMicrosoftWindowsCurrentVersionPoliciesSystem
4. Right-click the System key, select New => DWORD (32-bit) value .

5. Name the new value LocalAccountTokenFilterPolicy and press Enter.
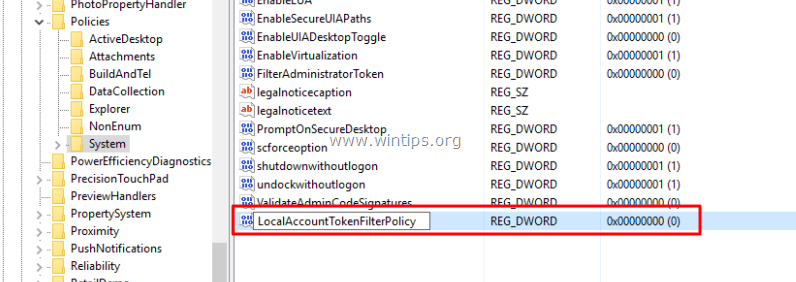
6. Double-click LocalAccountTokenFilterPolicy and set the value in the Value Data frame to 1.
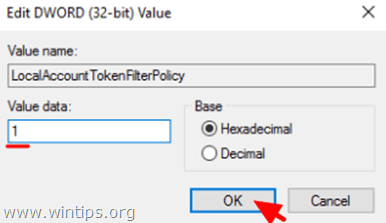
7. Close the Registry Editor window.
8. Restart your computer.
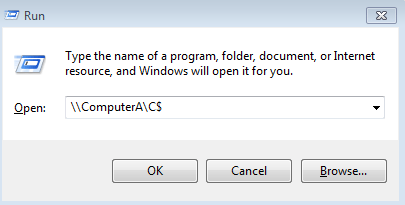
9. After your computer has finished booting, you can now access the Admin share disk on the host computer from any computer on the system (Guest) by entering the Run command window or frame. Search for the name (or IP address) of the server and the drive name you want to access by adding the icon & after the drive name.
For instance,, if you want to access the "C:" drive on your "ComputerA" computer, enter the Run command prompt:
ComputerAC $
Refer to some of the following articles:
- Free memory space after updating Windows 10 Anniversary
- How to completely hide a folder with a single command on Windows
- How to disable Lock Screen lock screen on Windows 10 Anniversary Update
Good luck!
FAQ
What should you know about step 1: Activate the Admin account and set up a password?
If you want to access Admin share on the computer (Host - server), you must first activate the Admin account, then set a password for the Admin account on the computer. To do this, follow the steps below:
What should you know about step 2: Activate File and Print sharing on Windows Firewall?
The next step is to enable File and Print Sharing via Windows Firewall (at the server).
What should you know about step 3: Add the value LocalAccountTokenFilterPolicy to the Registry?
1. Press the Windows + R key combination to open the Run command window.
Related Articles
 How to Activate and Using Admin Share on Windows 11/10/8/77 minutes read
 How to Enable Admin Protection in Windows Approval Mode: Step-by-Step Guide3 minutes read
 What Is Admin? Admin Facebook, What Is the Website?4 minutes read
 Losing Admin Permissions on Windows 10 // 8.1, This Is a Fix6 minutes read
 How to Activate the Hidden Admin Account on Windows 7/8/104 minutes read
 How to Assign Administrator Permissions on a Windows 7 Computer?4 minutes read
Reader Comments 0
Sign in with email or Google to join the discussion.