Instructions for creating multiple profiles on Firefox
Firefox has been updated with a number of new features, including the creation of separate profiles. This hidden feature allows you to create completely separate browsing sessions..
Firefox has a bunch of new features, including creating separate profiles. This hidden feature lets you create completely separate browsing sessions, each with its own settings, history, extensions, and bookmarks. This way you can separate work from personal stuff. Here's how to enable the new profile manager in Firefox.
How to enable the new profile manager on Firefox
Step 1:
In the Firefox interface, you enter about:config in the address bar. Then in the interface, we enter browser.profiles.enabled to search.

Step 2:
Display the configuration settings, we click on the value and select true to activate. Then restart the browser to change.

Step 3:
Click on the 3 dashes icon and select Original Profile , then select New User Profile .

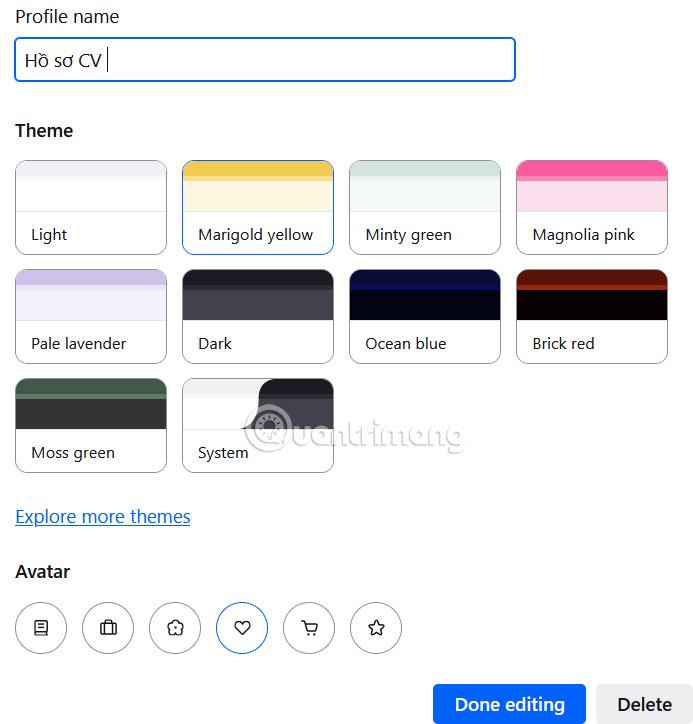
Now the interface is displayed for us to set up a new profile on Firefox . You name this new profile, select the theme, profile icon and then click Done editing to save .
Continue creating a new Firefox profile as described above. Any settings, extensions, themes, or browsing history in one profile will not affect the other profiles.
Step 4:
To quickly switch between multiple profiles in Firefox, click your avatar and select the profile you want to access.
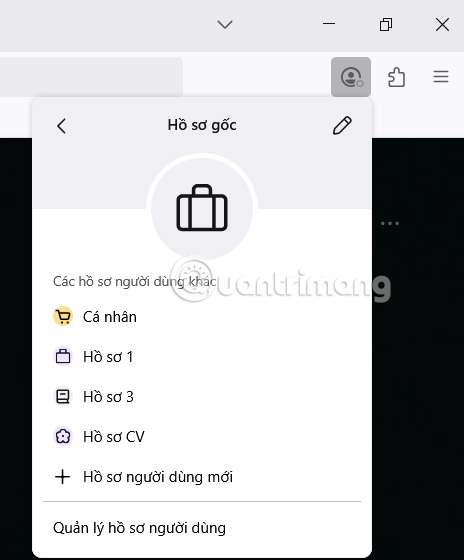
If you want to customize the profile created on Firefox , click on Manage user profiles .
In the interface, click the pen icon to edit, or click the trash icon to delete the profile created on Firefox.