Table of Contents
This updated guide examines How to Transfer Facebook Photos to Google Photos and organizes the essential facts, background, and practical takeaways in clear American English.
- Things to keep in mind when backing up data on your computer
- Collection of the best free online data storage websites today
- How to search for files saved on the cloud service
- How to use AnyTrans for Cloud to manage cloud services
Instructions for uploading photos and Facebook videos to Google Photos
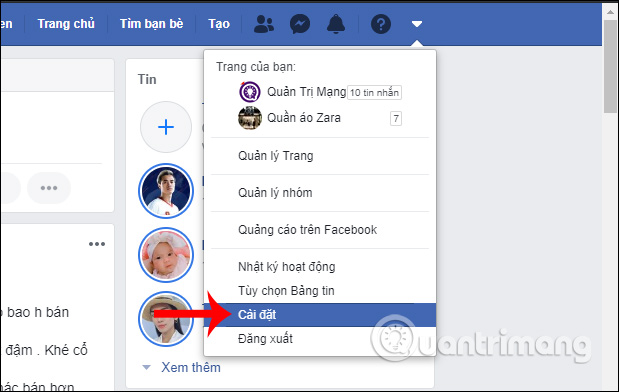
Step 1:
Open your personal Facebook account and click on the triangle icon and select Install .
Step 2:
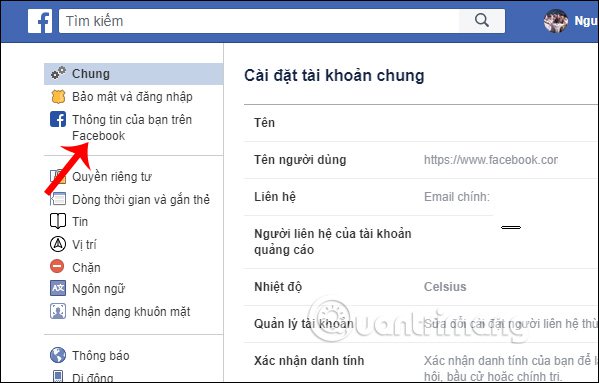
Switch to the general settings interface for the account, we click on your Information section on Facebook .
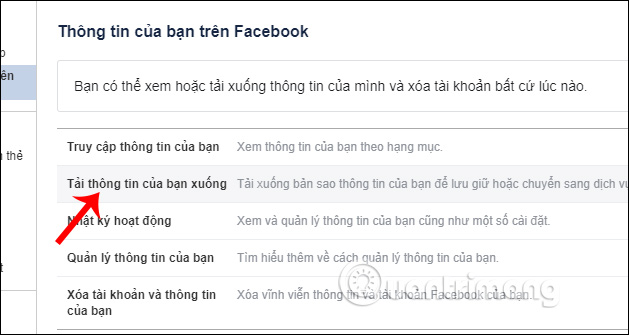
Looking to the side we see the option to Download your information to click select.
Step 3:
Switch to the interface to select the type of document we want to download. Here, users only need to backup photos and videos into Google Photos so we need to select images and videos . Other content is missing to reduce the time to download Facebook data to your computer.

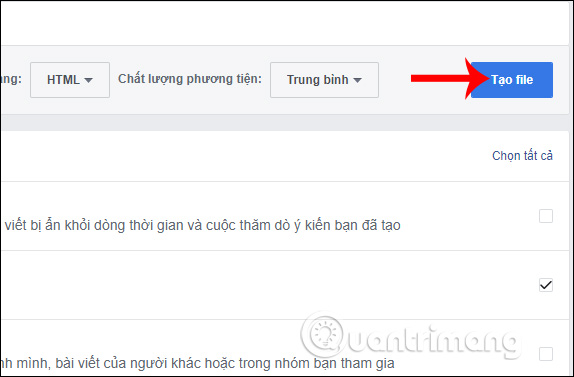
Next, select the time to upload the backup image at section Date, file format, media quality.
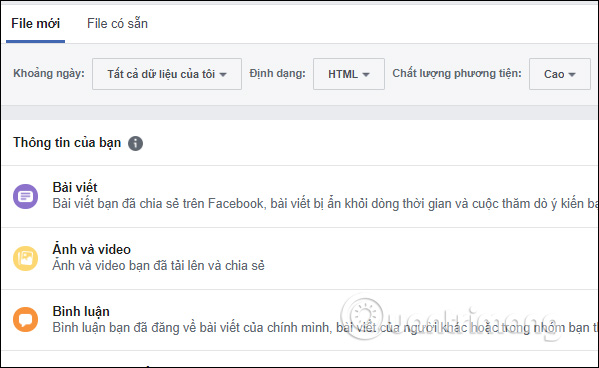
Continue clicking the Create file button as shown.
Step 4:
Soon after, the process of creating Facebook files and photos was conducted. If the process of creating this file completes the user receives the message. The process of creating image files and Facebook videos is fast or slow depending on the number of media files that you post to Facebook.

Display the interface to download the data file, click Download .

Step 5:
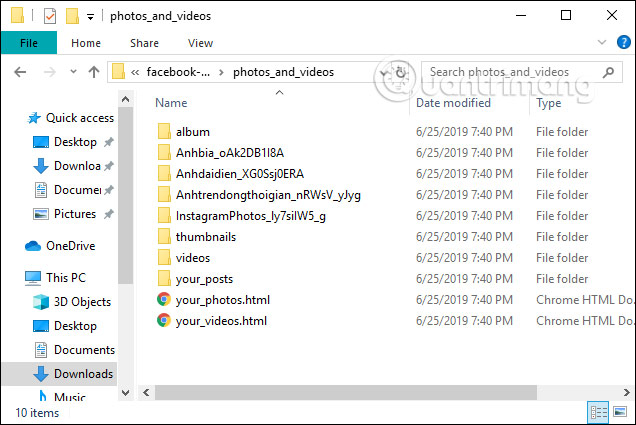
Open the folder to save the downloaded Facebook data file and then extract it . Then you get the picture and video folder as shown below. Each folder is a different type of image for easy search and management.
Step 6:
Next, install the Backup and Sync software according to the link below.
- Download Backup and Sync Windows software
- Download Backup and Sync Mac software
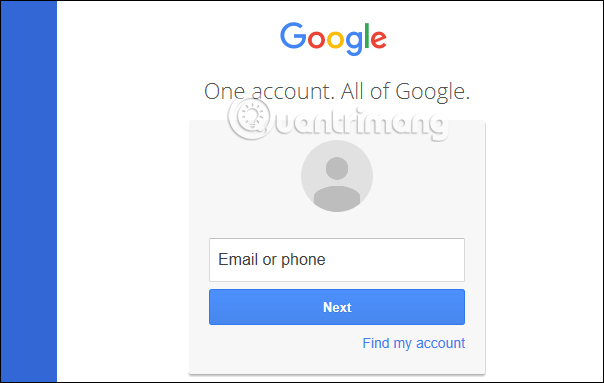
Perform the installation as usual. Log in to your personal Google account to use the software.
Step 7:
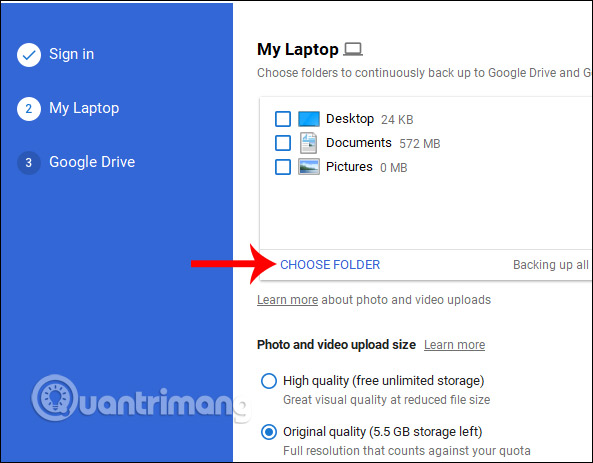
In the next interface, click Choose Folder to select the data folder. If you want to store unlimited, users choose in the section Photo and video upload size is High Quality (free unlimited storage).
Step 8:
Click on the Facebook photo and video folder, then click Nex t below to continue.

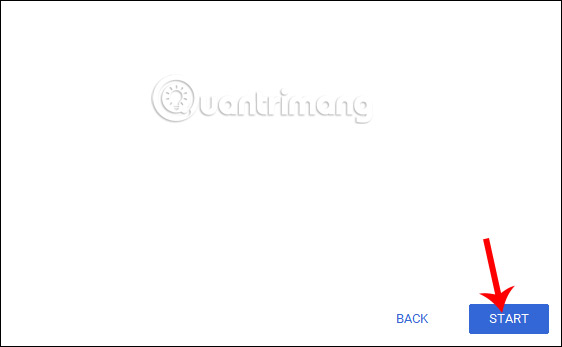
Finally press the Start button to proceed to upload photos and Facebook videos to Google Photos.
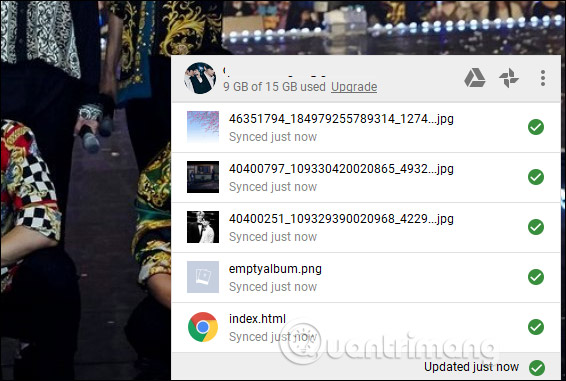
The process of downloading data is displayed in the tool interface when you click the icon in the system tray. When you see the green mark, it means that the uploading process has been completed by Google Photos.
So we have backed up all Facebook photos and videos to Google Photos, through Google Backup and Sync software. In addition to image backup, users also have many other data backup options on Backup and Sync tool.
I wish you all success!
FAQ
What is How to Transfer Facebook Photos to Google Photos about?
It provides a structured overview of download facebook data, explains the main context, and highlights practical takeaways for readers.
Why does this topic matter?
Understanding the main concepts helps readers evaluate the issue, avoid common mistakes, and make better-informed decisions.
How should readers use this information?
Use the guidance as a practical starting point, confirm details that may have changed, and follow current product, safety, or security recommendations.
Related Articles
 How to Transfer All Photos on Facebook to Google Photos4 minutes read
 Facebook Added a Feature That Allows Users to Transfer Images3 minutes read
 How to Transfer Photos from Google to Amazon Photos6 minutes read
 How to Transfer Photos from Onedrive to Google Drive3 minutes read
 Instructions to Backup All Photos and Videos on Facebook to Google Photos4 minutes read
 No Software Needed, This Is the Fastest Way to Transfer Images Between4 minutes read
Reader Comments 0
Sign in with email or Google to join the discussion.