Table of Contents
Gemini now has a Media Watermark setting that can control visible marks on newly generated images. Check that option before cropping or retouching a finished picture. Availability depends on your region and subscription.
This guide concerns the visible Gemini mark on images you are entitled to edit. Removing a visible mark does not change the image's origin or remove every form of AI provenance information.
Use Gemini's built-in control first
- Open Gemini on your computer.
- Choose Settings > Media Watermark.
- Turn the visible-watermark setting off, if the option is available.
- Generate the image you need and inspect the downloaded file.
Google's watermark settings guide states that users in India, South Korea, and Vietnam need an AI Ultra subscription to see this setting. Otherwise, visible watermarks remain automatic in those regions.
The setting applies to Gemini Apps, not every Google AI product. It controls new output; do not assume it rewrites an image already saved to your computer.
Visible marks, SynthID, and metadata are different
The visible symbol is part of the picture you can see. SynthID is an invisible watermark embedded in generated content. Content Credentials provide metadata about origin and history.
Gemini's visible-watermark setting does not disable SynthID or Content Credentials. Conversely, an edited picture without a visible symbol should not be presented as proof of a real photograph. The Gemini verification guide explains why a missing detection result is not proof that AI was never used.
Crop an existing image when the composition allows it
If the mark sits in an empty edge area, cropping can be the simplest edit. Open a copy in a basic image editor, move the crop boundary, and check the resulting aspect ratio before saving.

Do not cut off a subject, caption, or useful detail merely to hide the corner. Adding a border through a generation prompt is not a reliable guarantee of where a watermark will appear. Keep the original file so you can try a different crop without losing it.
Evaluate third-party removal tools carefully
Tools advertised as watermark removers may retouch the marked area or attempt to reverse a known overlay. Neither approach guarantees the original pixels will be recovered exactly. Compression, changes in the mark, or a complex background can leave a visible patch.
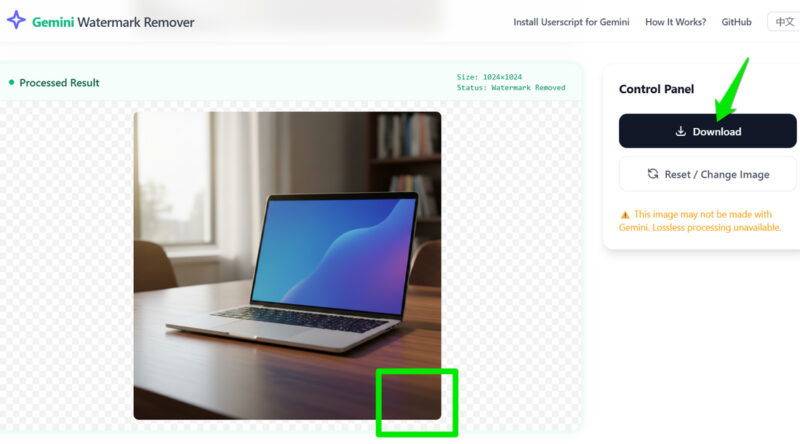
Compare the edited corner with the original at full size. Check edges, gradients, and fine texture. Before uploading, review the tool's privacy and retention information; use a local editor when you want to keep the file on your device. An unnamed tool or an old screenshot is not enough evidence to promise perfect results.
Retouch the corner with an image editor
A generative erase or healing tool can fill a selected area from surrounding details. In supported versions of Windows Photos, open the image, choose Edit, then Erase, and brush only the area you intend to replace.
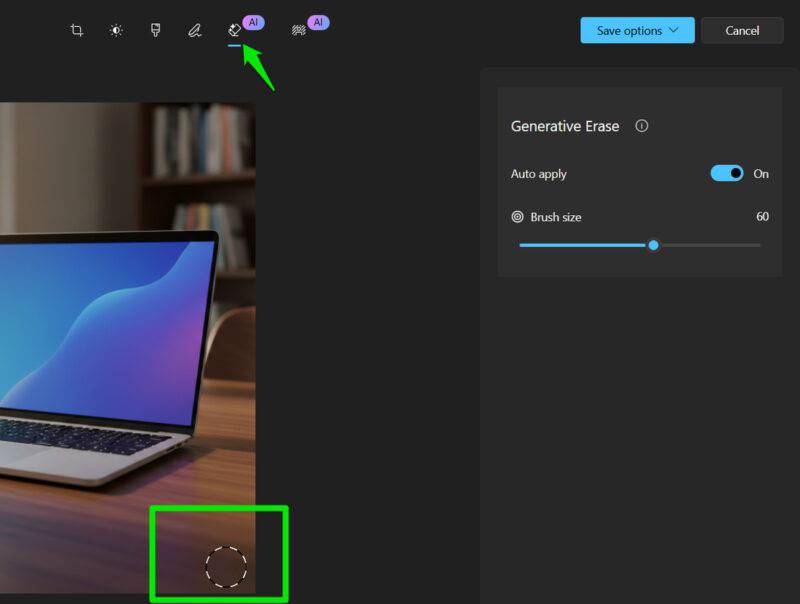
Inspect the fill before saving a separate copy. It creates an approximation of the background, not a guaranteed recovery of what was beneath the symbol. See the Windows Photos erase workflow for the controls.
Check AI-editor results beyond the corner
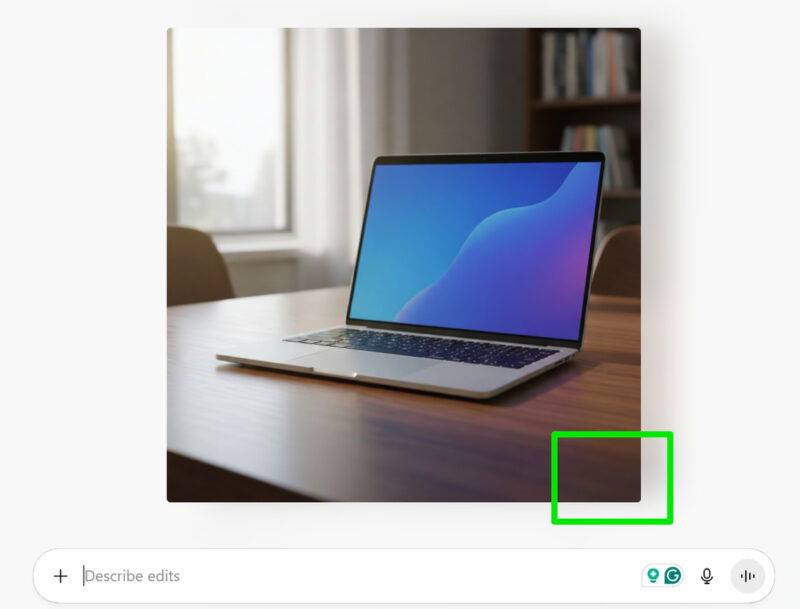
A conversational image editor may generate a revised image in response to an edit request, but it can also change faces, lettering, colors, dimensions, or fine details elsewhere. Compare the entire image with the source and reject an edit that alters important content.
Keep a record of the image's AI origin when sharing it in a context where that information matters. For a clean composition, the built-in output setting or a careful crop generally involves fewer changes than regenerating the whole picture.
Related Articles
 5 Ways to Remove Watermark from Photos: Recommended Choices12 minutes read
 How to Insert, Delete Watermark in Word Documents5 minutes read
 Steps to Remove Watermark in Photoshop So That You Have the4 minutes read
 Click: How to Add a Watermark to Photos6 minutes read
 How to Delete Watermark, Delete Stamps from Photos in Photoshop9 minutes read
 How to Remove Watermark Copyright Mark, Delete Watermark on PDF Files3 minutes read
Reader Comments 0
Sign in with email or Google to join the discussion.