Quick tips to turn photos into frames in Canva
From one image, you can transform it into a frame with that shape, and insert another image into that frame. We don't need to use complicated photo editing software; we can use the simple tools in Canva..
You can transform an image into a frame with a specific shape, and then insert another image into that frame. You don't need complex photo editing software; a simple tool like Canva will suffice. Let's look at the step-by-step process of converting an image into a frame in Canva below.
How to convert photos into frames in Canva
Step 1:
We can upload images to convert into frames, or we can search for images on Canva to use. Enter keywords and then select Graphics to proceed.

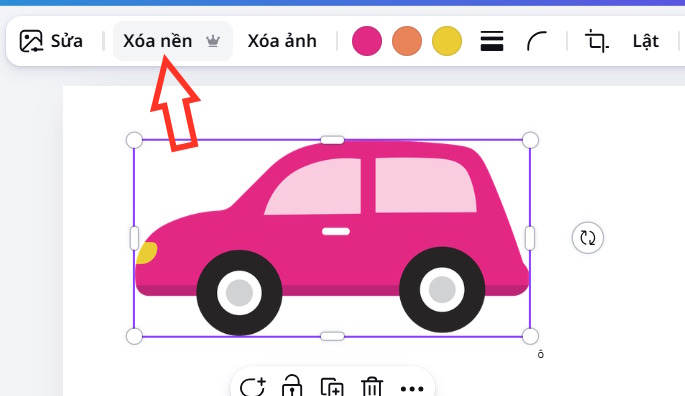
Step 2:
Next, select the inserted image and choose "Remove background" to proceed.
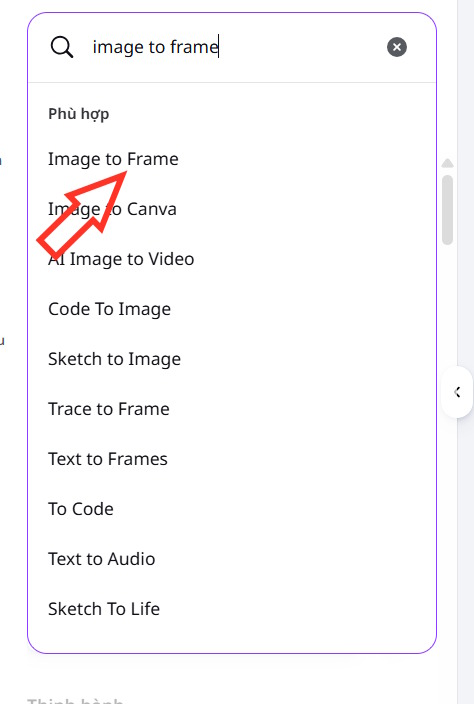
Step 3:
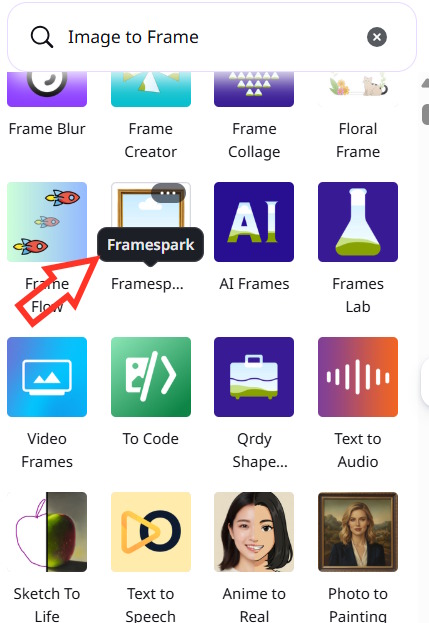
Look at the toolbar on the left, click on Applications , and then type the keyword "image to frame" to select an application to convert images into frames.
In the list of applications displayed, select the Framespark application .
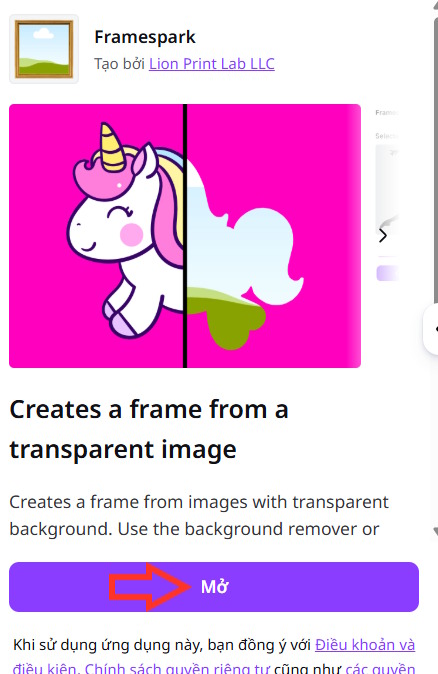
Step 4:
Click Open to use the Framespark application in Canva.
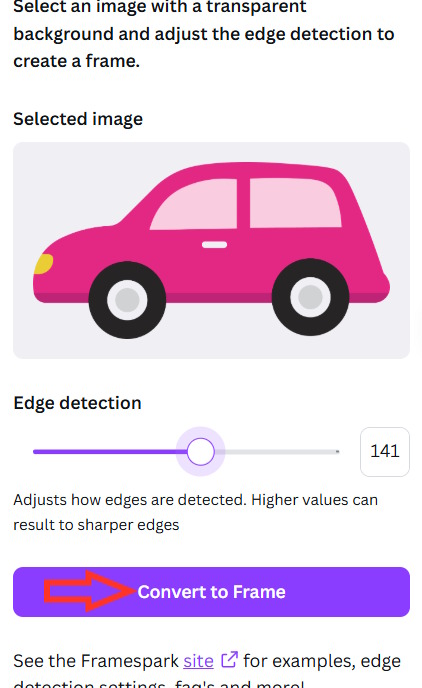
Now you need to click on the image you are using , then increase the Edge detection slider to identify the edges of the original image and convert it into a frame. Click Convert to Frame to do so.
The result is a frame created from the image as shown below.
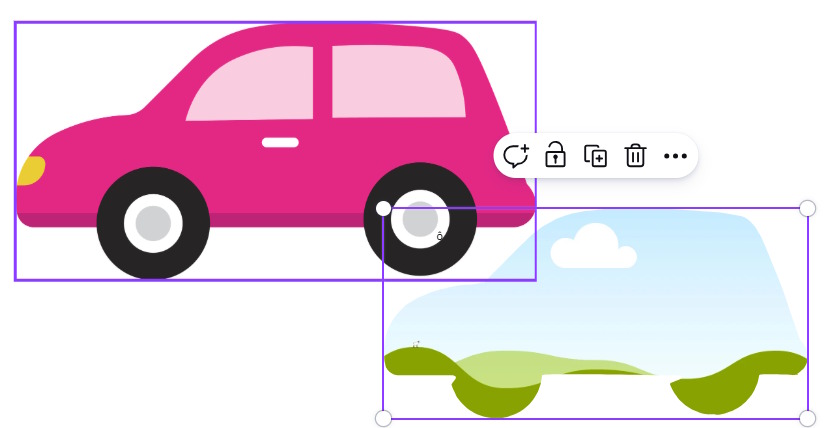
Now you can add any image to the photo frame. Simply select the image you uploaded to Canva and drag it into the frame.