How to show indented lines in Word
What is the text alignment in Word? These are dashed lines that let you know how the text is on each side and how to separate each paragraph, you can see the image below to understand better. To show the alignment in Word, you need to follow the steps below.
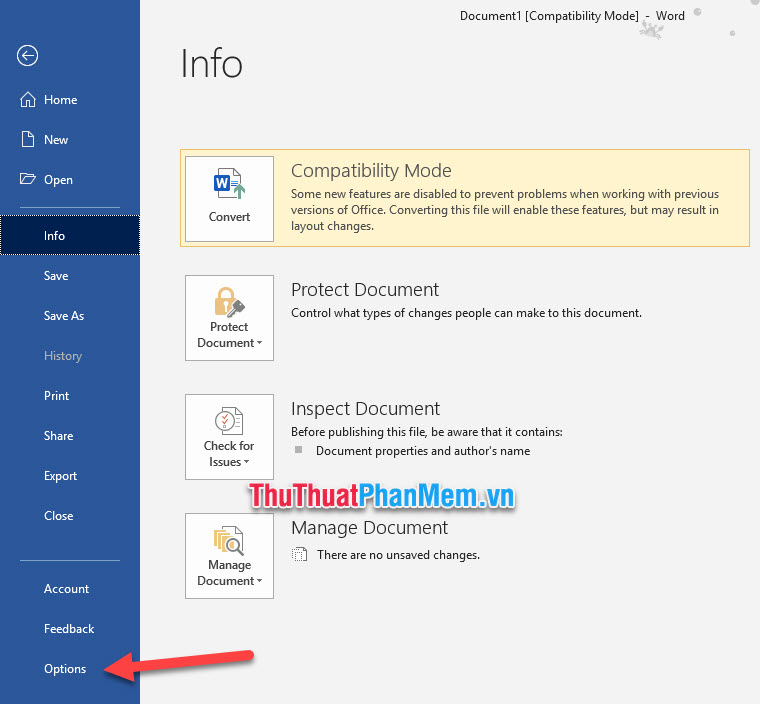
To show an indentation line in Word. You must do the following, first you open the File ribbon on the toolbar.

In the list of options for File , click the Options line .
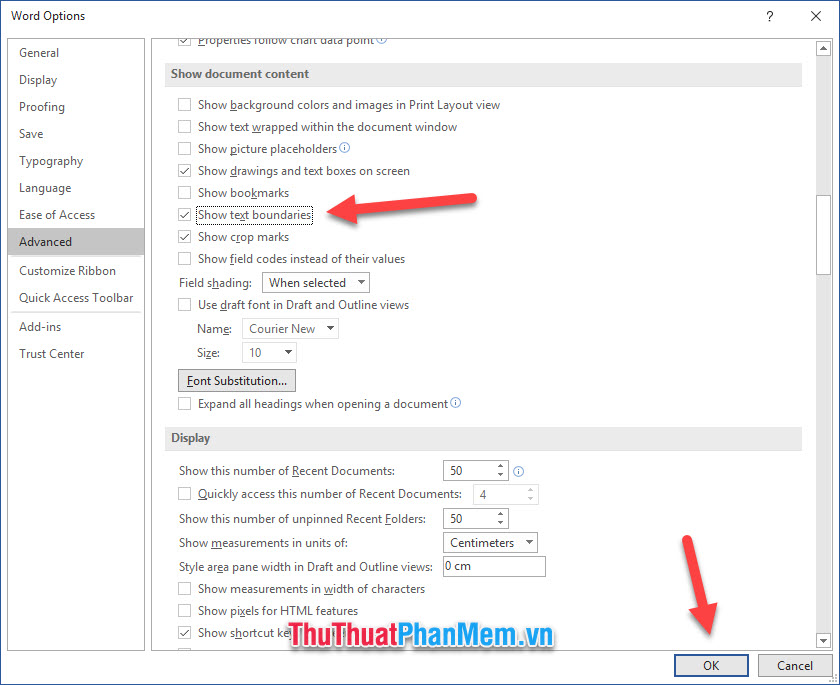
The Word Options function window will appear, click on the Advanced tab of Word Options . You then scroll down the page to find the Show document content section . Next you tick the line Show text boundaries .
Finally click OK to confirm the installation.
The results you have shown are aligned in your Word.

Thank you for reading the tutorial How to show the alignment in Word of TipsMake.com us. The track trace showing our alignment is over, wish you success.
Was this article helpful?
Your feedback helps us improve.
Related Articles
 How to show grid lines and squares in Word2 minutes read
 Instructions on how to display lines in Word are extremely simple2 minutes read
 How to Insert a Dotted Line in Word5 minutes read
 How to create horizontal lines in Word5 minutes read
 How to delete blank lines (blank lines) in Word3 minutes read
 Create dots in Word, how to create dots lines, tab line dots (.........) in Word2 minutes read
Reader Comments 0
Sign in with email or Google to join the discussion.