In the process of working with Word, you need to create horizontal lines to suit the requirements of the text to be edited in Word, you do not know how to create horizontal lines in Word. So, let's refer to the ways to create horizontal lines in Word that the following article will guide.
Invite you to track three ways to create horizontal lines, dotted lines in Word that the article shares below.
Method 1: Create horizontal lines quickly using the Enter key
You can use the icons and then press Enter to create arbitrary horizontal lines in Word.
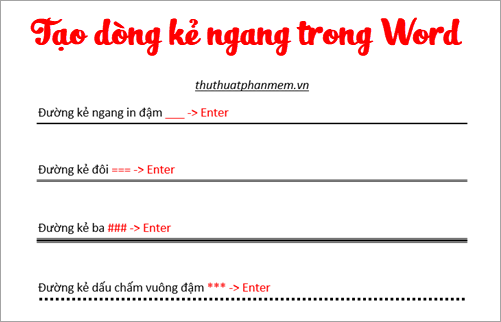
- Horizontal lines in bold : press successive 3 underscores ___ then press the Enter key.
- Double lines: you press 3 === in a row then press Enter to create a line.
- Third line : you press consecutive 3 sharps ### then press the Enter key to quickly create the third line.
- Dark square dots : you press 3 stars in a row *** and press the Enter key.
- Ziczac line: you press 3 consecutive marks ~~~ then press the Enter key to create the line.

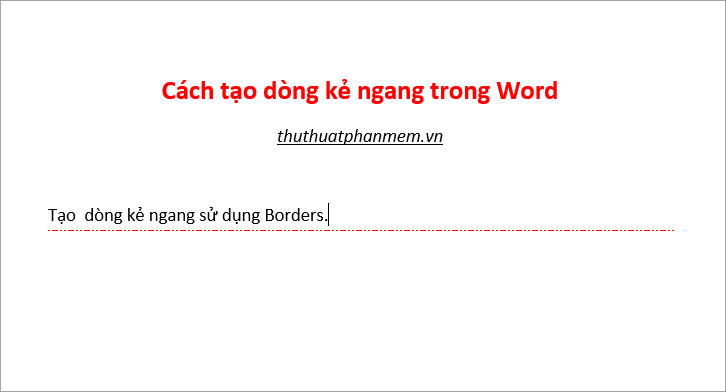
Method 2: Create horizontal lines using borders
You can also use the Border Bottom of the Border feature to create more horizontal lines and more colors for horizontal lines as follows:
Step 1 : Put the cursor on the line you want to create the horizontal line below. Next, select Design -> Page Borders tab .

Step 2 : Appears Borders and Shading, select the Borders tab , in the Settings section select None (1) , next select the horizontal style in the Style (2) section, select the color in the Color (3) section , thickness of the horizontal line in the Width (4).
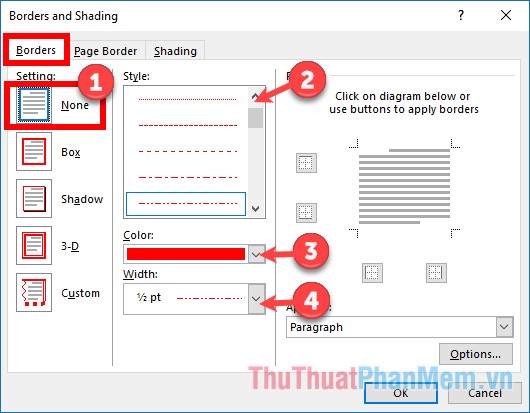
Next, select the lower border icon (note that the lower border is selected in blue, while the upper border, the left border, the right border are not gray), After the settings are complete Click OK to create the horizontal line.

So you will create horizontal lines as you have set.
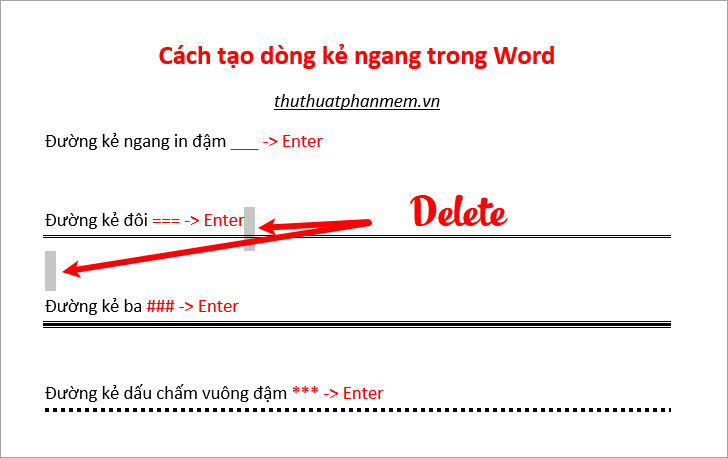
To delete the horizontal line created by ways 1 and 2, you place the cursor on the line containing the horizontal line and select Design -> Page Borders.

Borders and Shading appear, select the Borders tab and click the bottom border icon to deselect the bottom border and click OK .

Thus the horizontal line will be deleted.

Or you can select (black out) the end of the upper line and the oil position of the line below the horizontal line and press Delete to delete as shown below.
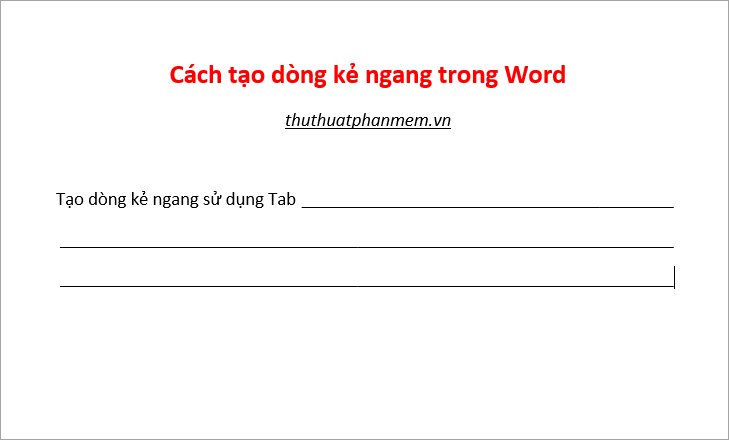
Method 3: Create horizontal lines using Tab
In addition to 2 ways to create horizontal lines in Word on TipsMake.vn, please share to you another way to create horizontal lines that is using Tab . Please follow up.
Step 1 : If you want to create horizontal lines for all lines, then select the Tab icon above the vertical ruler, and click on the last position on the horizontal ruler as shown below.

Step 2 : Double click on the Tabs icon you just placed on the horizontal ruler to open the Tabs dialog box .

Step 3 : Tab dialog box appears , you choose horizontal style in Leader (there are 3 types), because you create horizontal lines for the whole line, you do not need to customize in the Alignment section . Then choose Set -> OK.

Thus, when you press the Tab key on the keyboard, it will create horizontal lines in Word. This horizontal line will start from the cursor position to the end of the line.
To delete the horizontal line that you created when using Tab, place the cursor at the end of the line and select Backspace on the keyboard to delete.
Above are 3 ways to help you create horizontal lines and dotted lines in Word, hope this article will be useful to you. Good luck!


 Delete horizontal lines in text on Microsoft Word
 2 ways to create horizontal lines extremely fast in WORD
 How to create and delete horizontal lines on Word
 How to delete horizontal lines in Word
 Why are websites scrolling vertically and not horizontal scrolling?