How to show grid lines and squares in Word
When you are new to editing text in Word, you can hardly align the standard and beautiful text. Now you need to use the lines (grid lines) in Word. Grid lines help you easily align the Word document but when printing text, these lines will not be printed with.

The following article shows you how to make squares in Word 2003, 2007, 2010 and Word 2013.
Check box in Word 2007, 2010, 2013.
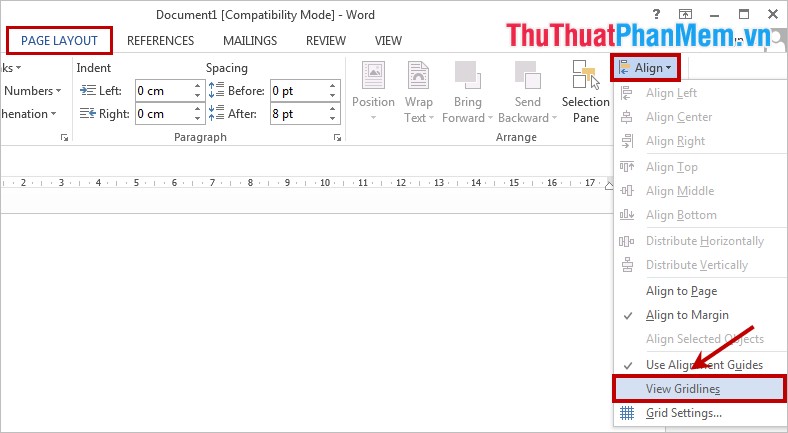
Step 1: On the Word interface, select the Page Layout tab on the Ribbon.

Step 2: In the Arrange section, select Align and in the drop-down menu, select View Gridlines .

If you want to customize the grid lines, then select Align -> Grid Settings to open a dialog box to help you install Grid .

In the Grid and Guides dialog box , you can change the distance between the lines in the Grid settings , open the line to the end of the paper in the Grid origin section . You can click Set As Default to change the default settings for lines in Word. After setup is complete you select OK to save changes.

To turn off the feature of displaying the grid, select Page Layout -> Align -> uncheck the View Gridlines .
For Word 2003.
1. First, select Drawing on the toolbar and then select Draw .
2. Next select Grid .
3. Check Display Gridlines .
To turn off the line display feature, simply uncheck Display Gridlines .
So you know how to make the grid and turn off the grid in Word versions from 2003 and up. Hope this article will help you. Good luck!