How to set a timer to take photos on iPhone is extremely simple and not everyone knows
Timing photos on iPhone will help you take photos with family, relatives, and friends without missing any members. Let's immediately learn how to set up a timer to take photos on iPhone through the article below.
To automatically take photos on your iPhone without touching, follow these steps:
Step 1: First, open the Camera application on iPhone.
Step 2: In the Camera application window, click the arrow icon at the top of the screen.
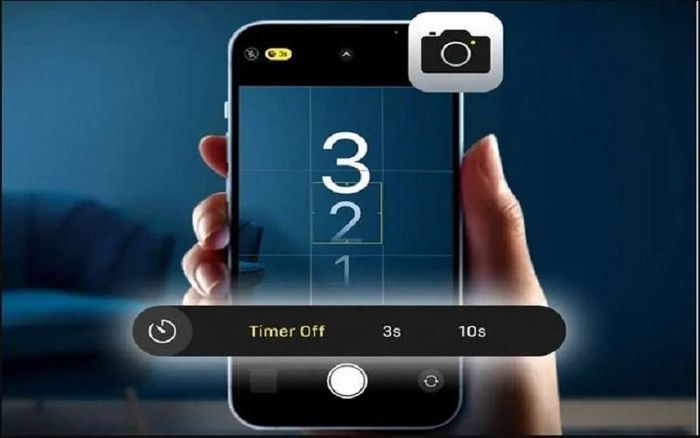
Step 3: At this point, you will see a toolbar with many options displayed below the camera's viewfinder window. Find and click on the timer icon (clock icon) to continue.
Step 4: Next, the camera application will appear with two photo timer options on iPhone for you to choose from: 3 seconds or 10 seconds. Depending on your needs, choose the delay time you want.
Step 5: Then, tap the shutter button and quickly move into position and wait for the camera app's countdown to end (the iPhone camera flash will flash when the countdown starts).
With just a few simple steps, you know how to set a timer to take photos on iPhone. From there, you can easily set up to take group photos, take family photos with all the members without ever missing members like normal shooting.
- How to set a countdown timer, timer on iPhone or iPad
- Trick to use quick timer on iPhone
- Simple and easy ways to schedule PC shutdown
- Some tips and tricks on using Camera on iPhone (part 2)
- How to Use Palm Timer to Take Selfies on Android
- Some tips and tricks on using Camera on iPhone (part 1)
- How to delete text on photos with Paint is extremely simple
- Apple launched a series of short video tutorials on taking photos on the iPhone
- How to download IPA files on Windows and macOS
- How to test the screen, check the iPhone screen easiest
- List of smartphones that support Google Camera (Gcam)
- How to install and experience Android 11 directly on Windows 10
- LiDAR and ToF sensors: What's the difference?
- How to fix iTools error not receiving iPhone
- Steps to check genuine iPhone battery
- How to use Snapdrop on Android and Windows
- How to check the purchase history in the app on iPhone, iPad
- How to control a remote computer by phone with AnyDesk Remote


-
 How to open the camera on a Windows computer or laptop.
-
How to turn the camera on and off in Windows 11
-
5 Android camera features only available on foldable phones.
-
These minimalist camera apps will help you fall in love with photography again.
-
Transfer files from computer to phone using just camera – no internet needed
-
How to turn your old phone into a security camera
 How to open the camera on a Windows computer or laptop.
 How to turn the camera on and off in Windows 11
 5 Android camera features only available on foldable phones.
 These minimalist camera apps will help you fall in love with photography again.
 Transfer files from computer to phone using just camera – no internet needed
 How to turn your old phone into a security camera