How to Repair Windows 7
Method 1 of 2:
Using the System Recovery Options
-
 Remove all external drives, CDs, and/or DVDs from your PC. If your PC turns on but won't boot into Windows, you can use the built-in Startup Repair tool to repair the operating system. Start by disconnecting all removable media.[1]
 -
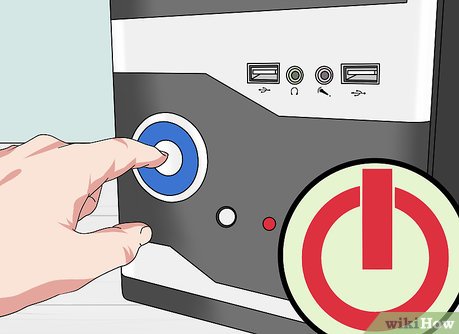
 Press and hold the Power button to turn off your PC. You can lift your finger once the PC is off.
 -
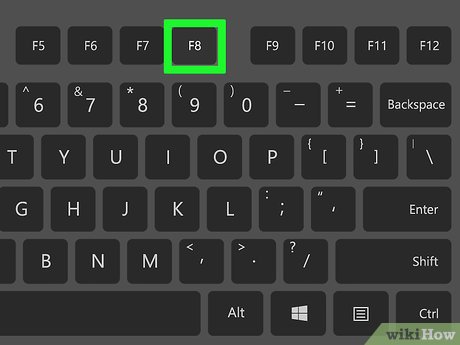
 Press and hold F8 as you turn on the PC. Continue holding this key down until Windows boots into the Advanced Boot Options screen.
- If the PC has more than one operating system, you'll have to select the Windows 7 installation when prompted to do so.
-
 Select Repair your computer and press ↵ Enter. Use the arrow keys to scroll down and select the option.
- If you don't see this option, see the "Using a Windows 7 Installation or Recovery Disc" method.
-
 Select a language and click Next. This opens the System Recovery Options.
 -
 Click Startup Repair. The Startup Repair tool will scan Windows for errors and try to fix them automatically.
 -
 Click Finish to repair and restart your PC. If Startup Repair fixed your issues, your PC should now boot into Windows 7.
 -
 Perform a system restore if you are still unable to boot into Windows. If you see an error that says the system cannot be repaired, follow these steps to perform a system restore:
- Boot the computer while holding down the F8 key as you did earlier.
- Select Repair your computer and press ↵ Enter.
- Select a language and click Next.
- Select System Restore.
- Follow the on-screen instructions to select a restore point from when the computer was last functioning properly.
-
 Perform a system recovery if you are unable to repair the operating system. If you have a Windows 7 installation or recovery DVD, you can use it to reinstall Windows 7. See the " Using a Windows 7 Installation or Recovery Disc" method to learn how.
Method 2 of 2:
Using a Windows 7 Installation or Recovery Disc
-
 Insert the Windows 7 installation or system repair DVD. If your PC turns on but won't boot into Windows, you can your Windows 7 installation DVD to repair the operating system. If you created a system repair disc, you can insert that instead.[2]
- If you don't have a Windows 7 DVD or system repair media but have access to a working computer with a DVD burner, you can use it to create a new installation disc. See How to Create a Recover Disc in Windows 7 to learn how. You'll need your Windows product key to do this, and you'll usually find it on a rainbow sticker somewhere on your PC.
-
 Remove all external drives from the PC. This includes flash drives.
 -
 Press and hold the Power button to turn off your PC. You can lift your finger once the PC is off.
 -
 Press the power button to restart the PC. The PC should prompt you to press any key to boot from the installation/repair disc.[3]
 -
 Press a key when prompted to boot from the installation or repair disc. You should see a message that says "Windows is loading files."
- If you are not prompted to boot from the DVD, you probably need to access the BIOS and make the DVD drive the first option in the boot order. See Change Computer BIOS Settings to learn how to change the boot order.
-
 Select a language and click Next. This will bring you to the "Install Windows" screen if you're using an installation DVD, or the "System recovery options" screen if you're using a repair disc.[4]
 -
 Click Repair your computer. The recovery tool will attempt to find Windows 7 on your computer.
 -
 Select your Windows 7 installation and click Next.
 -
 Click Startup Repair. The Startup Repair tool will scan Windows for errors and try to fix them automatically.
 -
 Click Finish to repair and restart your PC. If Startup Repair fixed your issues, your PC should now boot into Windows 7.
 -
 Perform a system restore if you are still unable to boot into Windows. If you see an error that says the system cannot be repaired, follow these steps to perform a system restore:
- Reboot the PC from the DVD as you did a moment ago.
- Select your language and click Repair your computer.
- Select your installation and click Next.
- Click System Restore.
- Follow the on-screen instructions to select a restore point from when the computer was last functioning properly.
-
 Perform a system recovery if you are unable to recover Windows 7. If you are not able to fix your computer using these tools, you'll typically have to perform a system recovery. This will wipe your hard drive clean and reinstall Windows 7. To perform a recovery:
- Reboot from the DVD again and select your operating system.
- Click System Image Recovery on the "System Recovery Options" screen.
- Follow the on-screen instructions to reinstall the operating system.
Share by
Samuel Daniel
Update 04 March 2020


