How to remove and clean a laptop keyboard and replace it yourself at home
Your laptop keyboard is unstable, malfunctioning or has dead buttons, but you don't know how to remove the laptop keyboard yourself? Let's see how to clean your laptop keyboard at home.
Table of Contents
The laptop keyboard is where we operate every day, to enter text, data or in short, do everything. For that reason, after a long time of use, they often encounter basic errors such as: the laptop keyboard is broken, some buttons are paralyzed or even the keys are popped or broken. Basically, when encountering the above errors, we should think about cleaning it before replacing the new keyboard. If you want to learn how to remove the laptop keyboard to clean or replace it yourself at home, please refer to the article below by TipsMake on the most standard way to clean a laptop keyboard.
What to prepare to remove laptop keyboard
Similar to repairing other electronic devices, to disassemble a laptop keyboard, you need to prepare the following items:
- Small 4-sided screwdriver to remove the screw holding the keyboard to the body
- Flat screwdriver (2 edges)
- Tweezers and wrench to remove loose keys.
How to remove laptop keyboard HP, Dell, Asus.
Most laptops from brands like Asus, HP, Dell. have similar keyboard structures. Therefore, the steps to remove laptop keyboards from these brands are also somewhat similar.
Step 1: Turn off the laptop completely, unplug the power source - remove the battery to avoid unfortunate short circuits and fires.
Step 2: Find and identify the screw positions that secure the keyboard to the chassis. For current laptop models with recessed keyboards, it is best to remove all the screws on the back.
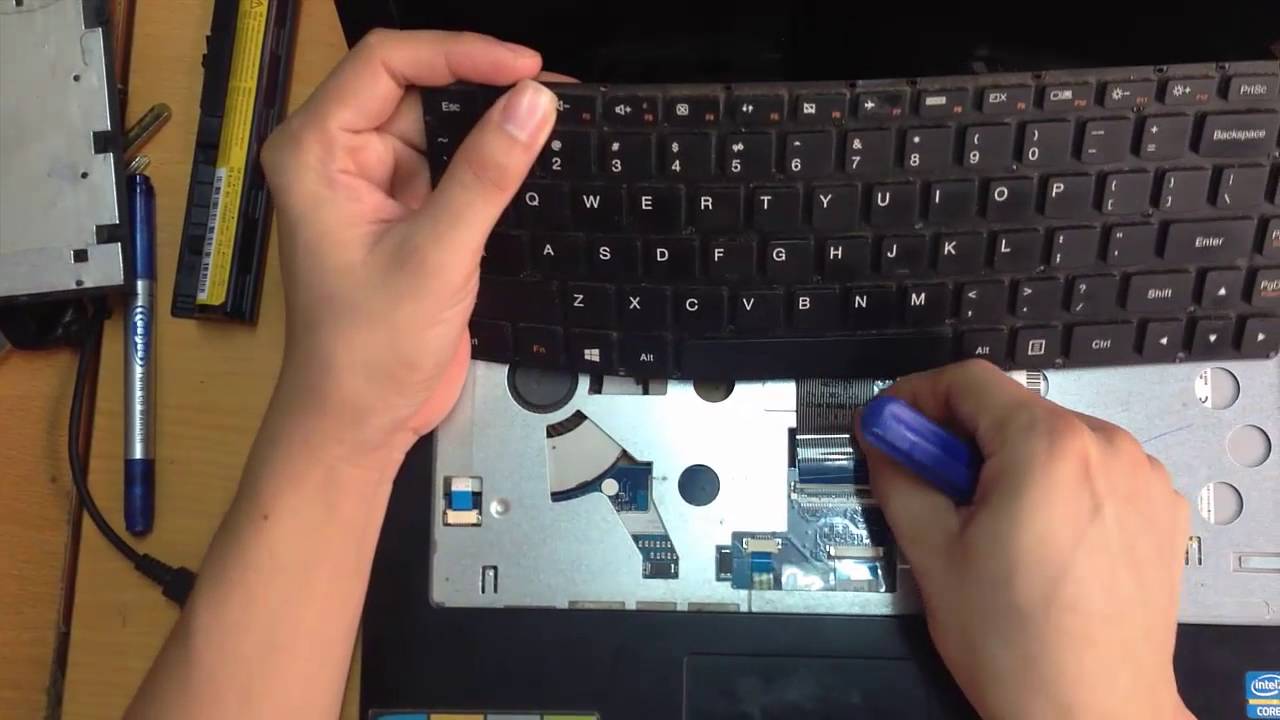
Step 3: With the above-ground keyboards, use a flat screwdriver to gently pry up the keyboard. With the recessed keyboard models, we need to pry up the C-side (the keyboard surface of the laptop ). Be careful to be gentle and slow because the keyboard and the C-side of the laptop often have signal cables attached. If the cable is accidentally broken, things will be extremely bad and it will take time and money to replace the cable.

Use a flat screwdriver to gently pry up the plastic latches of the keyboard.
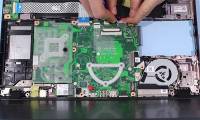
Step 4: After prying the laptop keyboard apart, gently separate the keyboard cable from the motherboard. In the steps to remove the laptop keyboard, this is an important step and requires great care.
Separate the laptop keyboard cable from the motherboard
Step 5: After removing the keyboard cable, completely remove the keyboard from the laptop body.
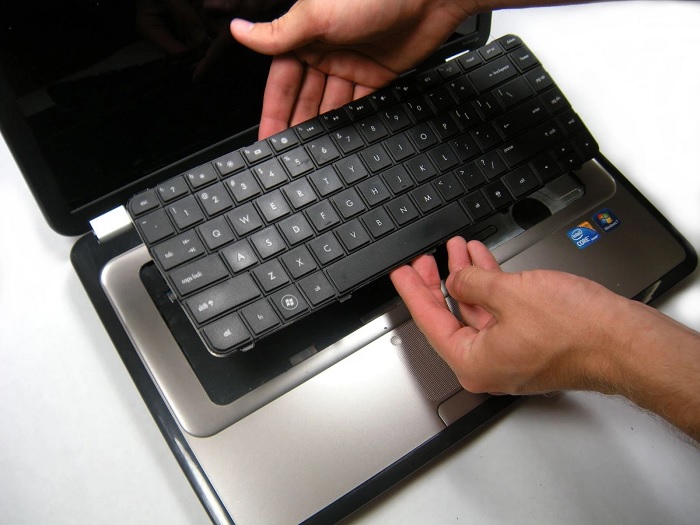
Lift the keyboard completely off the body of the device.
Video tutorial on how to remove laptop keyboard
For easier visualization, you can refer to the video of keyboard removal and simple laptop keyboard cleaning below:
Hopefully this article will help you remove the keyboard button and clean it easily at home. Good luck!
Was this article helpful?
Your feedback helps us improve.
Related Articles
 Instructions on how to remove the laptop keyboard for quick cleaning15 minutes read
 How to properly clean the laptop5 minutes read
 Instructions for removing laptop Acer Aspire ES1-532G4 minutes read
 Instructions for cleaning laptop keyboard without turning off the computer (safe & effective)6 minutes read
 7 simple steps to make your laptop as clean as new3 minutes read
 Instructions for cleaning the keyboard yourself, cleaning Laptop keyboard4 minutes read
Reader Comments 0
Sign in with email or Google to join the discussion.