Table of Contents
Learning how to reduce photo size in batches with high quality photo resize doesn't have to be complicated. This updated guide presents a clear workflow, practical checks, and troubleshooting advice you can use while completing the process.
Key Takeaways
- Follow the recommended steps in order to avoid common mistakes with reduce photo size in batches with high quality photo resize.
- Review compatibility, settings, or requirements before making changes.
- Use the troubleshooting notes to confirm the final result.
Step 1: Download and install High Quality Photo Resize here: Download High Quality Photo Resize.
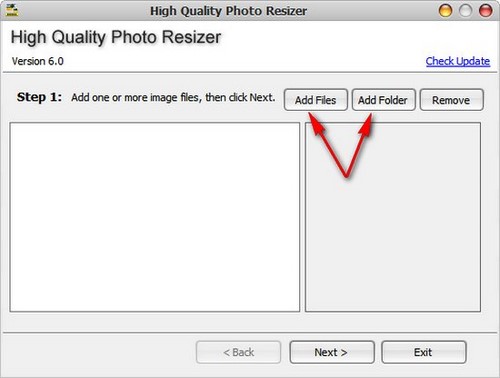
Step 2: After installing the High Quality Photo Resize batch image compression software, launch the tool. At the main interface of the tool, you can select Add Files to add one or more photos or select Add Folder to add all photos in a folder.
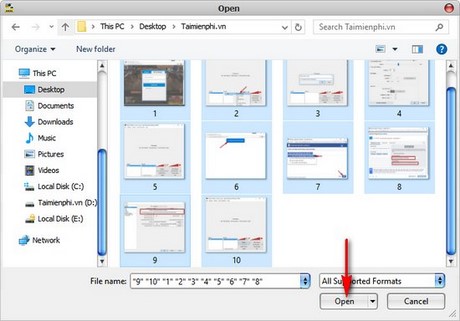
Step 3: The tool will automatically recognize all image files with extensions MP, DIB, EMF, GIF, ICB, JPG, JPEG, PBM, PCD, PCX, PGM, PNG, PPM, PSD, PSP, RLE, SGI, TGA, TIF, TIFF, VDA, VST, WBMP, WMF. Select one or more photos that you want to reduce the image size in batches and then select Open.
Step 4: After adding, the photos you choose to reduce the photo size in bulk are displayed in a list on the main interface of the application. Click Next to continue.

Step 5: Here you can choose the folder to store the compressed images at Browse. Note that the software will not automatically create a folder for you, so you need to create a separate folder and lead to that folder. After setting the path, click Next.

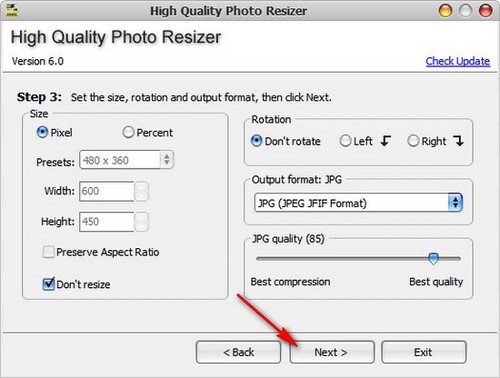
Step 6: Here, you have the options to change the size by pixel ratio ( Pixel ) or by percentage ( Percent ). Select Don't resize if you still want to keep the original size. In the Rotation section, you can choose to rotate all images to the left ( Left ) or right ( Right ), then select the output image format ( Output format ) and image quality ( JPG Quality ), the lower the image quality, the lower the image size. Click Next when you have finished setting up.
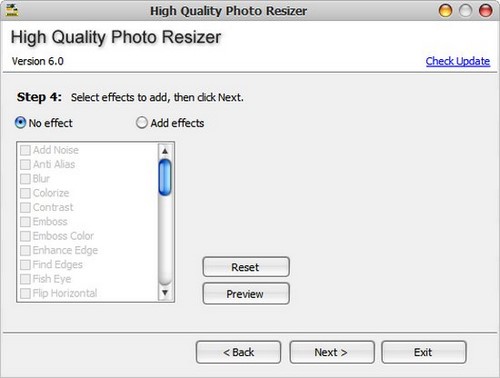
Step 7: The tool gives you many effects such as blur, noise, fish eye effect and many other effects you can add. Select No effect if you don't want to add any effects to the photo then click Next.
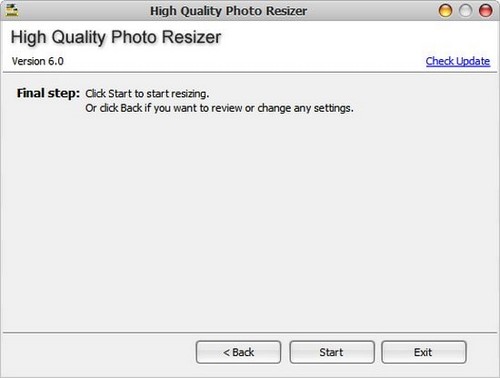
Step 8: Click Start to start reducing photo size in batches.
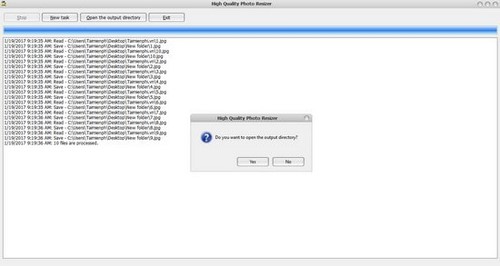
Step 9: After reducing the image size in batch, the tool will ask you if you want to open the output directory ( Do you want to open the output directory? ).
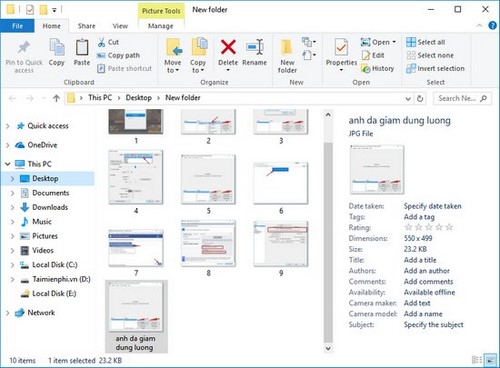
Step 10: You can compare the reduced image with the original image. In this example, TipsMake has reduced the image size to 23.2 KB compared to 31 KB before reducing the size.
So this guide has guided you to reduce the size of photos in bulk using High Quality Photo Resize to help you save memory resources and especially for those who are looking for a tool to reduce the size of photos to upload to the website. You can find many other photo editing software to serve your many purposes if you don't like to install tools on your computer to limit the consumption of hard drive memory.
Final Thoughts
The most reliable way to handle reduce photo size in batches with high quality photo resize is to follow the process in order, verify each important setting, and test the result before moving on. Use the guidance above as a practical reference, then adjust the details for your device, software version, or specific goal.
FAQ
What should I check before I reduce photo size in batches with high quality photo resize?
Use the latest available software, confirm that your device meets the requirements, and make sure you have the necessary permissions, account access, or backup before changing anything.
Why might I be unable to reduce photo size in batches with high quality photo resize?
Common causes include outdated software, missing permissions, incompatible settings, incomplete setup steps, or a temporary network problem. Recheck the process from the beginning and restart the app or device if needed.
Is it safe to reduce photo size in batches with high quality photo resize?
It is generally safe when you use official tools, review every permission, and back up important data before making system-level or account-level changes.
Related Articles
 3 Best Photo Resize Applications on Your Phone3 minutes read
 Install High Quality Photo Resizer3 minutes read
 Resize Images, Image Resizing Software3 minutes read
 Guide to Resize a Batch of Photos on Mac Using Automator5 minutes read
 Reduce Image Size Online Without Breaking the Image, Keeping7 minutes read
 Instructions to Reduce Photo Size on Windows 112 minutes read
Reader Comments 0
Sign in with email or Google to join the discussion.