How to Fix Installation Error 0x800f081f on Windows 11
When trying to update your PC, error code 0x800f081f can cause trouble and prevent you from performing the system update.
Table of Contents
Running Windows Updates is essential to keep your PC running smoothly and avoiding new security risks. But sometimes, when trying to update your PC, the error code 0x800f081f can cause problems and prevent you from performing system updates. Windows 11 users have reported encountering an installation error – 0x800f081f related to .NET Framework 3.5, which can be quite difficult to resolve.
Installation error – 0x800f081f can also be triggered when trying to run the DISM command to repair system files. So, this guide will cover all the solutions to fix error code 0x800f081f on PC. Here are 6 simple ways to fix installation error – 0x800f081f on Windows 11.
Method 1: Enable .NET Framework from Windows Features
- Press the Windows key + S shortcut on Windows 11 to open search. You can also click the Start menu to search for apps, settings, etc.
- Search for 'Windows Features' , then click the suggestion that says 'Turn Windows features on or off'.

- Next, click the checkbox next to '.NET Framework 3.5' if it is not already selected.

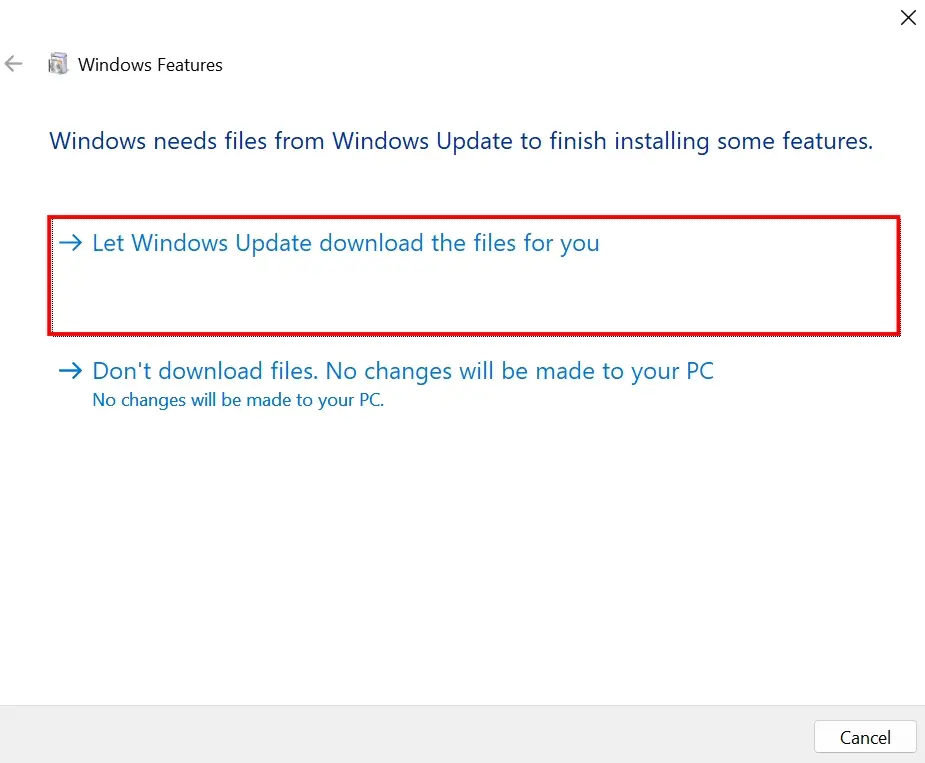
- Once done, click OK . Windows will then prompt you to download and install the feature through Windows Update.
- Continue by clicking 'Let Windows Update download the files for you' and .NET Framework 3.5 will begin installing.
If .NET Framework 3.5 is already installed on your system, the check box will be selected when you open Windows Features in step two. In this case, you can disable and re-enable .NET Framework 3.5 to reinstall it.
Method 2: Run Windows Update Troubleshooter
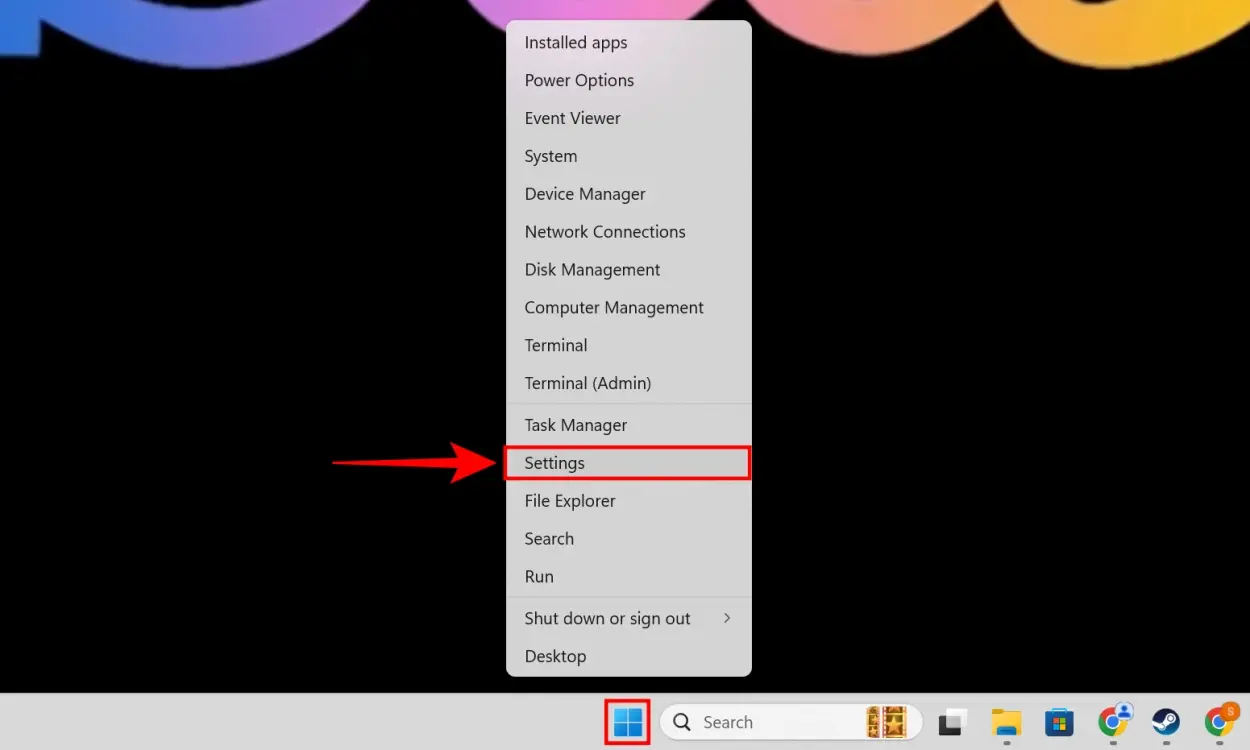
- Right-click the Windows button on the taskbar and select Settings . You can also open the Settings app by pressing the Windows key + I shortcut .
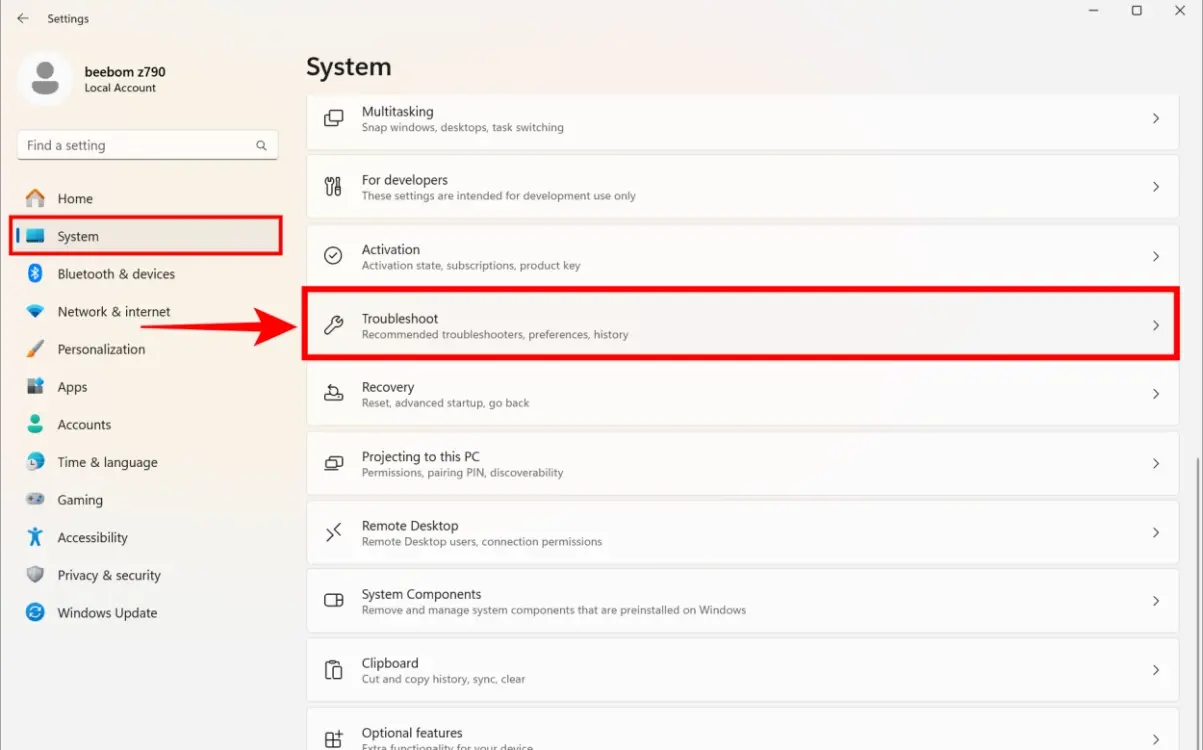
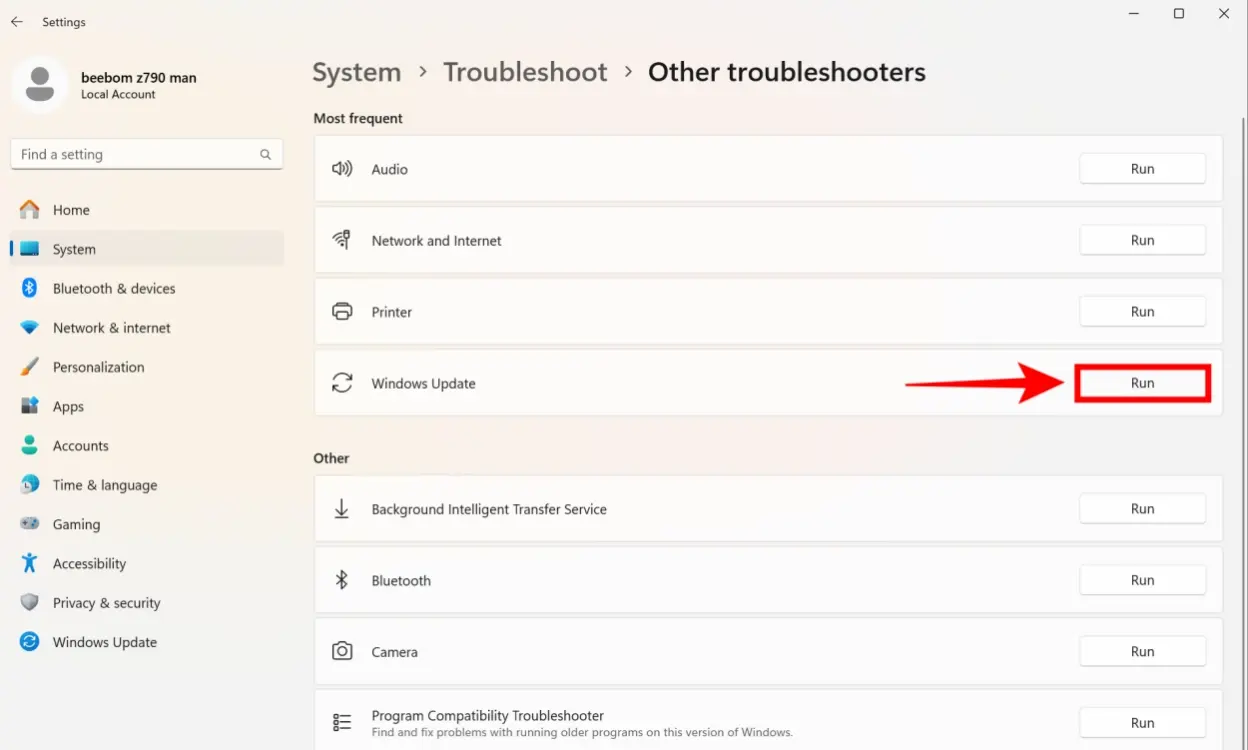
- Next, click on System in the left sidebar. Here, scroll down until you find Troubleshoot and click on it to access the troubleshooting options.
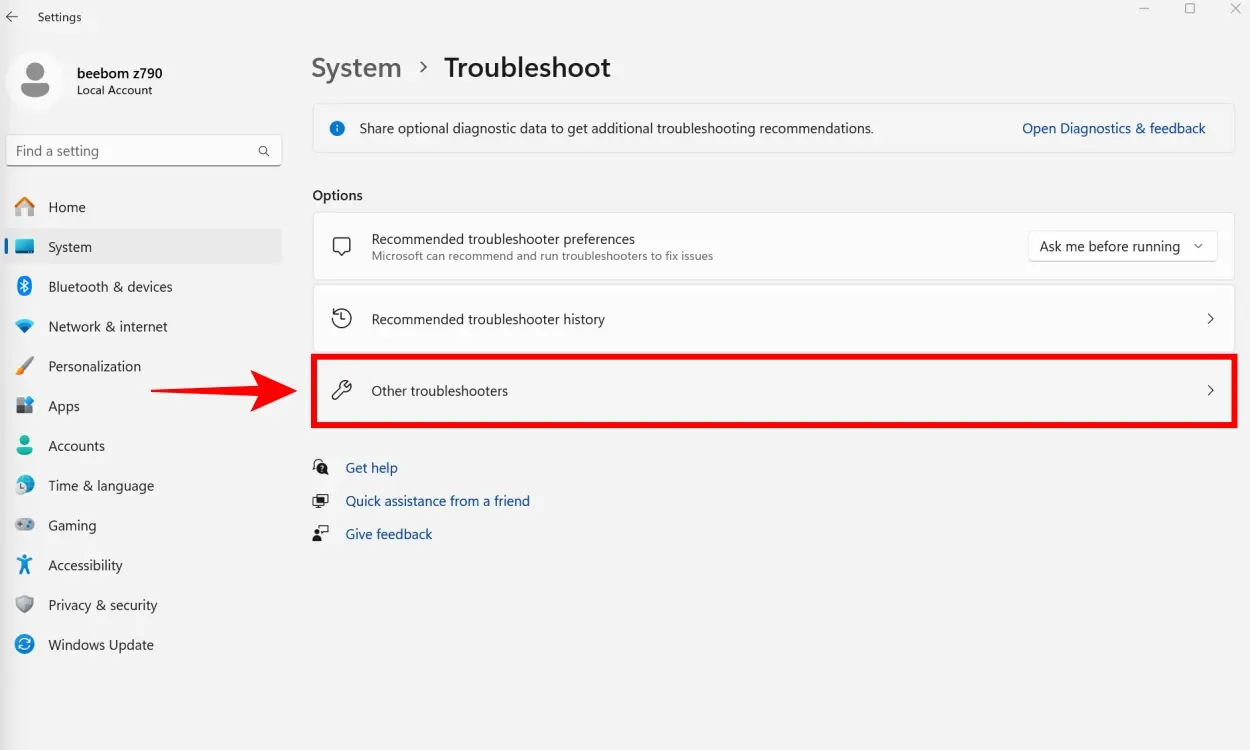
- Here, click on Other troubleshooters .
- Finally, click the Run button next to Windows Update in this menu.
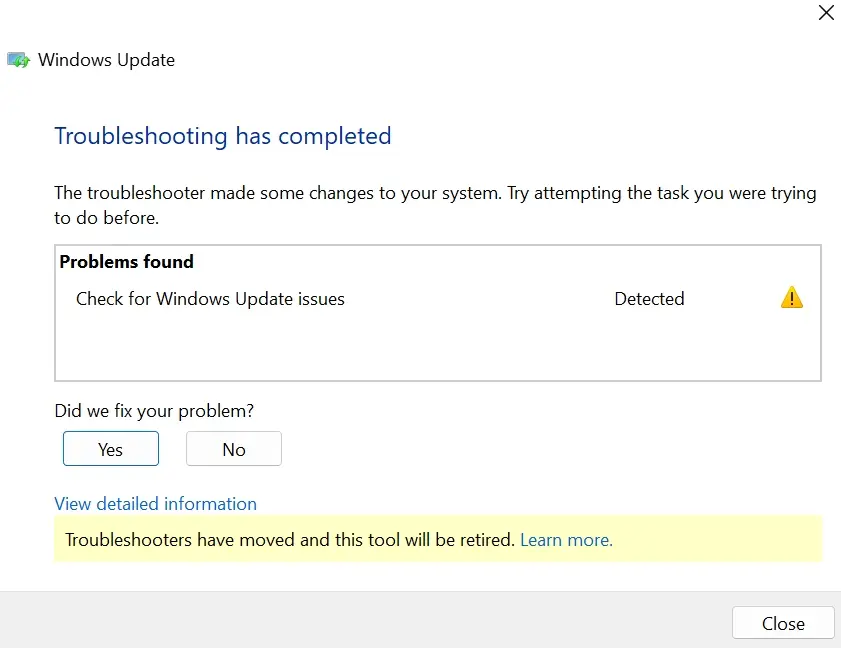
- Follow the instructions prompted by the Windows Update Troubleshooter. It will attempt to resolve the 0x800f081f error for you and also check for any issues that are preventing Windows Update from working.
Method 3: Reset Windows Update Services
The next fix to resolve the installation error – 0x800f081f on Windows 11 is to restart Windows Update Services. Here's how you can do it:
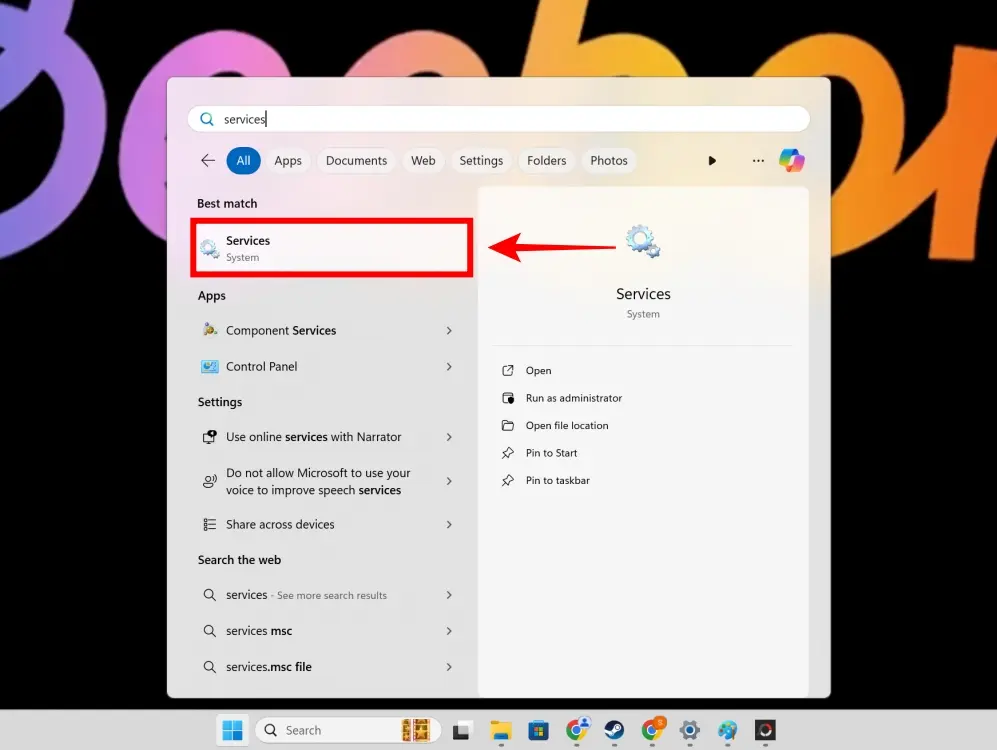
- To do this, first open Windows Search by pressing the Win + S shortcut (or accessing it via the taskbar)
- Type Services in the Windows search menu. Click on the suggested result as shown below.
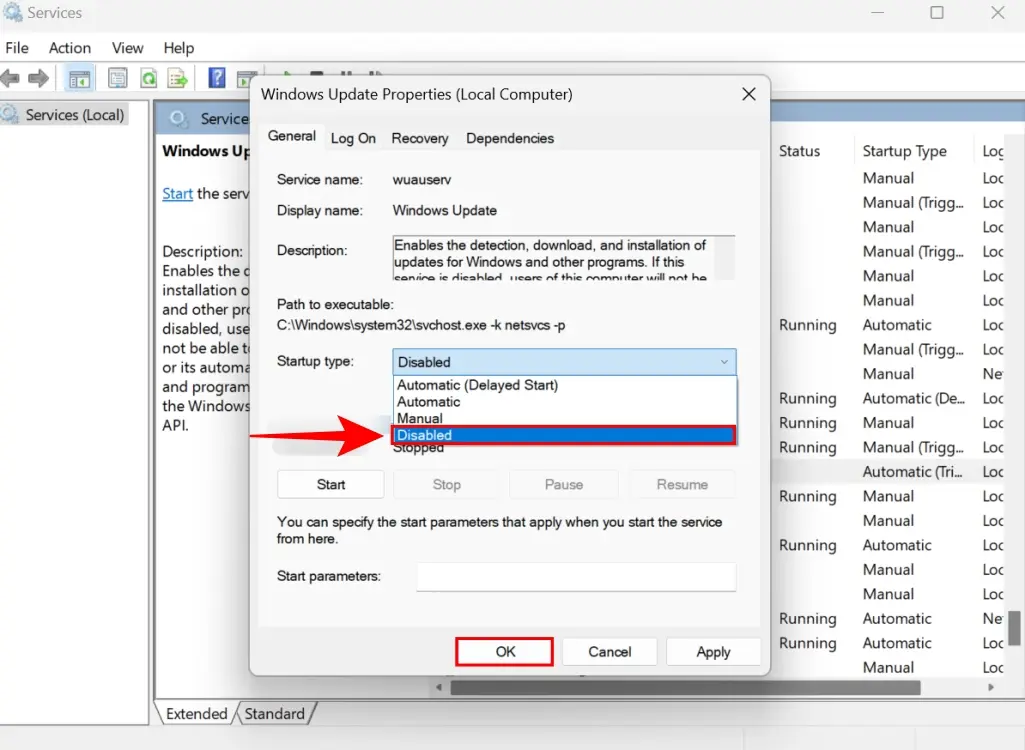
- Now, scroll down and find Windows Update . Once you do, right-click on it and click Properties .
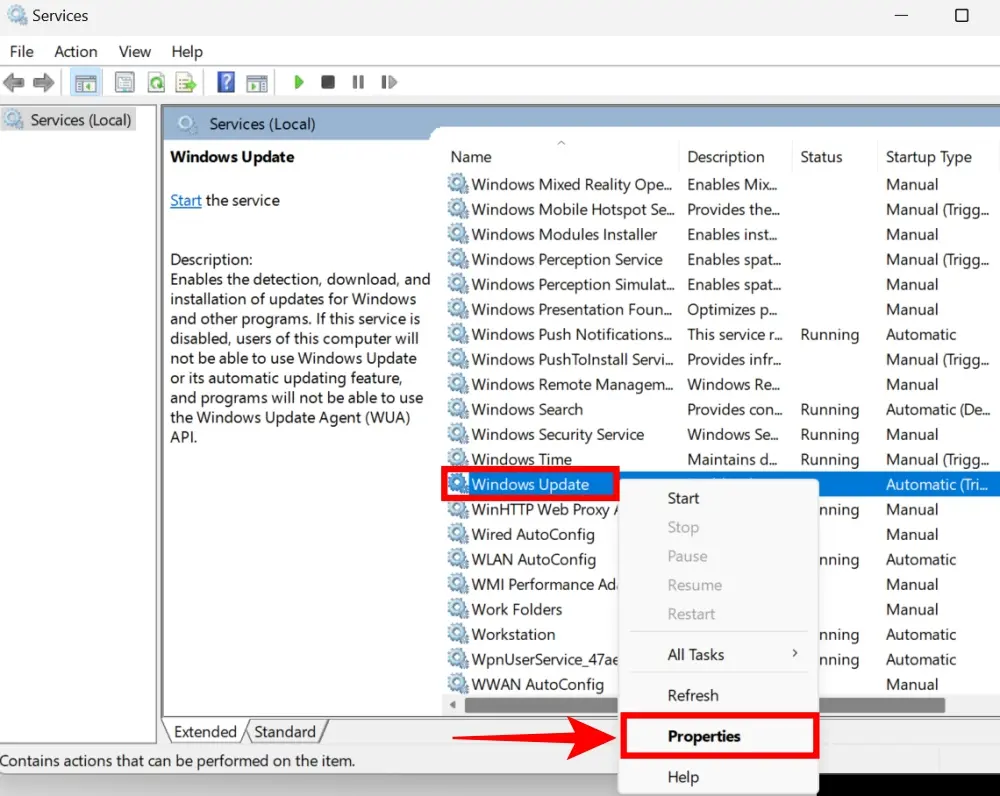
- Here, click on the drop-down menu next to Startup type and click on Disabled. Then, click OK to apply these changes.
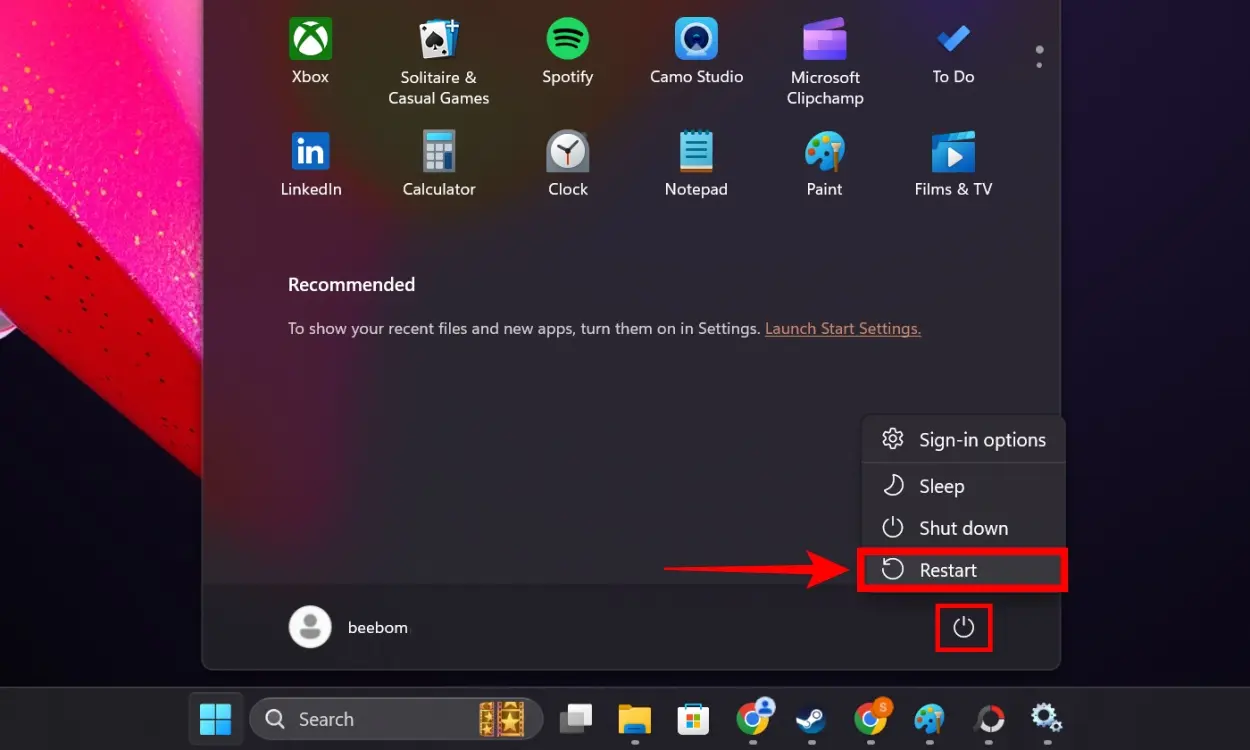
- First, restart your PC . Then, you need to turn Windows Update Services back on. To restart, click the Windows button > Power button icon > select Restart .
- When you return to the desktop, open the Windows Services list again .
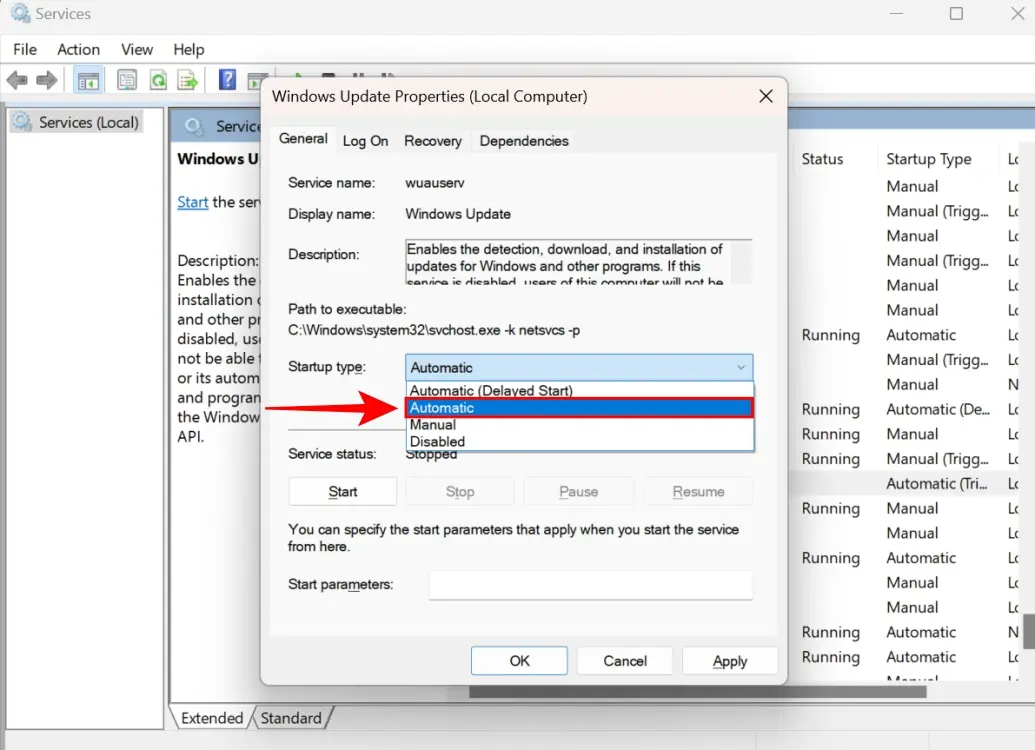
- Open Windows Update Properties again.
- This time, in the Startup Type setting , click Automatic instead. Click OK to complete the change.
- Windows Update Services has been successfully restarted. Before trying to check if the installation error 0x800f081f is fixed, restart your PC.
Method 4: Run DISM & SFC Commands in CMD
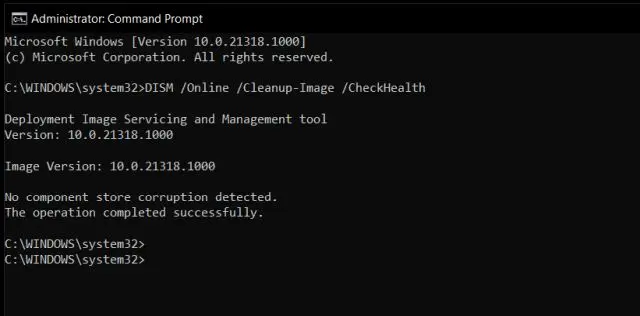
- The DISM command can be useful for fixing errors in Windows. Open Search by pressing the Win + S keyboard shortcut or clicking the search menu in the taskbar.
- Search for cmd and when the suggested result for Command Prompt appears, click Run as administrator , as shown below.

- Once in Command Prompt , copy and paste the command mentioned below and press Enter .
DISM /Online /Cleanup-Image /CheckHealth
- Remember that you need to have Internet access when using DISM. After the above command, type the next command mentioned below and press Enter .
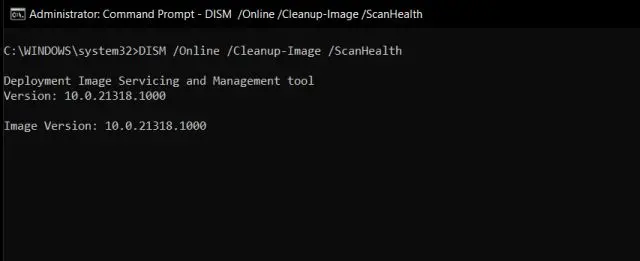
DISM /Online /Cleanup-Image /ScanHealth
- Enter this final DISM command into Command Prompt as mentioned below. As before, press Enter to continue.
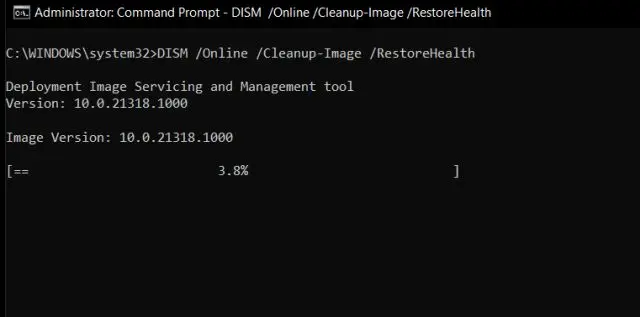
DISM /Online /Cleanup-Image /RestoreHealth
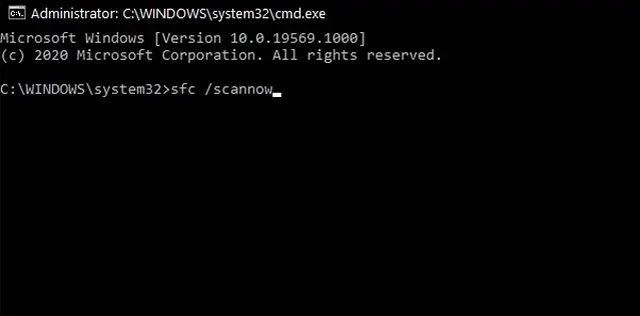
- System File Checker (SFC) verifies the integrity of operating system files. While CMD is still running, type the command below and press Enter .
/scannow
- This will take a while, but once it's done, check to see if the 0x800f081f installation error is gone.
Method 5: Change Windows Update settings in Group Policy Editor
This is a simple way to fix the installation error on Windows 11. However, if you are on Windows 11 Home edition, you may need to enable Group Policy Editor first to use it. Once done, follow the steps below:
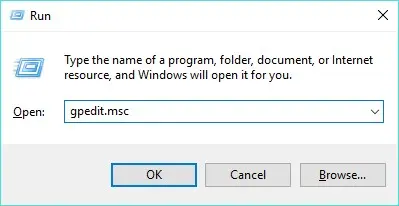
- Press Windows + R to launch the Run command window . Here, type gpedit.msc and click OK .
- Now, Local Group Policy Editor will open. Here, navigate to Computer Configuration > Administrative Templates > System .
- On the right, look for the 'Specify settings for optional component installation and component repair' setting .
- Then right click here and click Edit.

- Now click on Enable and finally click on OK to apply your changes.

- Restart your PC. Then check if this group policy editor method to fix error 0x800f081f works for you.
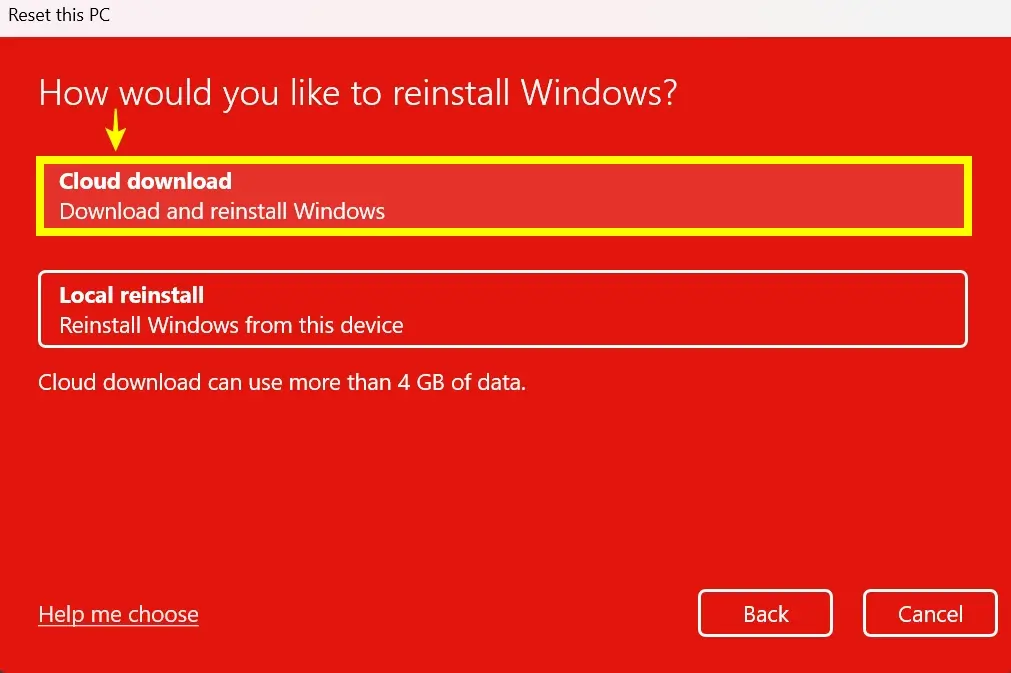
Method 6: Reset Windows 11 settings
- To fix Windows Update installation error 0x800f081f, you may consider resetting your Windows 11 operating environment as shown in the linked guide.

- Remember to select Cloud download when performing the reset process. It will download the latest build of Windows 11.
- You can also consider the clean install method where you manually reinstall Windows 11. You will need a USB drive of 8GB or more for this.
Solving the installation error 0x800f081f can be frustrating. However, the solutions mentioned above can help you fix the problem on your Windows 11 PC in no time. While you're here, check out some of the cool new features coming with the Windows 11 24H2 update later this year. Also, here are some simple ways to speed up Windows 11 !
Good luck!
See also the following articles:
- Enable .Net Framework 3.5 on Windows 8
- Instructions for installing .NET Framework 3.5 Offline on Windows 10
- How to enable .NET FrameWork on Windows 10?
Was this article helpful?
Your feedback helps us improve.
Related Articles
 How to fix error 0x800F081F on Windows 102 minutes read
 Fix Windows 10 update error 0x800f0988, 0x800f081f or 0x800f08a4 minutes read
 Fix error 0x800F081F when installing .Net Framework 3.53 minutes read
 Instructions to fix Windows 7 installation error11 minutes read
 Windows 10 KB5001330: Prevent these serious problems in the latest update2 minutes read
 Instructions for fixing 1406 errors during application installation3 minutes read
Reader Comments 0
Sign in with email or Google to join the discussion.