Table of Contents
This practical guide explains how to Disable Activity History on Windows 11 through clear, ordered steps. It also covers useful settings, common mistakes, and checks that can improve the final result.
Activity history is a built-in feature in Windows 11 that keeps a record of various tasks performed on your computer. Activity history helps you see what you have done in the past, such as which apps, documents, and websites you have opened, at what time, and on what day. If you want to delete or disable activity history on Windows 11, follow the instructions below.
How to Clear Activity History on Windows 11
Step 1:
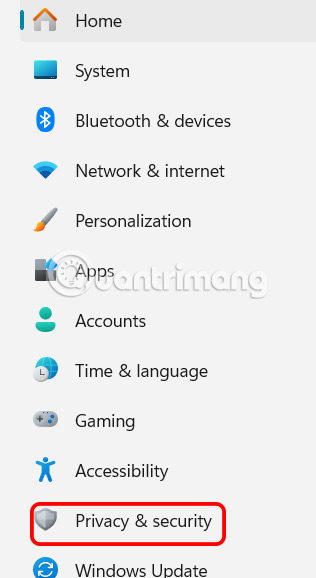
You press the Windows + I Key combination to efficiently access Windows settings. Next, the Privacy & Security User is on the left side of the interface.
Step 2:
Next, look at the content next to it, click on Activity History To see the activity history on Windows 11.

Step 3:
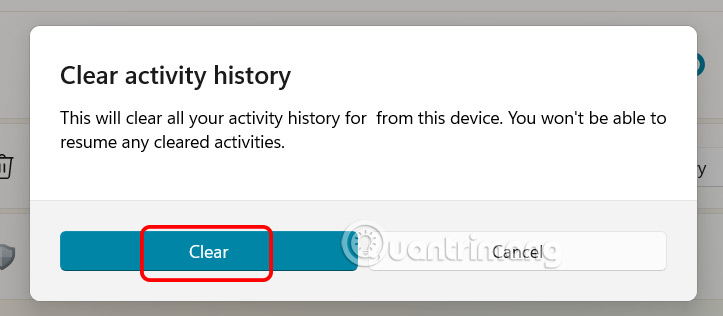
In this new settings interface, go to Clear Activity History for This Account And click The Clear History button To delete activity history on Windows 11.

Finally, Click Clear To proceed to delete activity history on Windows 11.
How to Disable Activity History on Windows 11
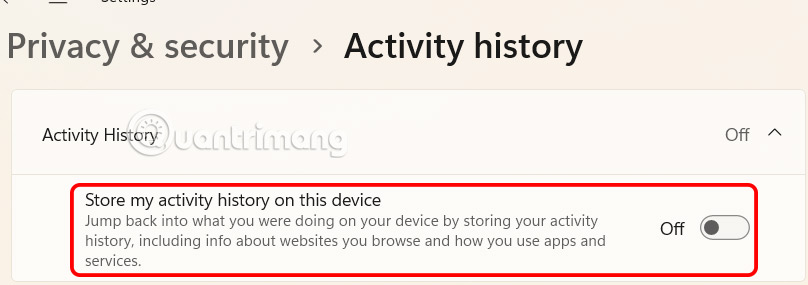
If you want to stop Microsoft from collecting your activity data, you need to turn off activity history in Windows 11. Once you turn this feature off, your computer will stop tracking and storing your activities.
In the Activity History management interface, you need To deactivate Store My Activity History on This Device , slide the round button to the left to switch to Off mode.
FAQ
How do I Disable Activity History on Windows 11?
Follow the steps in this guide in order, verify each setting before continuing, and check the result after every major change.
What should I prepare before I Disable Activity History on Windows 11?
Confirm compatibility, install current updates, save important work, and back up data before changing system or application settings.
What can I do if disable Activity History on Windows 11 does not work?
Review permissions and requirements, restart the relevant device or app, repeat the steps carefully, and use official support resources when the issue continues.
Related Articles
 How to View AI Activity by App in Windows 119 minutes read
 Instructions for Deleting Microsoft Copilot Activity History3 minutes read
 How to Lock TikTok Activity History with FaceID3 minutes read
 Windows 10 Collects and Sends Your Activity History to Microsoft3 minutes read
 The Suspect on the Network Was Arrested After the Provider Shared VPN Access6 minutes read
 How to View and Delete Activity History on Windows 105 minutes read
Reader Comments 0
Sign in with email or Google to join the discussion.