How to cut photos using Microsoft PowerPoint
PowerPoint is a software used for presentations, it needs a design tool to create compelling presentations. Therefore, you need to learn how to manipulate images and create interesting effects with photos in PowerPoint. This article will show you three ways to edit photos in PowerPoint.
Table of Contents
PowerPoint is a software used for presentations, it needs a design tool to create compelling presentations. Therefore, you need to learn how to manipulate images and create interesting effects with photos in PowerPoint. This article will show you three ways to edit photos in PowerPoint.
Video tutorials cut photos on PowerPoint
Method 1: Crop the image using the Crop tool on PowerPoint
Step 1 : Go to Ribbon and press Insert> Picture to add images to the slide.
See also: How to insert text into images in PowerPoint
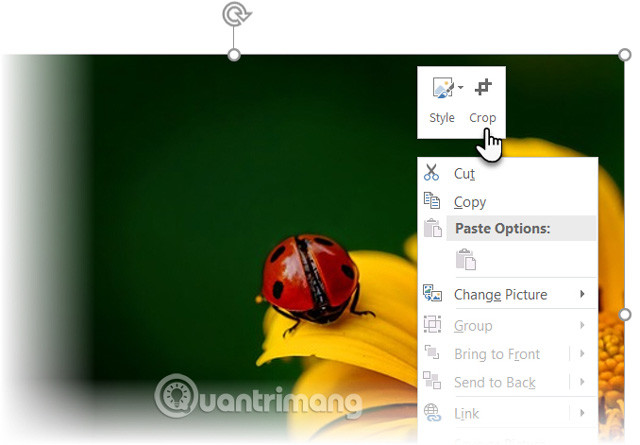
Step 2 : Right click on the image and click on the Crop button that appears at the top. The black bar on the edges and corners allows you to resize the image.
Step 3 : Drag one of these bars inside or out to crop the image. You can also cut four sides evenly by pressing Ctrl + dragging the frame in the corner or cutting both sides in parallel by pressing Ctrl + dragging the sidebar. If you want, you can drag the image to focus on the area you want to keep.
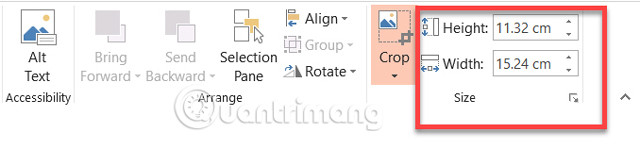
Step 4: To cut to a specific size, use the Height and Width boxes next to the Crop button.
Step 5 : Press Esc to finish or click anywhere outside the image.
Method 2: Cut the image according to the frame rate
Assuming you have photos you want to cut into squares or any popular aspect ratio, PowerPoint lets you cut with some standard ratios with just a click.
Step 1 : Click and select the image on the slide.
Step 2 : Go to Picture Tools> Format . In the Size group, click the drop-down arrow under the Crop button.
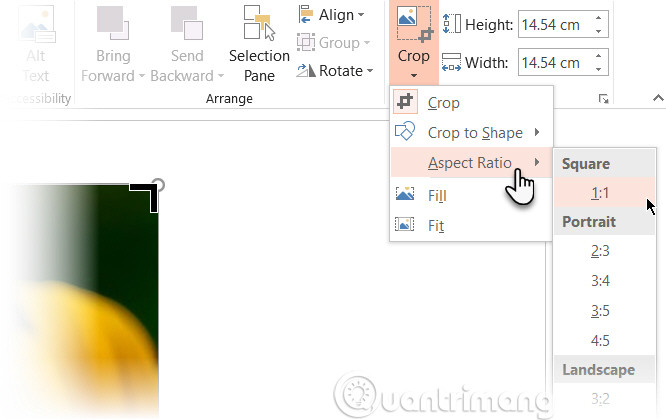
Step 3 : Select the ratio in Aspect Ratio you want to use and apply to the image.
Step 4 : Use the Crop rectangle to adjust the crop area. You can also use the scroll bars to adjust the final size.
Method 3: Cut the image into any shape
Fill Shape can be used with the Crop tool and create interesting effects. For example, you can use a circle to cut a headshot image.

Step 1 : Go to Insert> Shapes and select the shape from the available options.
Step 2 : Click Drawing Tools> Format . In the Shape Styles group, click Shape Fill> Picture .
Step 3 : Browse to the image you want to use and insert it into the shape.
Step 4 : Click to select the image in the picture.
Step 5 : Go to Picture Tools> Format . In the Size group, click the arrow under Crop to display two cutting options.
Step 6 : Select Fill or Fit .
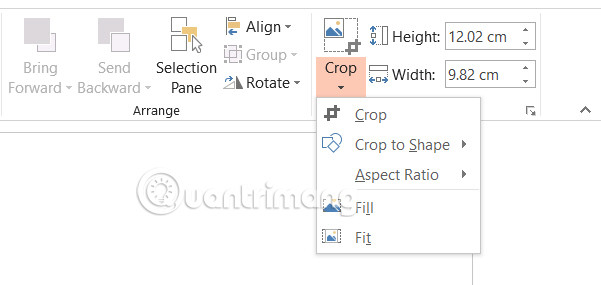
Fill to fit the width or height of the shape, in a larger direction. Fit will set the image size to the height or width of the image, both fit perfectly to the size of the shape.
Similarly in the above methods, you can use the pull bar to adjust the position of the shape to match the cut shape.
I wish you all success!
See more:
- Fix 6 common errors on PowerPoint slides
- Strange, strange moves for PowerPoint users
- MS PowerPoint - Lesson 7: Insert images and graphics in the slide
Was this article helpful?
Your feedback helps us improve.
Related Articles
 Link to download Microsoft PowerPoint 20194 minutes read
 How to insert images below the word on PowerPoint3 minutes read
 How to flip, rotate images on PowerPoint3 minutes read
 PowerPoint 2019 (Part 1): Getting Started with PowerPoint6 minutes read
 PowerPoint 2019 (Part 11): Presenting Slideshows7 minutes read
 PowerPoint 2019 (Part 6): Applying Themes4 minutes read
Reader Comments 0
Sign in with email or Google to join the discussion.