Steps to crop images in PowerPoint
1. How to Add Photos to PowerPoint
Before cropping images in PowerPoint, you will have to add images to the software so that they have data and process quickly. How to add images to PowerPoint as follows:
Step 1: You proceed to select Insert => Pictures => This Device/ Online Pictures…
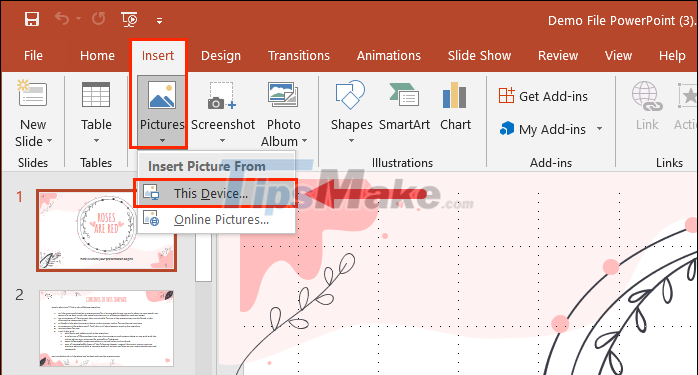
If you choose images available on your computer, then choose This Device and if you want to choose photos directly on the Internet, choose Online Pictures .
Step 2: With just such basic operations, you can quickly and accurately add images to PowerPoint.
2. How to crop a free image in PowerPoint
PowerPoint has a lot of different cropping modes, and each mode has unique features for users. For the free cropping mode, you will crop the image without any rules, they depend on your needs.
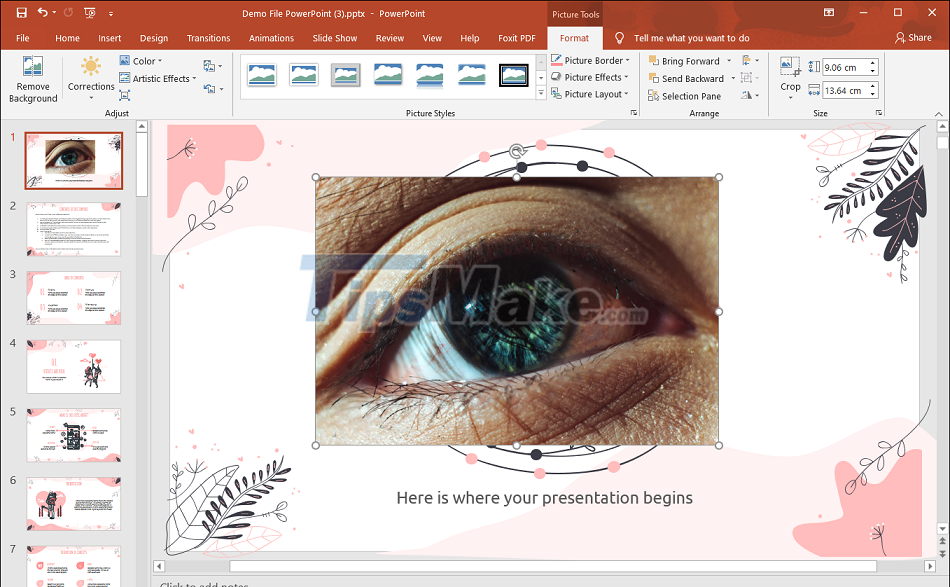
Step 1: Double-click on the image to switch to editing mode (Format).
Step 2: Then, select the Crop item and view the available extended feature table.

Step 3: In this article, we will crop the image freely, so please select the Crop item .
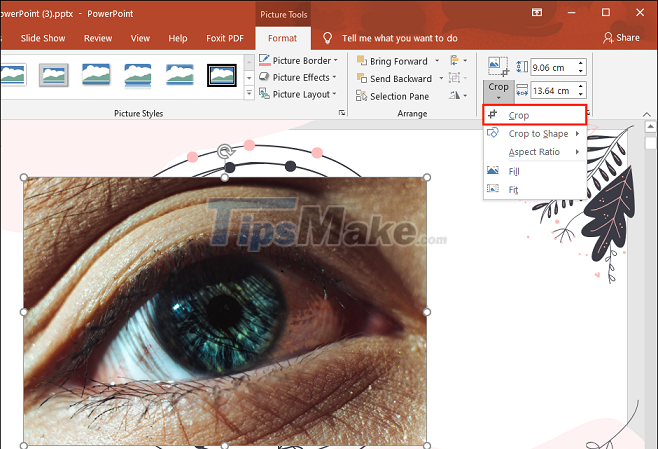
Step 4: PowerPoint's image cropping mode will appear and you just need to resize it horizontally and vertically to suit your needs.
After selecting the picture frame to be cut, you just need to press Enter to confirm the cutting operation.

3. How to Crop Photos with Geometry in PowerPoint
PowerPoint also provides you with different geometric templates to cut shapes based on existing templates and to do this you just need a few basic steps as follows:
Step 1: You proceed to double click on the image in PowerPoint.
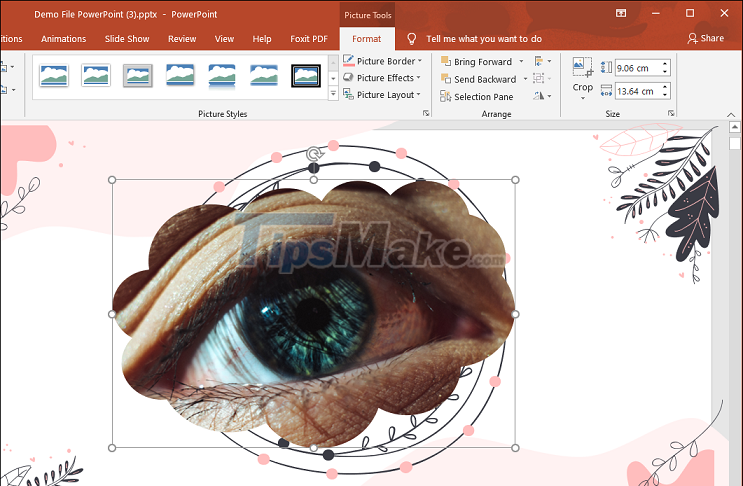
Step 2: Then, you choose Crop => Crop to Shape => Select the image you want.

Step 3: Immediately, the image will be automatically cropped based on the available geometry.
4. How to crop photos proportionally in PowerPoint
In case you need to be accurate in terms of scale, then you should choose how to crop the image according to PowerPoint's available ratio.
Step 1: You proceed to double click on the image to edit.
Step 2: Then, you select the item Crop => Aspect Ratio => Select the ratio .
In the cut modes, PowerPoint has already divided it for you as follows:
- Square: Square
- Portrait: Vertical rectangle
- Landscape: Horizontal rectangle
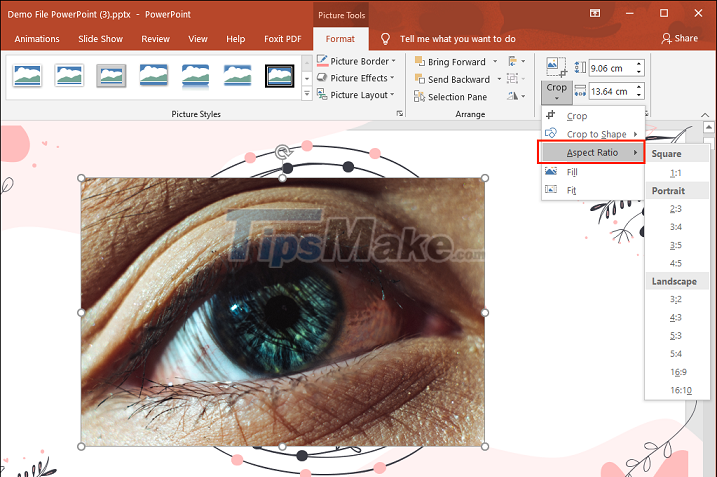
Step 3: After selecting the mode, you will have a fixed image frame and you can only adjust the size according to the ratio of that frame.
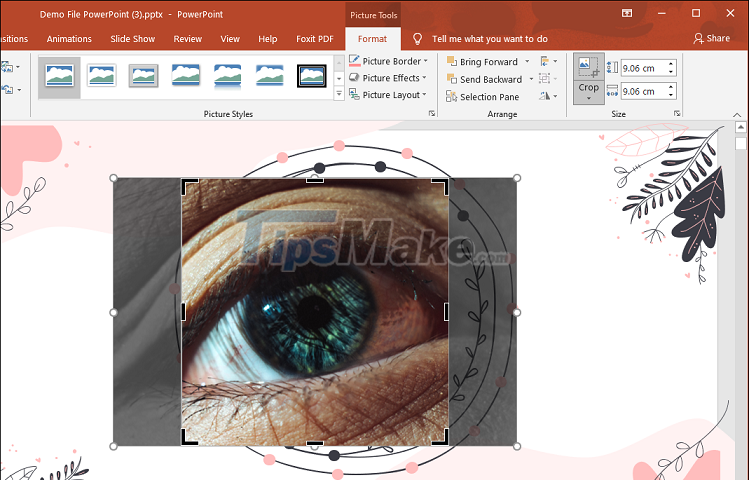
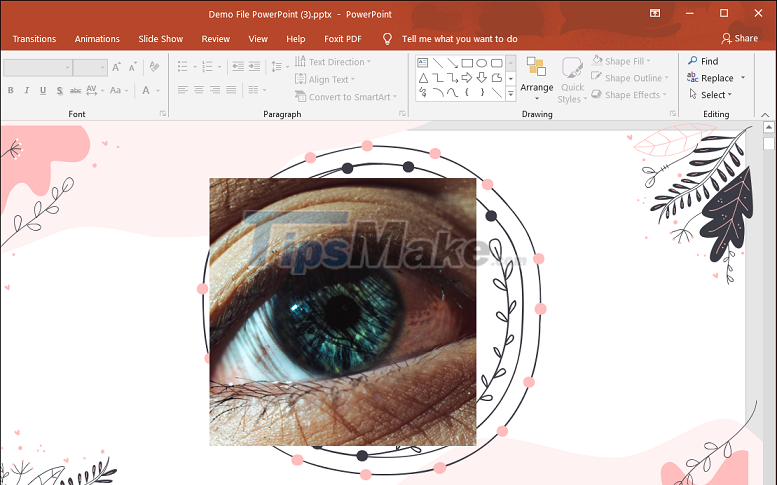
Step 4: After the adjustment is complete, press Enter to finish cropping the image.
5. How to crop photos with enlarged mode
In addition to the above image cropping modes, you also have an expanded cropping mode to fill the Slide or enlarge the image content on PowerPoint.
Step 1: You proceed to double click on the image to edit.
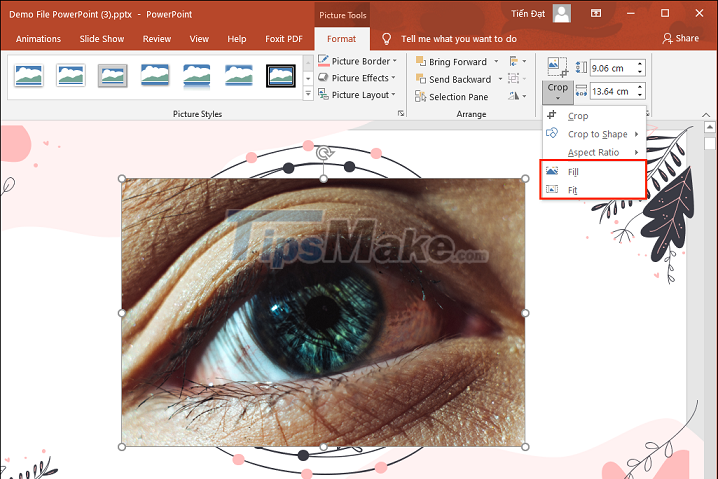
Step 2: Then, you proceed to select Crop => Fill / Fit .
If you choose the Fill mode, the image will be enlarged to the edges to fill it, while the Fit mode will enlarge the image unevenly (resize) to fill it.
In this article, TipsMake has shown you how to crop images in PowerPoint quickly and effectively. Have a nice day!