How to create whirlpool effect on Photoshop
Creating a whirlpool effect on Photoshop will increase the art of the image, as the whirlpools move.
Table of Contents
Creating additional effects for photos always adds art, as well as creating newcomings that attract viewers. With Photoshop image editing software, we can use a lot of effects creation tools such as creating color effects on Photoshop, lightning effects on Photoshop, or creating water movement effects.
Motion whirlpool effect can be used in many different situations, such as with a glass of water. Instead of leaving the image with a static water surface, we can create round swirls that look like motion. The following article will guide you how to create circular whirlpools in Photoshop.
- How to use Photoshop CS5 - Part 12: Create Light and Glow effects
- How to use Photoshop CS5 - Part 13: Create a reflection effect from the water
- How to use Photoshop CS5 - Part 14: Create motion effects
Tutorial to create Photoshop whirlpool effect
Step 1:
Click File and select Open to open the saved image in the computer to create the effect. Next, select the Eliptical Marquee Tool to create a selection on the water.

Step 2:
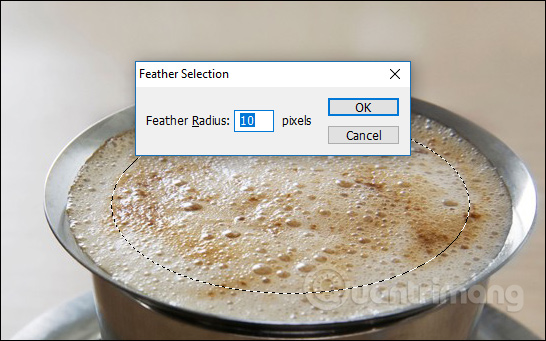
Next, the user delineates the water surface on the coffee cup.

Step 3:
Press Shift + F6 key combination and the Feather Selection dialog box appears. Here the user adjusts the horizontal bar at the Feather Radius between 10-15 and then click OK.
Step 4:
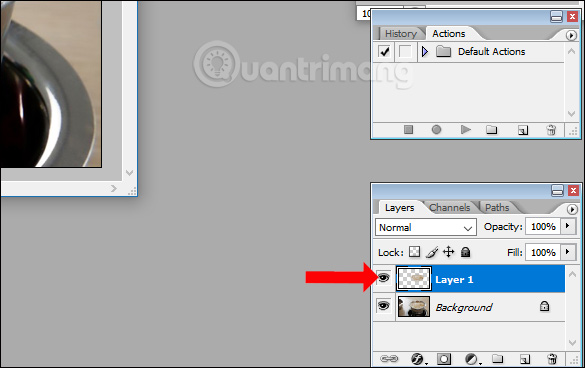
Click Ctrl + J to copy the selected water area to add a new layer as shown below.
Step 5:
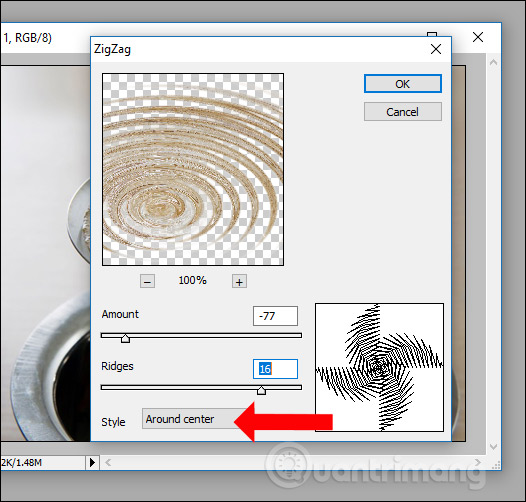
We look at the toolbar above and click on Filter then click on Distort and select Zigzag as shown.

At Zigzag interface, you select the Style as Around Center to create whirlpools from the center to spread out outside. Then move 2 sliders to create a whirlpool effect at your disposal.
Step 6:
The image will then have a whirlpool effect as shown below.
Press Ctrl + T again and right-click and choose Distort .
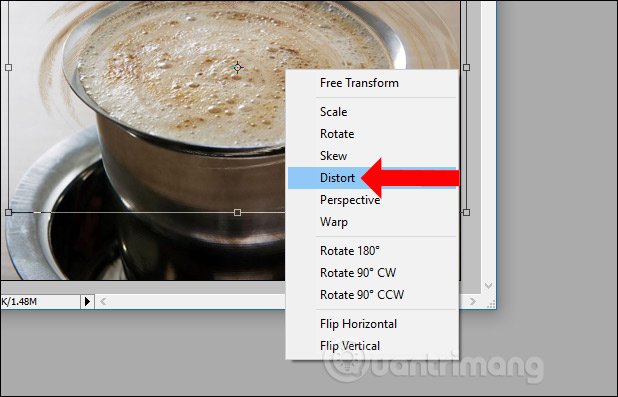
Step 7:
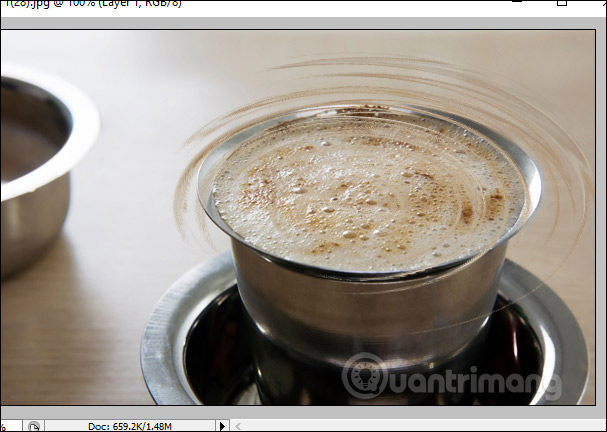
Users align, narrow the whirlpool area, adjust the position in the middle of the cup of water accordingly. Press Enter to complete the editing.

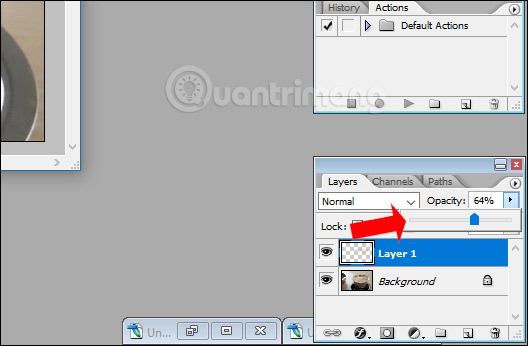
Next, on the duplicated layer, adjust the opacity to create a more realistic feel for the whirlpool. Finally, click Save to save the image.
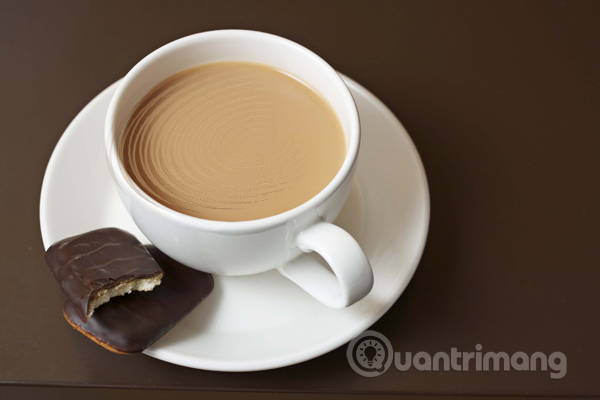
Your result will be a cup of coffee with a whirlpool like the picture.
Depending on the ability and skills of image processing, creating effects for images we can create a whirlpool effect that looks much better. The basic steps will be like above.
See more:
- How to integrate images into text on Photoshop
- How to design a simple logo in Photoshop
- Instructions for designing websites in Photoshop
I wish you all success!
Was this article helpful?
Your feedback helps us improve.
Related Articles
 Learn how to create a fade effect with Photoshop CS69 minutes read
 How to Create an Orton Effect in Photoshop3 minutes read
 How to create Picture in Picture effect in Photoshop12 minutes read
 How to use Photoshop CS6 (Part 4): Create a fading effect9 minutes read
 How to create poster effect for photos in Photoshop11 minutes read
 Tutorial to create a sparkling snow effect using Photoshop Brush3 minutes read
Reader Comments 0
Sign in with email or Google to join the discussion.