How to Create an Orton Effect in Photoshop
The Orton effect is traditionally a similar effect that photographers have used to great effect to improve their landscape and nature photos..
The Orton effect is traditionally a similar effect that photographers have used to great effect to improve their landscape and nature photos. In the digital age, it has become a filter that can be easily applied to your images on smartphones and in photo editors. This tutorial will show you how to easily create a beautiful and fully customizable Orton effect in Adobe Photoshop.
What is the Orton Effect?
The Orton effect is a post-processing technique used to create a soft and dreamlike effect, popular with landscape and nature photographers. It was created by photographer Michael Orton in the 1980s using photo slides to align at least one sharp image and one indistinct image together.
Nowadays, there are filters in photo editing apps that can give an Orton effect to your images. And for Photoshop users who want to create their own effects and have more customization control, they can achieve that easily with a few layers.
How to Create an Orton Effect in Photoshop
The Orton effect can be achieved in Photoshop with a few simple steps. First you need to create two duplicate layers set in different Blend Modes to change the layer properties. On top, place two adjustment layers and then apply a Gaussian Blur.
Follow these simple steps:
1. Duplicate the Background layer by pressing Ctrl + J .

2. Double click the copy layer and name it Screen.
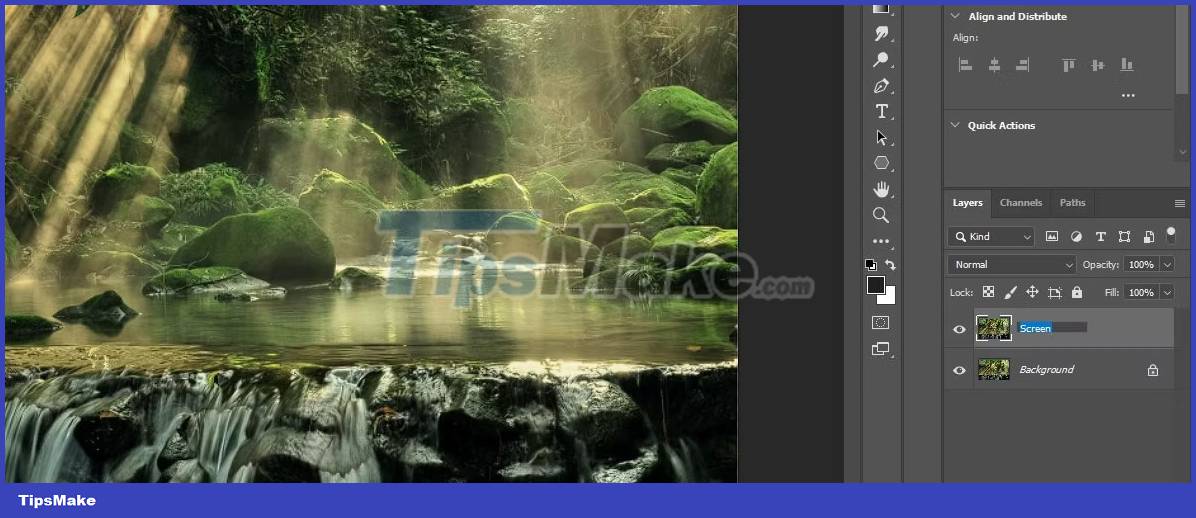
3. Change the top layer's Blend Mode from Normal to Screen.
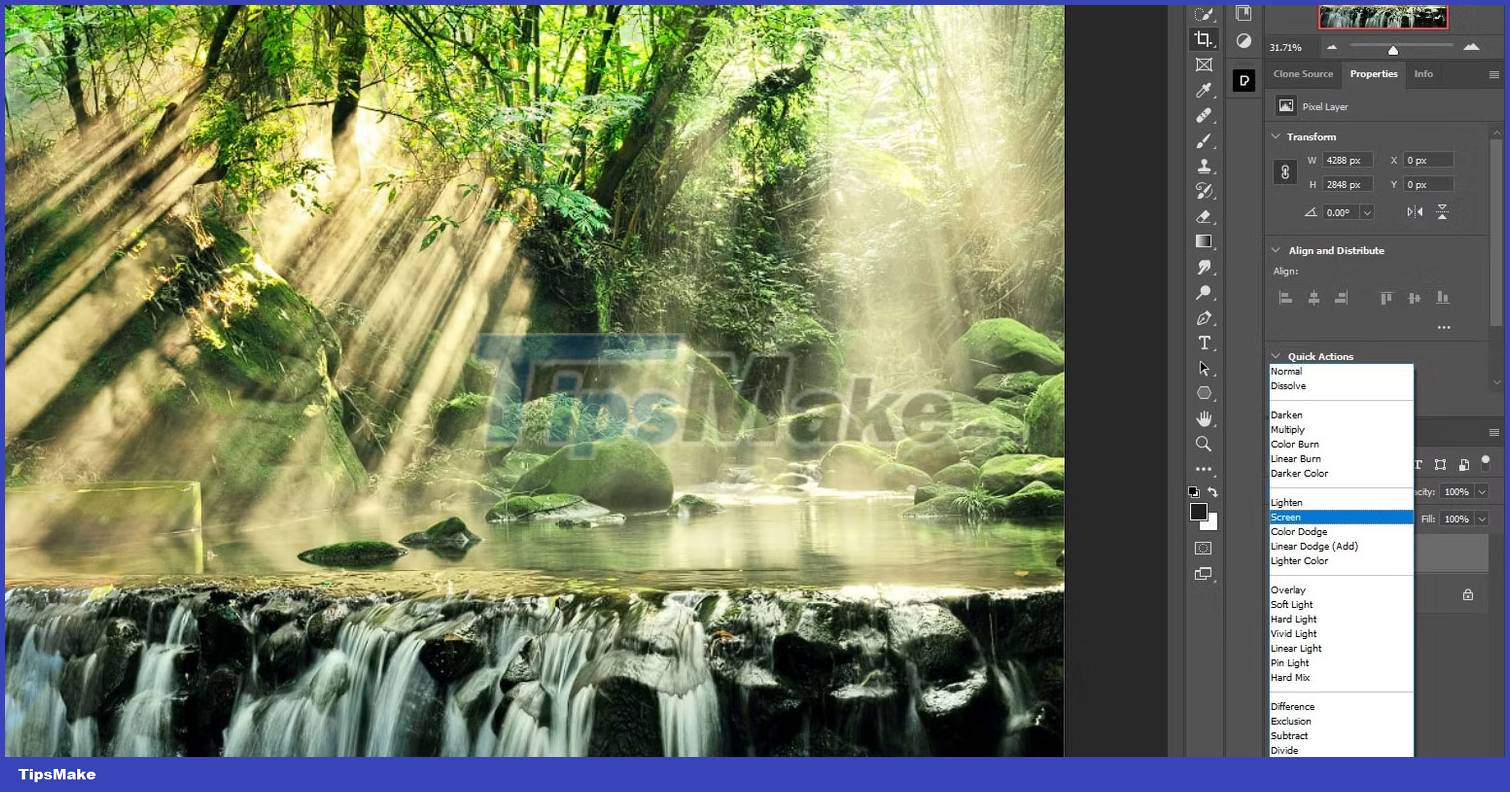
4. Press Ctrl + J to duplicate this layer and name it Multiply.
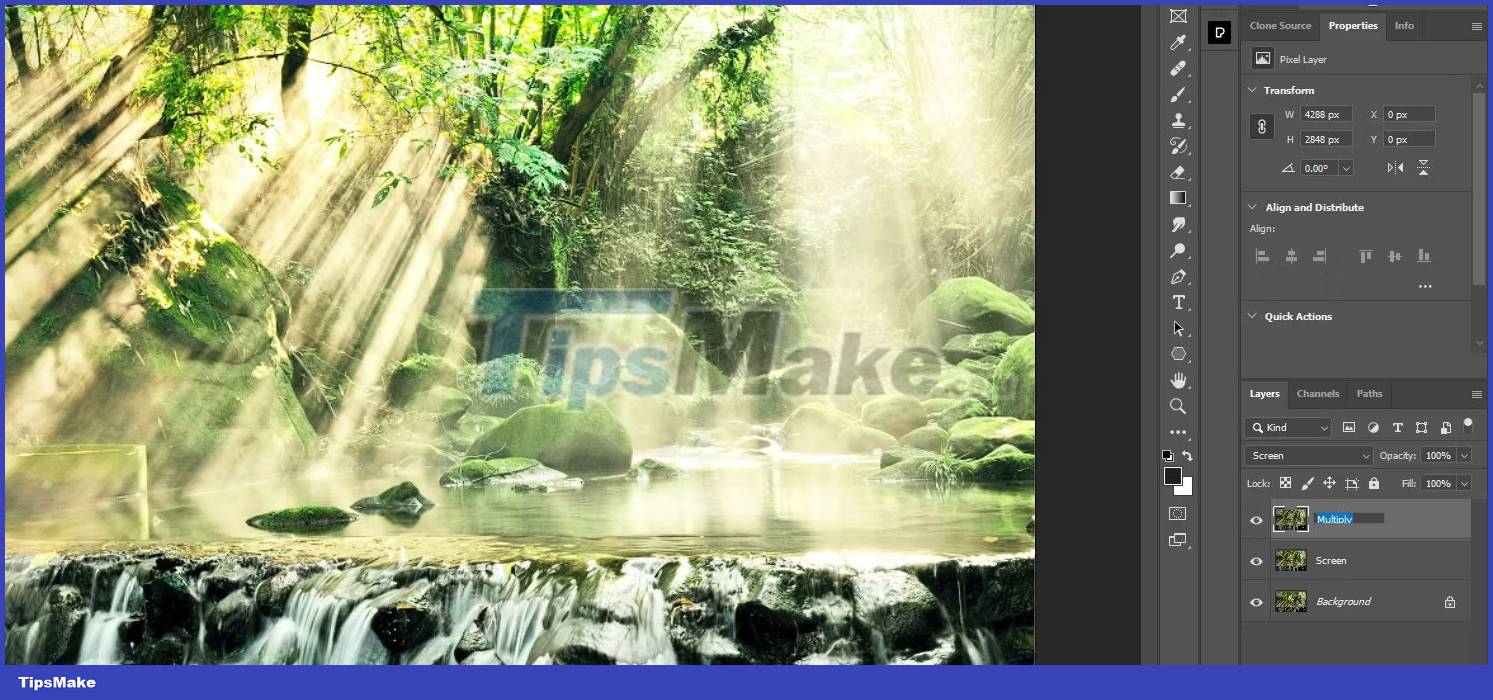
5. Change the Blend Mode from Normal to Multiply .
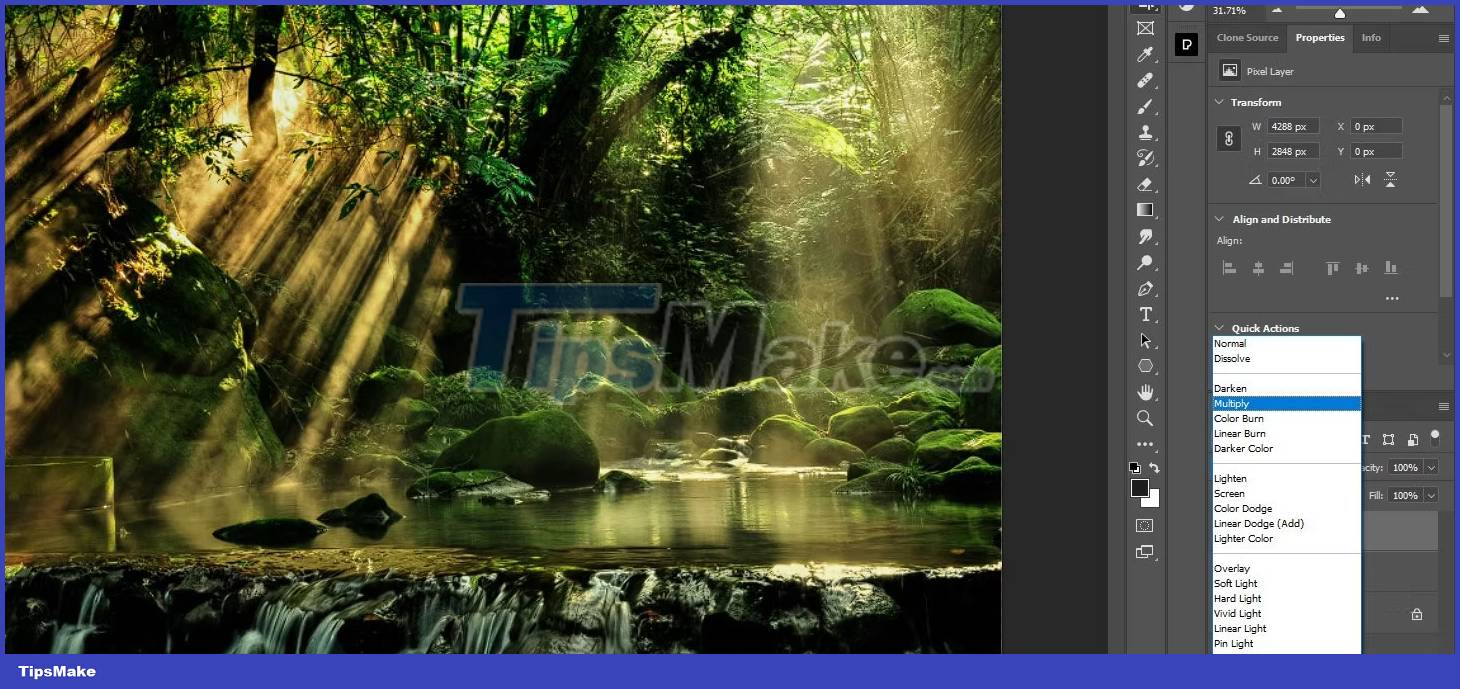
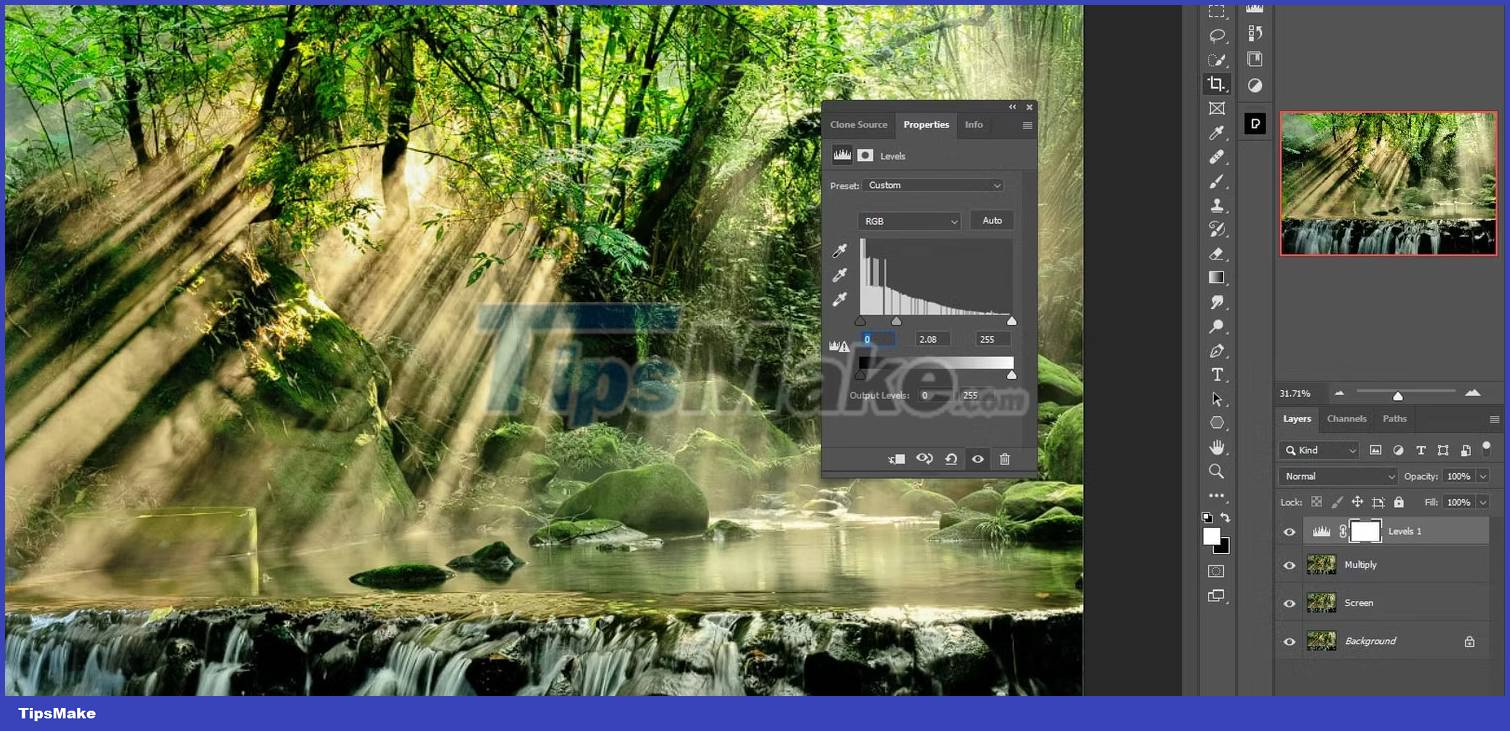
6. Create a Levels adjustment layer from the bottom right corner menu in Photoshop.
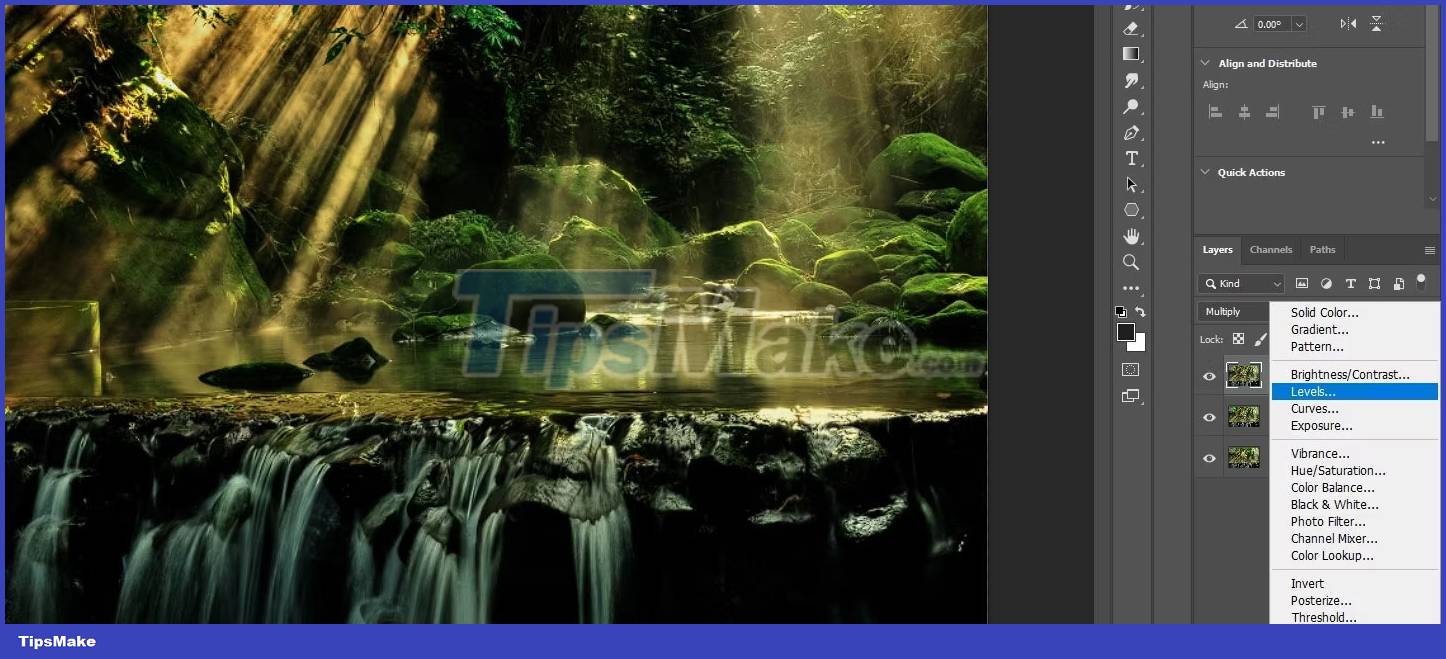
7. Move the Midtones slider to the left to lighten the image.
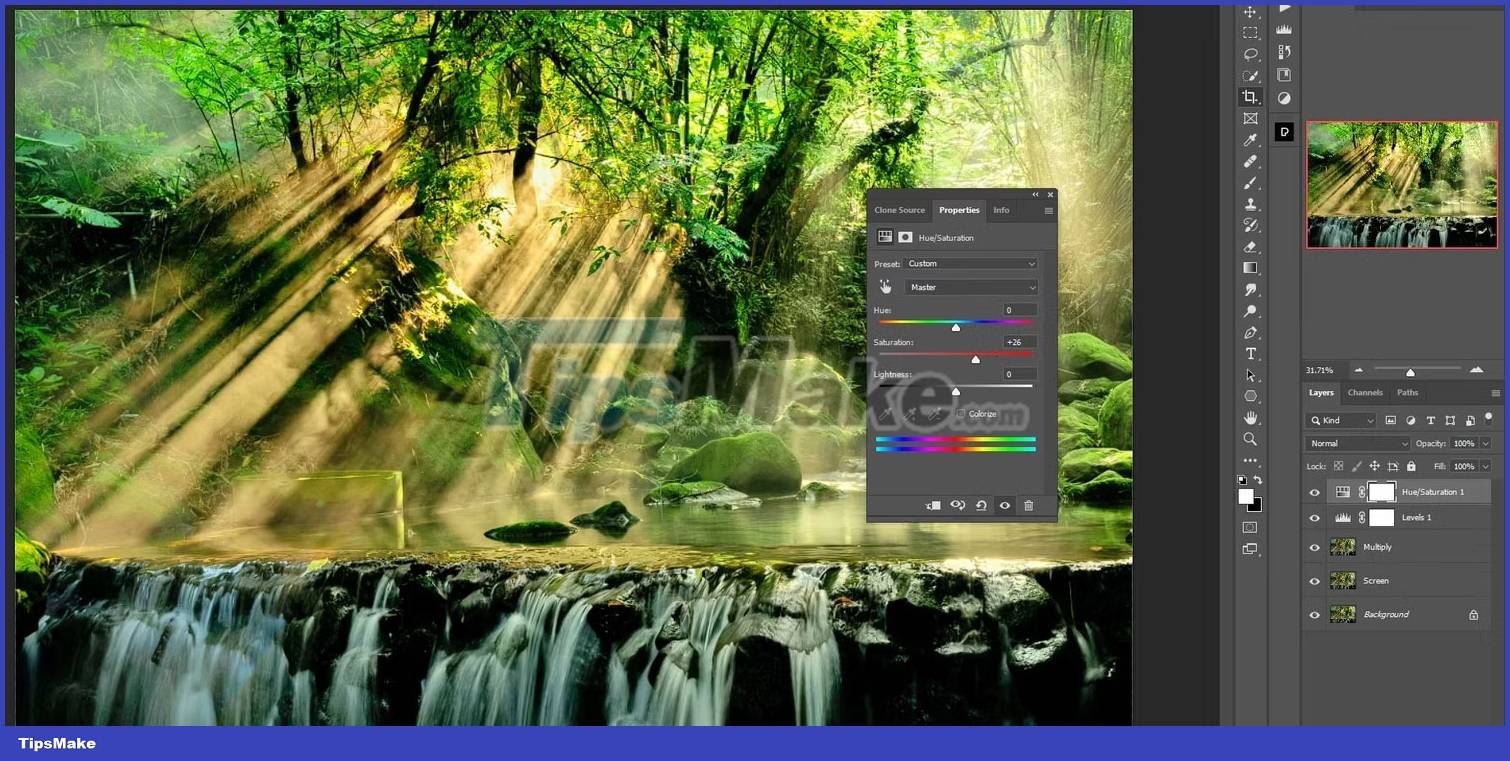
8. Create a Hue/Saturation adjustment layer from the bottom right menu in Photoshop.

9. Increase the Saturation slider to create a dreamlike effect. This value will vary depending on the image. You can always go back and change it.
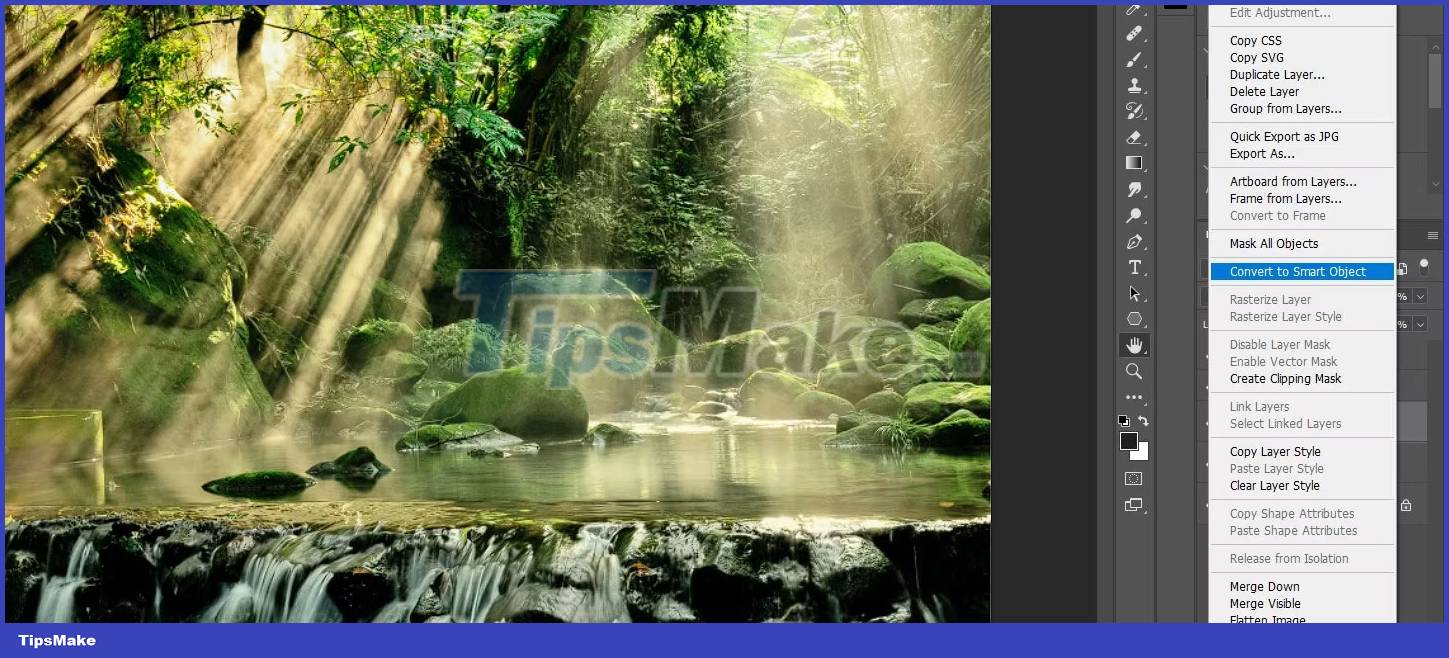
10. Click on the Multiply layer to activate it.

11. Right click on the Multiply layer and choose Convert to Smart Object .
12. Go to Filter > Blur > Gaussian Blur.
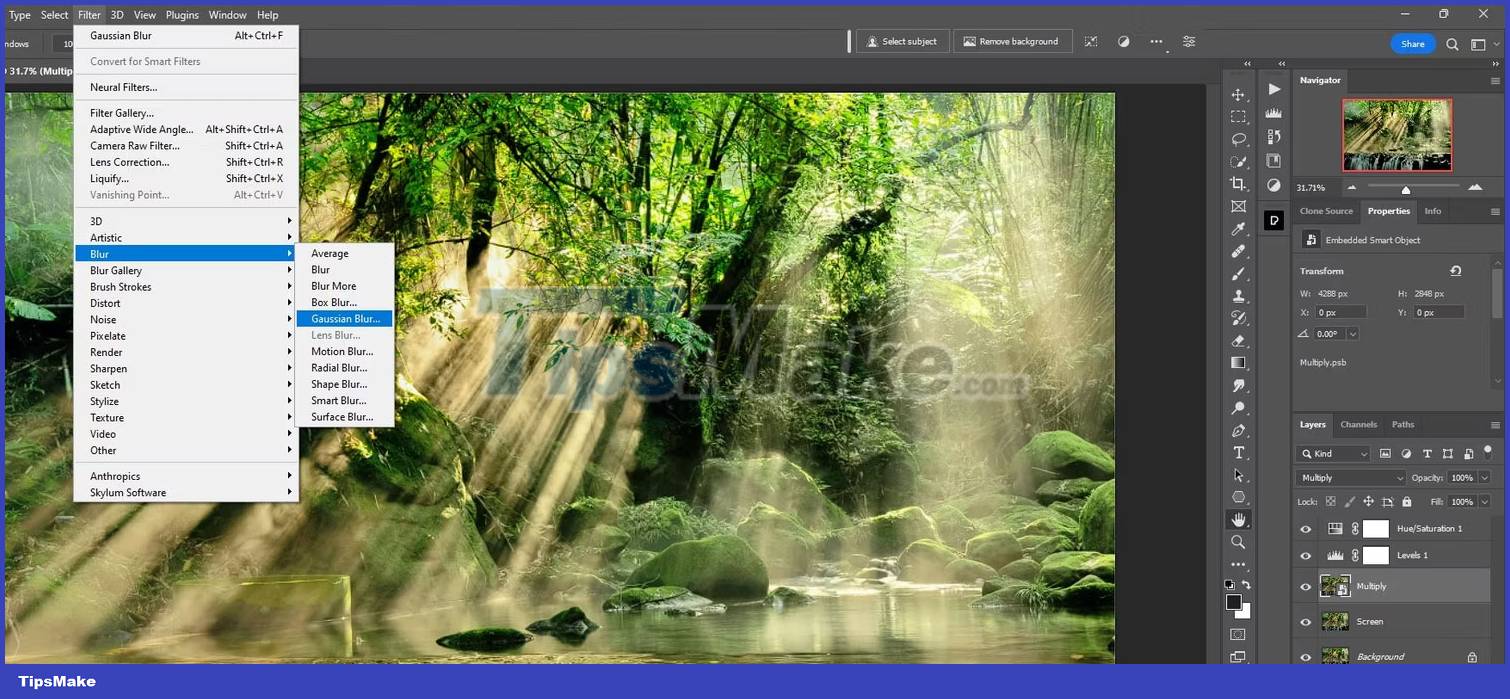
13. Change the Radius to a value that produces a dreamlike effect and click OK. Again, this value can be changed later if you need to tweak it.

Remember we created the Orton effect using a non-destructive workflow. This means you can go back and change all the values for different effects.
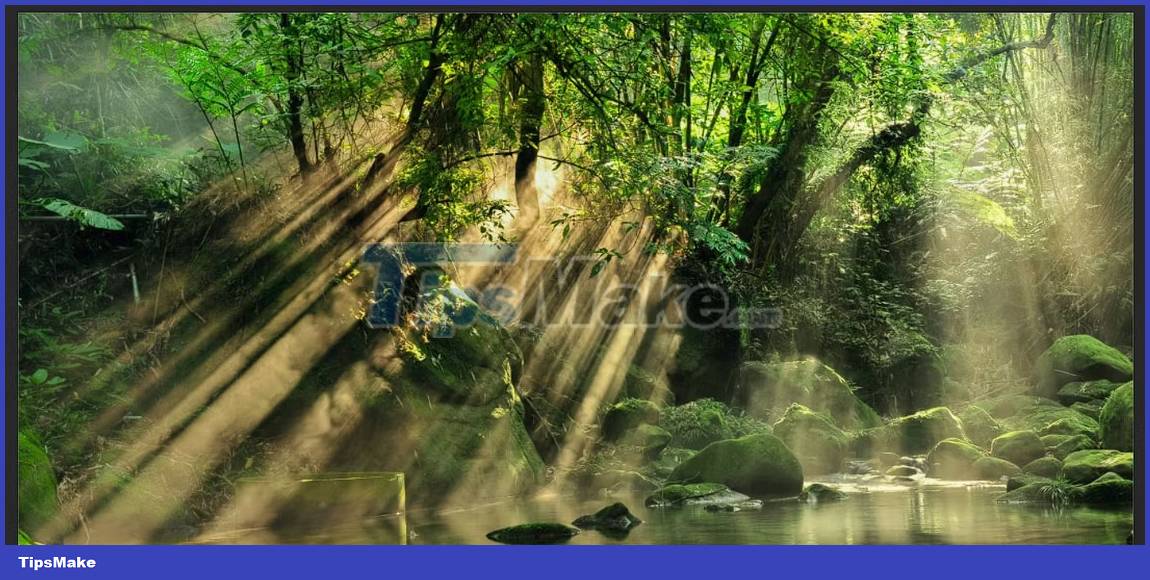
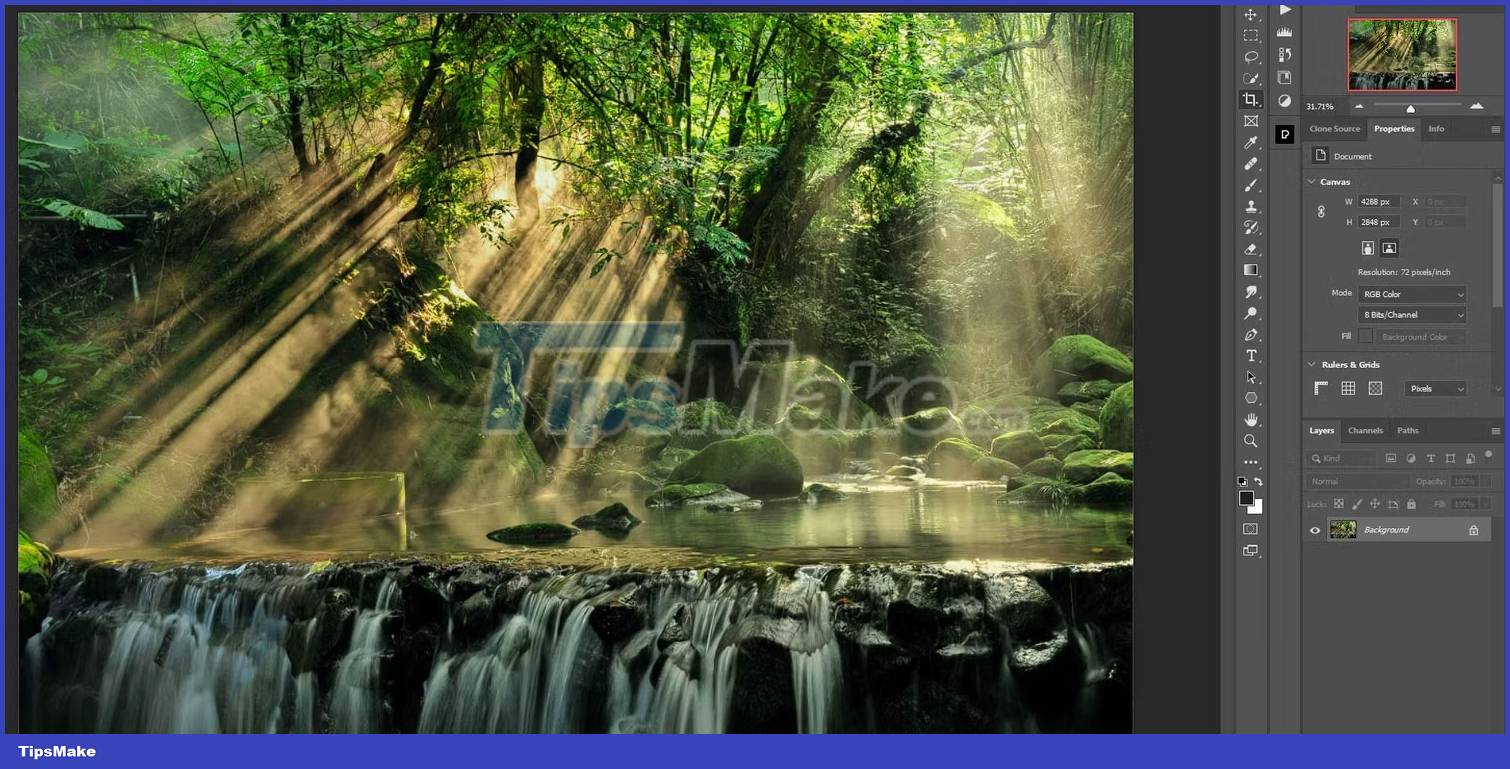
Before:
After:
